If you are a multitasking person, having multiple displays is a blessing for you. Multiple displays ease the task as you can use multiple applications at once. Luckily windows allow you to use multiple screens, and Windows 11 is no less. You must have used the multiple-display feature if you are a heavy user. There are times when windows show errors while connecting multiple displays. When Windows 11 multi-display is not working, it can present in several ways. The most common issue is that one or more displays may not be detected or appear blank.
Another problem is when the desktop icons are not properly in align or windows do not resize properly. These issues can arise due to various reasons, such as outdated drivers, hardware incompatibility, incorrect settings, or software glitches. In this article, we will show you all the issues you can face while connecting multiple displays and how you can fix them. There are multiple issues you might face while connecting an extended display, and all of them will be solved in this article.
Using multiple physical displays for your work or gaming is the Multi-Dispaly feature that is provided by windows for the last few years. This feature allows you to increase the available working area by extending the current display of your system. You can play a game while watching your favorite videos at the same time.
Also Read
Page Contents
Fix: Windows 11 Multi Display Not Working
To fix Windows 11 multi-display not working, there are several troubleshooting methods that you can try. Firstly, ensure that all monitors are correctly connected and powered on. Then, check the display settings in the Windows 11 settings app to ensure that the monitors are detected and configured correctly. Below is a detailed walkthrough of different methods that you can follow:
Issue 1: The second monitor is not displaying
If you have connected two monitors to your system and you are not getting the signal on your second monitor, You can fix this issue by yourself. There might be a loose connection that is causing this issue. Here are the steps you can try.
- Check for your HDMI cable connection; tighten it if it is loosely connected. If you are unsure about it, plug out and plug in the HDMI cables from the monitors.
- Turn off your screen, and turn it back on. If the issue persists, power off both your monitors and power them on again.
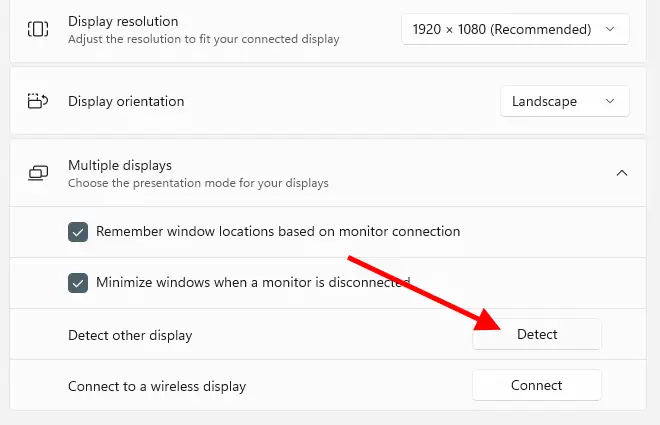
- Go to display settings located in the system tab of the settings. Click on the multiple display tab and then click on Detect.
- If the issue persists, remove any other device connected to the system and try again.
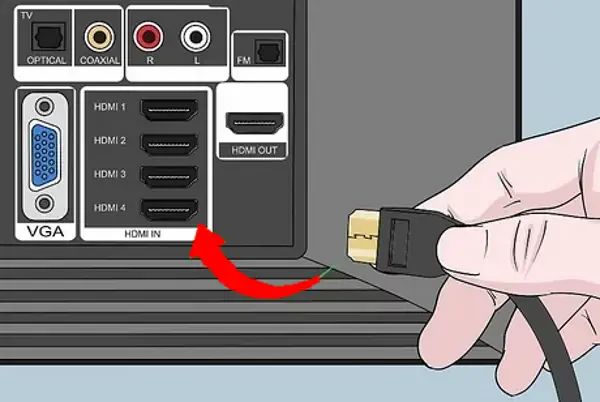
- Use the correct Input. If you are connected with HDMI 2, and your source input is HDMI 1, you won’t be able to see anything on your monitor
Issue 2: Your display is showing the wrong resolution
This issue arises for people who have just upgraded from a low-resolution monitor to a high-resolution monitor, and in that extended display, only half of the screen is used. This issue is also very common and can be fixed by following a few steps.
- Go to settings and click on the display settings under the system tabs.
- Click on the display resolution.
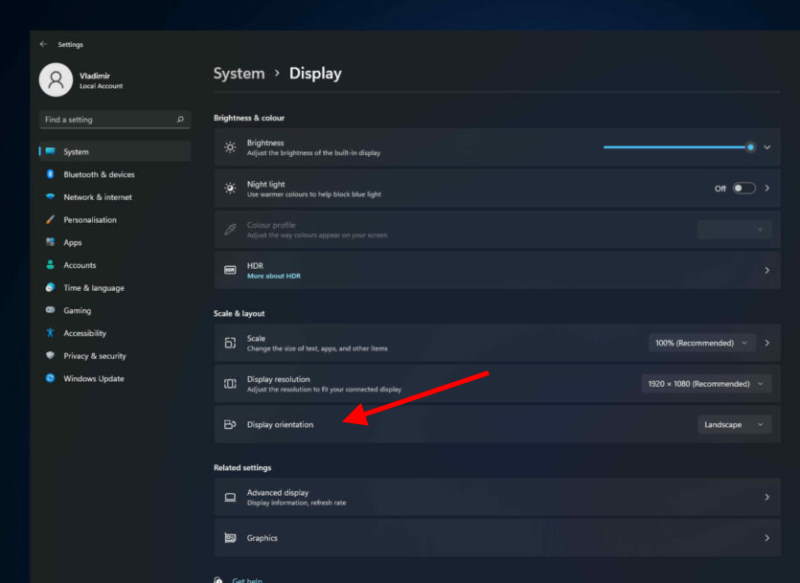
- Select the best resolution for your display. You can use the windows recommended one if it fills your screen.
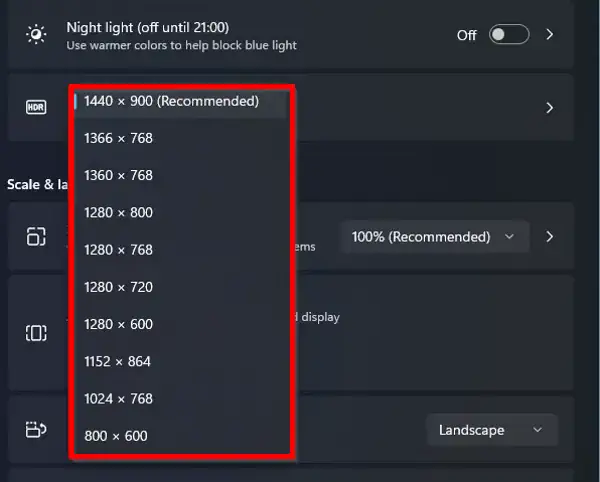
- Restarts your Computer. (This is not a necessary step, but if your setting is not applied, you can do this)
Issue 3: No Signal Error
If you have connected your display and you are sure that there is some software issue, then you might be right. If you have chosen the wrong refresh rate your windows will give a No Signal error to the connected display. But you can fix this issue by manually adjusting the refresh rate in windows 11.
- Go to the settings app on your Windows 11.
- Select the system and go to Advance Display Settings. Now click on the Refresh rate.
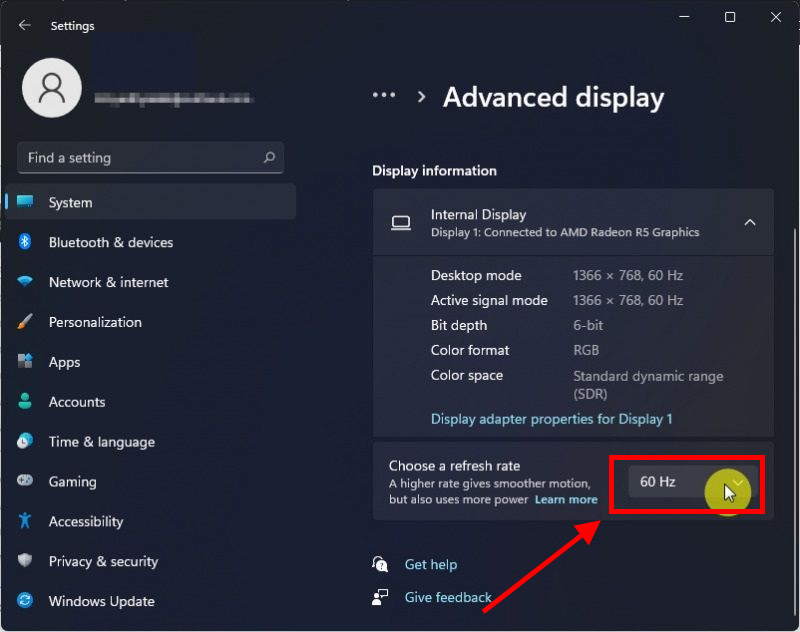
- Now, select the correct refresh rate. The refresh rate that appears on your settings is solely based on your display capability.
Issue 4: Same screen on all the monitors
If you see the same display on all your displays, you have selected the wrong settings for your multiple display option. You can use the same display for all of your monitors by using the duplicate display. However, you can extend this display to use each monitor as a separate screen. Here is how you can fix this issue.
- Go to settings and click on the system.
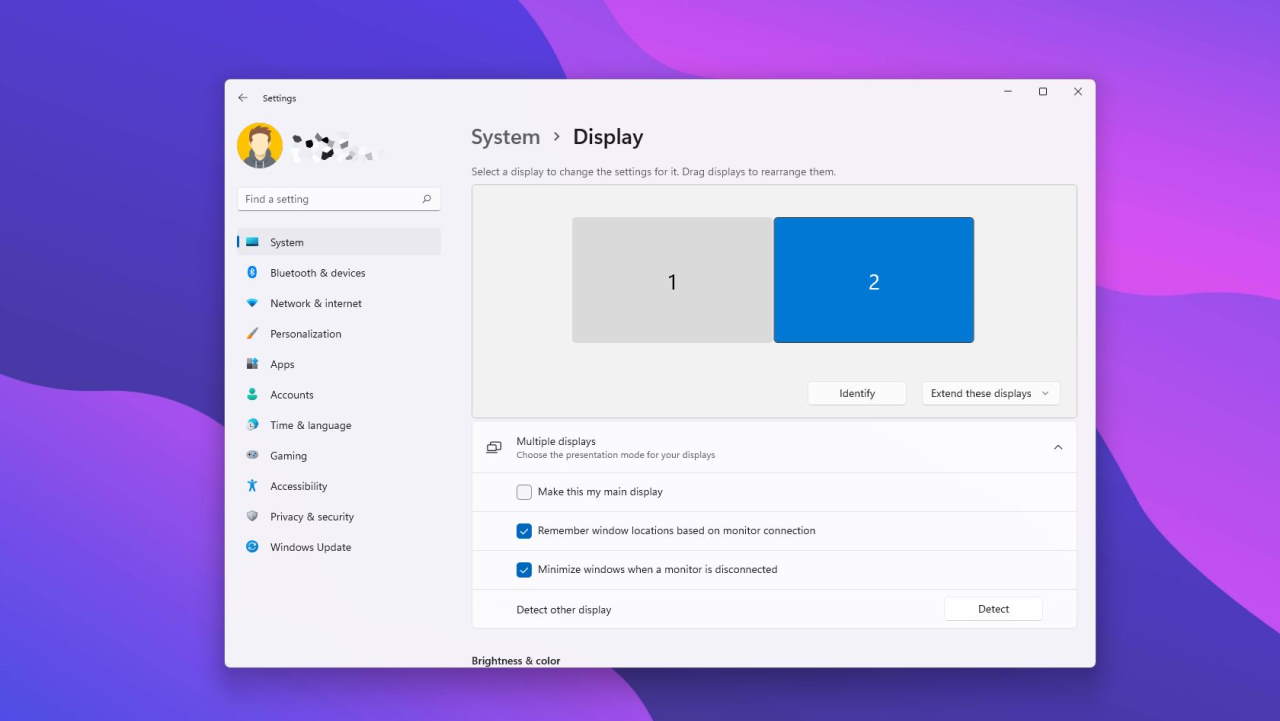
- Go to display settings; you will see all of your displays by numbering, 1,2,3… and so on.
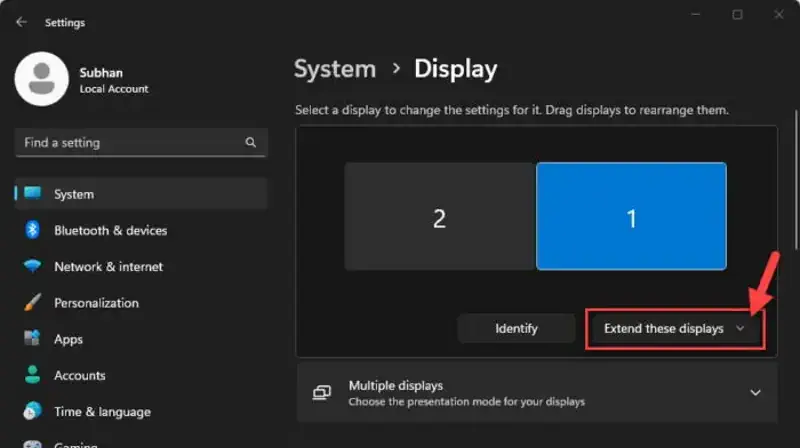
- Click on the extend this display button on the display dropdown menu.
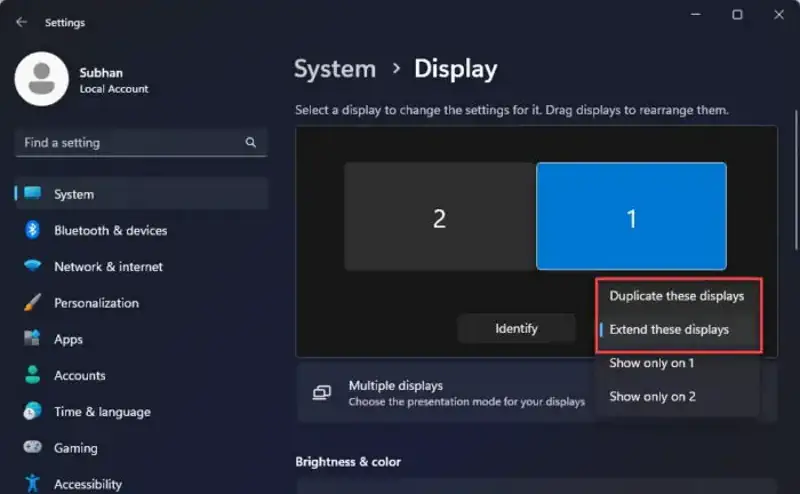
- You can choose whether the Duplicate display or extend these display options.
- Arrange all your display in order to use them as Multiple displays.
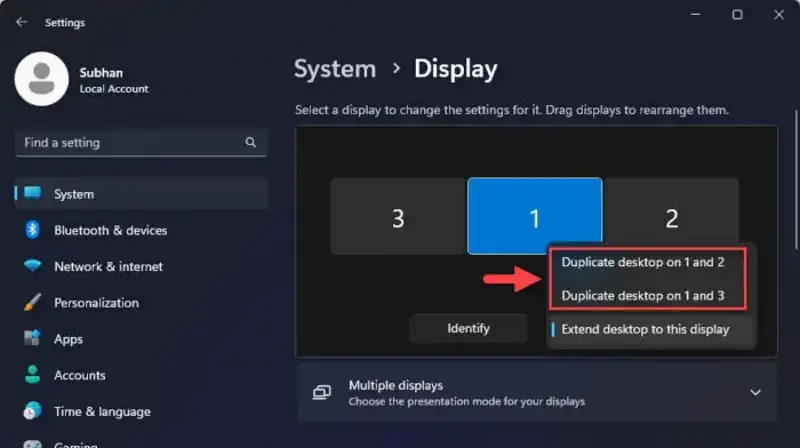
- You can also use the Win+P button to get these options and to get these changes quickly.
If you are still unable to use the multiple displays in Windows 11 even after all this troubleshooting, then there is a slight chance that your graphics driver is out of date, and you need to update your graphics driver. Here is how you can update your graphics driver in windows 11.
- Right-click on the window start menu and click on the device manager.
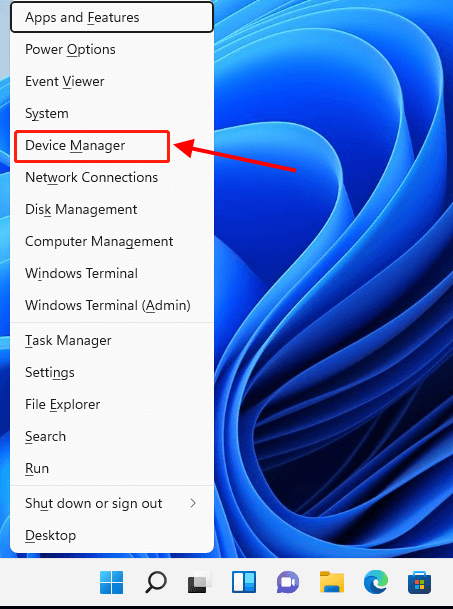
- Now, click on the display adapters section.
- Right-click on your display adaptor and then click on Update driver.
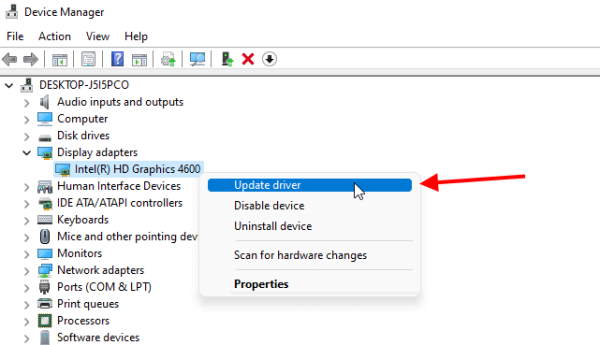
- Click on search automatically for drivers.
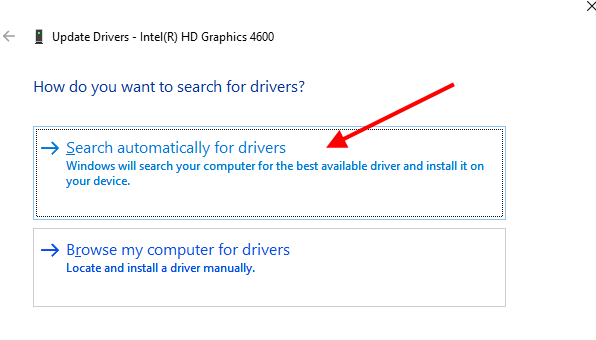
- This will install the best available drivers for your display automatically.
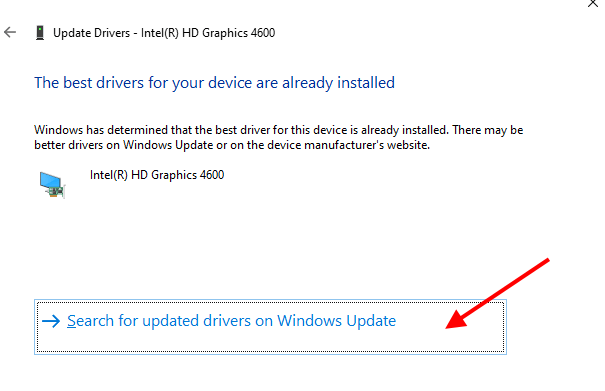
- Restart our Computer and start using the Multiple Display again.
Conclusion
Having an extended display has many advantages over a single display, and if you have the features available on your windows 11, you would love to use it. You can face some issues while connecting multiple displays with your system, but you can use this troubleshooting guide to discover your exact issue and the solution to fix that existing issue.
