If you’re a PC gamer then you may have heard about G-Sync. It’s a proprietary adaptive sync technology that has been developed by Nvidia to reduce screen tearing and improve the graphics quality while gaming on Windows PC. But some of the users have reported that the G-Sync is unable to connect. Are you also looking for What To Do If Your G-Sync Not Working in Windows 11/10? This guide is for you.
Some users have reported that there is no G-Sync option on Control Panel or it suddenly stopped working in the full-screen mode on the Nvidia graphics card. If your monitor doesn’t support the G-Sync that means it won’t gonna use this feature even if your Nvidia graphics card is capable of doing it. Whereas a higher refresh rate in gaming is always better in every scenario with a better display on Windows 11/10.
Also Read
Fix: Nvidia Display Driver Service Missing Issue
Download Dolby Audio Driver for Windows 11/10/8.1
How To Fix External Hard Drive I/O Device Error in Windows 11/10
Fix: Win+Shift+S Not Working on Windows 11/10
Fix: NVIDIA Drivers Not Installing 2023
Best Nvidia Control Panel Settings for FPS and Performance Improvement
Will GPU Prices Drop in 2023 or 2024?
Page Contents
What To Do If Your G-Sync Not Working in Windows 11/10?
Talking about the G-Sync issue on your Windows PC, it seems that there can be multiple reasons such as the faulty configuration in the graphics card utility or in the game, an outdated Windows OS build, an outdated game version, missing or corrupted graphics card driver, etc. So, without wasting any more time, let’s jump into the troubleshooting steps below.

1. Enable V-Sync (Vertical Sync)
G-Sync is linked with V-Sync and sometimes it offers game stuttering, lag, screen tearing, etc. If your G-Sync can’t work properly on Windows 11/10, you should enable V-Sync.
- Open NVIDIA Control Panel > Right-click on the desktop.
- Choose NVIDIA Control Panel from the list.
- From the left pane window, click on Manage the NVIDIA Control Panel window and click on Manage 3D settings.
- Now, choose to Global setting in the Manage 3D settings window > Check out whether the vertical sync is enabled or disabled.
- Scroll down to the Vertical sync drop-down box and choose turn On.
- Make sure to click on Apply to save your settings.
- Finally, restart your computer to enable V-Sync.
2. Check G-Sync Settings
The G-Sync settings issue can also lead to unable running G-Sync or the screen tearing on G-Syn. Therefore, it’s expected to check G-Sync not working issue.
- Check whether your G-Sync monitor is good and working properly.
- Make sure to reboot your system and sign in to your account.
- Head over to the NVIDIA Control Panel > Go to under Manage 3D settings > Keep in mind that the G-Sync option turned on or off to check for the issue.
3. Update Graphics Driver
An outdated or missing or even corrupted graphics driver may cause several issues with the Windows system and the gameplay. It’s recommended to update the graphics driver to its latest version.
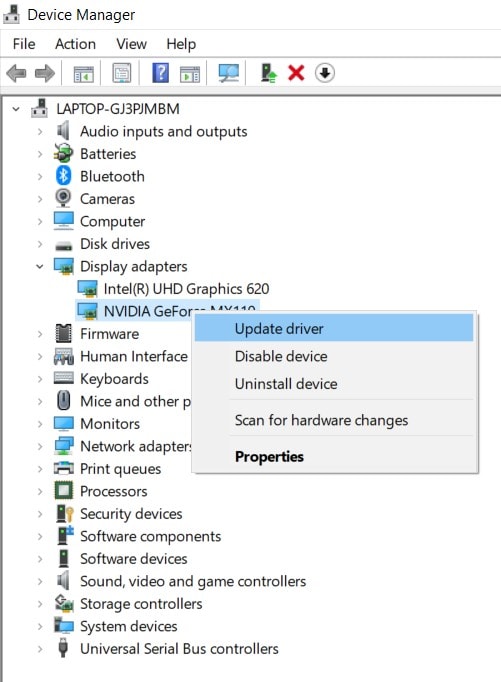
- Press Windows + X keys to open the Quick Start Menu.
- Click on Device Manager from the list.
- Double-click on Display adapters to expand the list.
- Now, right-click on the dedicated graphics card.

- Select Update driver > Click on Search automatically for drivers.
- If there is an update available, it’ll automatically download and install the update.
- Once done, make sure to reboot your PC to apply changes.
4. Roll Back Graphics Driver
It may possible that sometimes the latest Nvidia driver causes the G-Sync issue. NVIDIA graphics offer G-Sync and the rollback feature can also come in handy. If the latest version isn’t stable or has some bugs, then you can try roll back the graphics card driver.
- Press Windows + X keys to open the Quick Start Menu.
- Now, click on Device Manager > Double click on Display adapters.
- Go to Nvidia graphics driver > Head over to Properties.
- Click on Drivers > Then select Roll Back Driver (if available).
- Wait for the process to complete. If not available, you can manually do so by visiting the official website of the manufacturer.
5. Update Windows OS Build
If nothing works for you, try checking the Windows OS build as well. It may possible that you haven’t updated the Windows build for a while and outdated software can cause several issues with the newly released video games. To check for it:
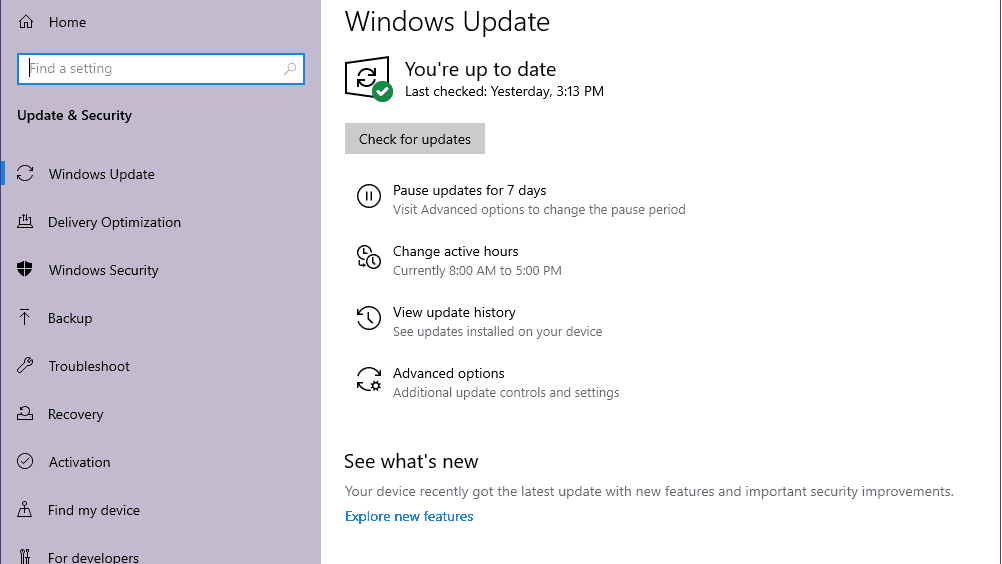
- Press Windows + I keys to open Windows Settings.
- Click on Update & Security > From the Windows Update section, click on Check for Updates.

- If there is an update available, it’ll notify you.
- Just click on Download and Install to start updating the software.
- Wait for the process to be completed.
- Once done, make sure to restart your computer to apply changes.
This method should gonna fix the G-Sync Not Working issue on your Windows.
6. Reset Windows 11/10
The chances are also high that may be the Nvidia Control Panel isn’t either working well or there are some issues with the Windows 11/10 system. It basically creates and stores cache data for a while and therefore, the error appears. So, Windows 11/10 can come in handy. To do that:
- Press Windows + I keys to open Windows Settings.
- Click on Update & Security > Go to the Recovery section from the left pane.
- Now, click on the Get Started button under the Reset this PC option.
- Then you can either keep your files or obliterate all folders and files.
- Follow the on-screen instructions to apply changes > Restart the PC to check for the issue.
7. Try Changing RAM
As per several users reports online, the affected users have managed to fix this problem by just replacing their RAM. There may be some issues with G-Sync and SLI, and even RAM can be the culprit in so many ways. If you also face the same issue, try checking the RAM status or replace it with another one.
That’s it, guys. We assume this guide was helpful to you. For further queries, let us know in the comment below.
Also Read
