Well, there are many tips and tricks that Windows PC beholds. Some require the use of Registry Editor and Command prompt while others could be done more easily. And in this guide, we will be sharing the latter. Today, we will show you the steps to create an invisible folder on your Windows 10 desktop. Suppose you wish to temporarily hide any folder from your friends or just want to prank them, well its April Fools Day anyways!
Or if you wish to keep your personal files under the wraps, or just want to prevent it from getting accidentally deleted, then this trick will definitely come in handy. Granted it isn’t entirely secure and might get fortuitously discovered as well, but still, it is a pretty handy workaround nevertheless. Furthermore, we won’t be taking clue of any third-party software, all the steps will be carried out using whatever is at our disposal. With that said, here are the instructions to create an invisible folder on your Windows 10 desktop.
Also Read

Page Contents
Create an Invisible Folder on Windows 10 Desktop
Creating an invisible folder is pretty easy. Just follow the below steps for the same. After that, we will also be sharing the steps to make this folder reappear if you prefer to do so sometimes in the near future. Follow along.
Steps to Create an Invisible Folder
- Head over to Windows 10 desktop and create a new folder. This could be done by right-clicking on the desktop and selecting New > Folder.
- By default, it will be named as New folder. You will be required to rename it. To do so, press and hold ALT and type in the number 255 from the numeric keypad and hit Enter. Make sure you use the numeric keypad and not the number keys at the top of your keypad.

Folder with the invisible name - What we did just now? To clear the doubts, we have typed in a special ASCII character that isn’t on your keyboard. As a result, the name of the folder won’t be supported or visible in Windows Explorer or Desktop.
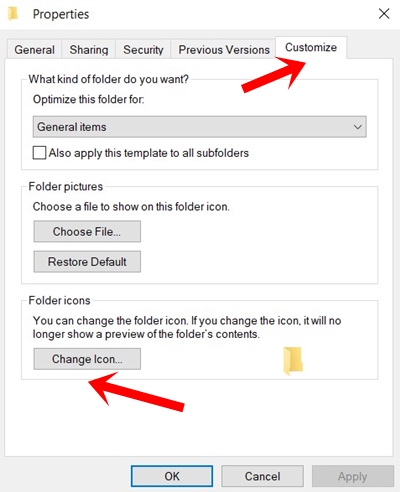
- Now it is time to make the icon invisible as well. To do so, right-click on that folder and select Properties.
- Then click on the Customize tab and click on Change Icon under the Folder Icon section.

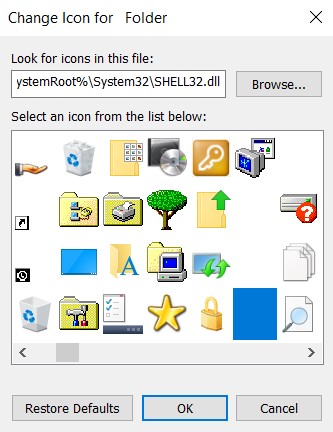
- Under the Change icon for the Folder section, scroll to the right, select the invisible icon (see below image) and click OK. Again click OK > Apply to close the dialog box.

That’s it. You have successfully created an invisible folder on the Windows 10 desktop. Let us check out the steps to rever the said changes.
Make Folder Visible Again
At any point in time, if you change your mind and wish to make the folder visible again, here is what needs to be done.
- Right-click on the invisible folder and select Properties.
- Head over to the Customization tab and click on the Change Icon. Select any of the visible icons and click OK.
- Again right-click on the folder and select Rename. Give it any name of your choice and hit Enter. That’s it. You have successfully undone the changes.
Is this Method Fool Proof?

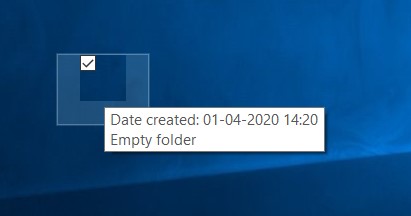
Not really. Although the folder is invisible on your Windows 10 desktop, yet there are many ways through which some could land upon it, intentionally or not. If someone selects multiple folders on your desktop, that will also be selected and you might notice the folder getting highlighted with dotted lines. The same is possible if someone hovers the mouse over that folder (as could be seen above). Along the same lines, any content inside that invisible folder is still accessible via the system search. So if you really wish to secure your folder or contents, head over to our PC tips and tricks section. Likewise, you could also check out our iPhone and Android tips and tricks to know more.
