In this tutorial, we will show you the steps to disable the laptop keyboard on Windows 11/10. As for the reason to carry out the aforementioned task, well there could be quite a few ones. For example, if one of the keys on your keyboard gets stuck then it would continuously keep on executing its associated actions. Along the same lines, if you prefer to use an external USB keyboard, then might consider disabling this in-built keyboard. In this regard, there are quite a few approaches that you could take.
The easiest one involves disabling or uninstalling the keyboard drivers. However, this might not work for everyone as once you restart the PC, the system might reinstall the drivers. In that case, you could then disable the automatic keyboard driver installation via the Group Policy Editor. In this guide, we will be sharing the instructions for both these methods. So without further ado, let’s get on with the guide to disable the laptop keyboard on Windows 11/10.
Also Read

Page Contents
How to Disable a Laptop Keyboard on Windows 11/10
Apart from the two methods we discussed above, there’s another one that you might have come across. It involves installing an incompatible keyboard driver to make your keyboard unusable. We strongly advise not to try it out as it may cause more harm than one could imagine. In certain instances, it may even lead to the Blue Screen of Death issues. So that should be avoided at all costs. You should only stick with the two methods that we have mentioned below to disable the laptop keyboard on Windows V.
Method 1: Disable or Uninstall Keyboard Drivers
First off, you should try disabling the drivers. However, if that option has been greyed out, then you should take the uninstall route. Here are the required instructions for both of them:
- Right-click on the Windows icon present on the taskbar and select Device Manager from the menu.
- Expand the Keyboard section by clicking on it.
- Then right-click on your keyboard name (Standard PS/2 Keyboard) and select the Disable device option.
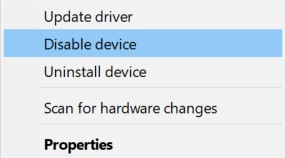
- Reply in the affirmative in the confirmation dialog box that appears and wait for the process to finish.
- However, if the Disable option isn’t there, then select the Uninstall device option and proceed with the instructions to remove the drivers.
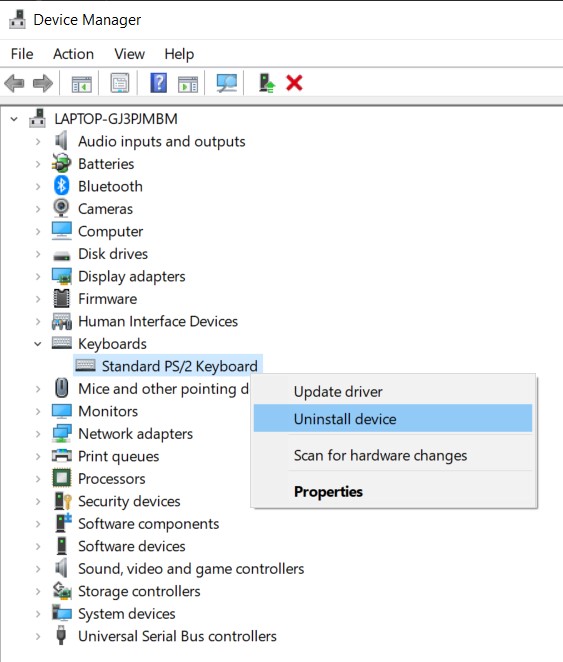
Once that is done, restart your PC and check if you were able to disable the laptop keyboard on Windows 11/10 or not. If the answer is a negative tone, then the reason is that your PC must have automatically re-installed the drivers on the next boot. So you know need to move to the next section to disable this automatic update of your keyboard drivers and hence disable the laptop keyboard Windows 11/10.
Method 2: Disable Automatic Keyboard Driver Installation
Before we get on with the steps, you need to get hold of your keyboard’s hardware ID. Once that is done, we would inform the Local Group Policy Editor to prevent Windows from automatic driver installation of any device that matches the above hardware ID. Here is how it could be done:
- Head over to the Start menu and search for Device Manager.
- Now expand the Keyboard section by clicking on it.
- Then right-click on the keyboard name (Standard PS/2 Keyboard) and select Properties.
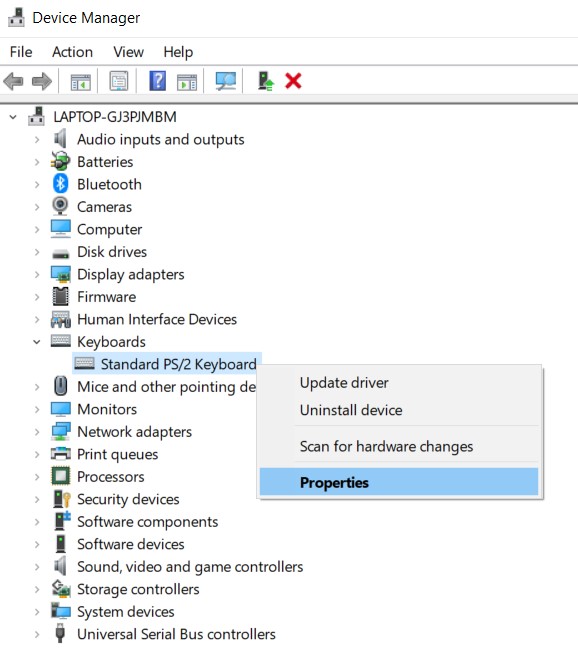
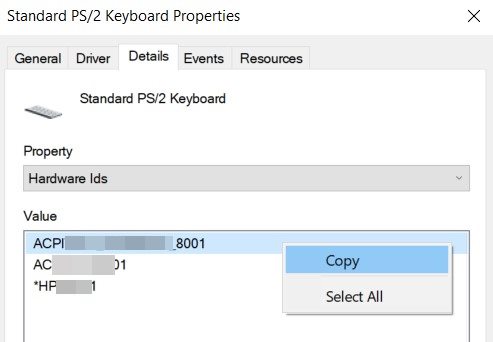
- Go to the Details tab, click on the Property section and select Hardware Ids from the drop-down menu.
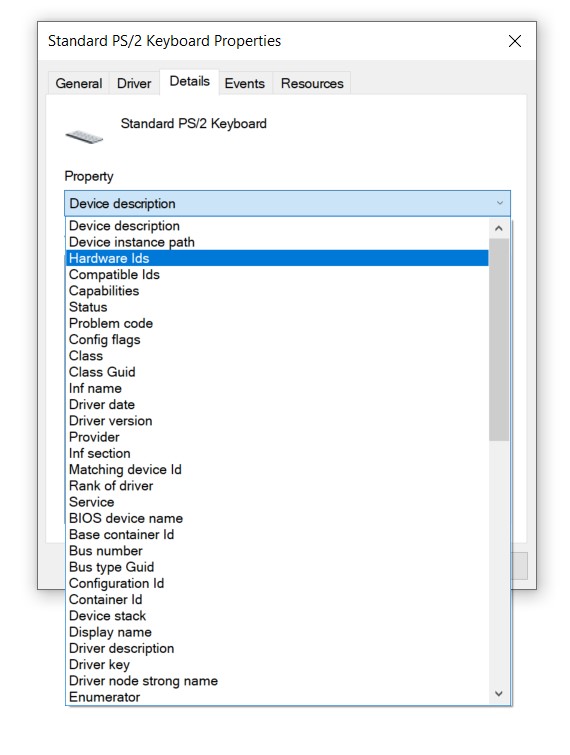
- You will now see three different IDs, copy the first one. Using this ID, we will be going to disable the laptop keyboard Windows 11/10.
- Now use the Windows+R shortcut key combinations to bring up the Run dialog box. Type in gpedit.msc and hit Enter.
- This will open the Group Policy Editor. Select Computer Configuration from the left menu bar.
- Then go to Administrative Templates > System > Device Installation > Device Installation Restrictions.
- Under the Device Installation Restrictions, right-click on Prevent installation of devices that match any of these device instance IDs, and select Edit.
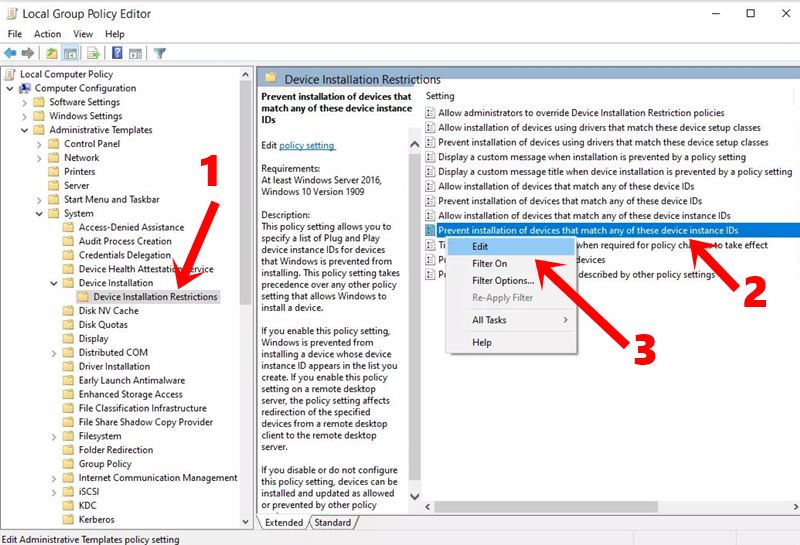
- Then select the Enabled option and click on Show. Now paste the Keyboard Hardware ID that you had copied in STEP over to this Value box and click OK.
- Once that is done, head over to Device Manager and expand the keyboard section.
- Right-click Standard PS/2 Keyboard and select Uninstall Device.
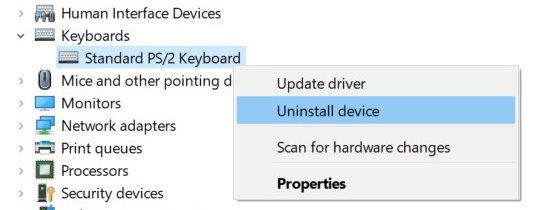
- Wait for the process to finish, and once that’s done, reboot the PC. This time, the keyboard drivers wouldn’t be automatically installed when the PC boots up and the keyboard stands disabled.
With this, we conclude the guide on how to disable the laptop keyboard on Windows 11/10. We have shared two different methods for the same. You should only proceed to the Local Group Policy Editor method if the Uninstall device option doesn’t give out any success. On that note, here are some iPhone Tips and Tricks, PC tips and tricks, and Android Tips and Trick that you should check out as well.
