Word documents containing embedded images can not be easily extracted. Attempts to copy and paste the images result in poor quality images or the document contains too many images to copy them individually.
Microsoft Word allows us to insert images easily and without reducing any resolution. We might come across a situation where we want to share only images and not the entire document, or you might have deleted all images from your Windows PC and want to get them back from the Word document. Follow the below simple guide to Extract All Images from Word Document in very simple steps.
Page Contents
Steps to Extract All Images from Word Document
Method 1: Using Save as Picture
Warning
- Open the Word File from where you want to extract images.
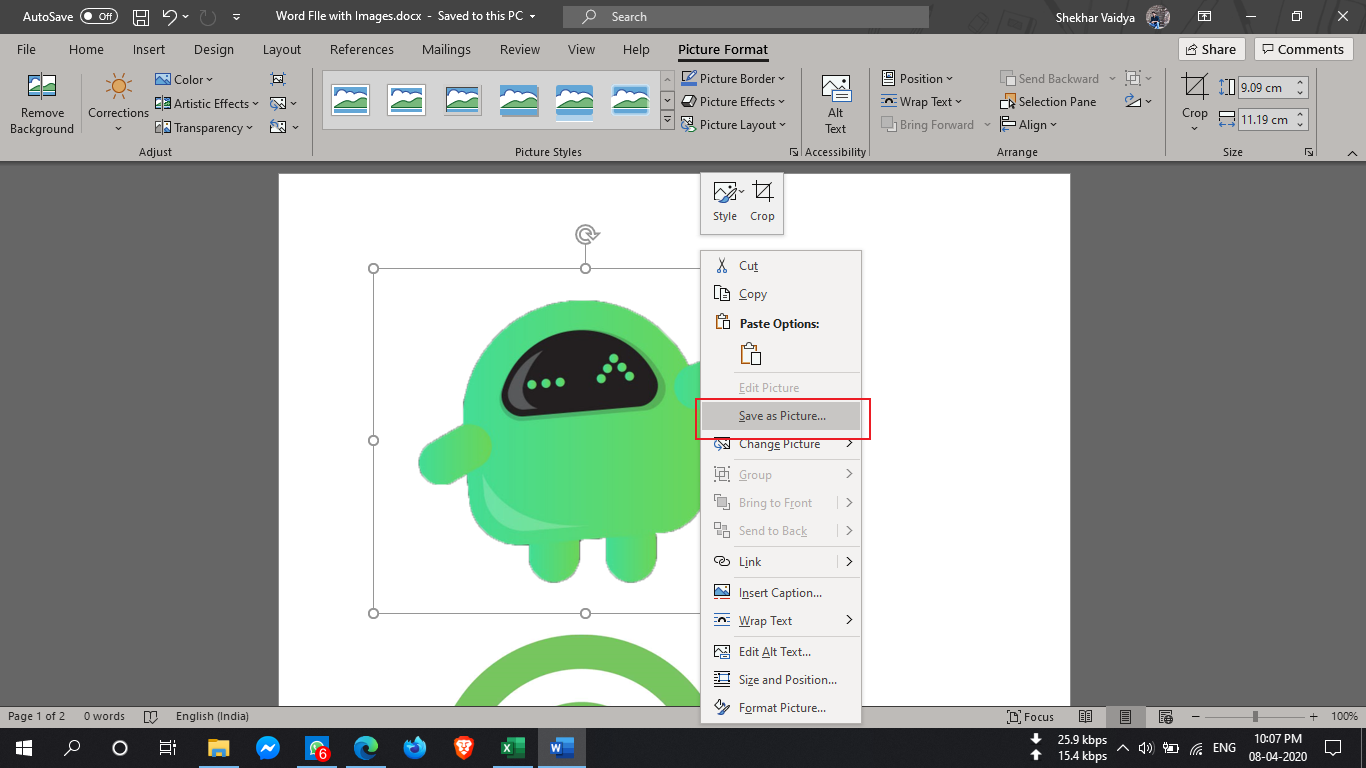
- Right-Click on the image.
- And then click on Save as Picture.
- Finally, save it in the desired location.
- And follow the same steps for all the images.
Method 2: By Saving it as Web Page
- Open the Word document from which you want to extract all images.
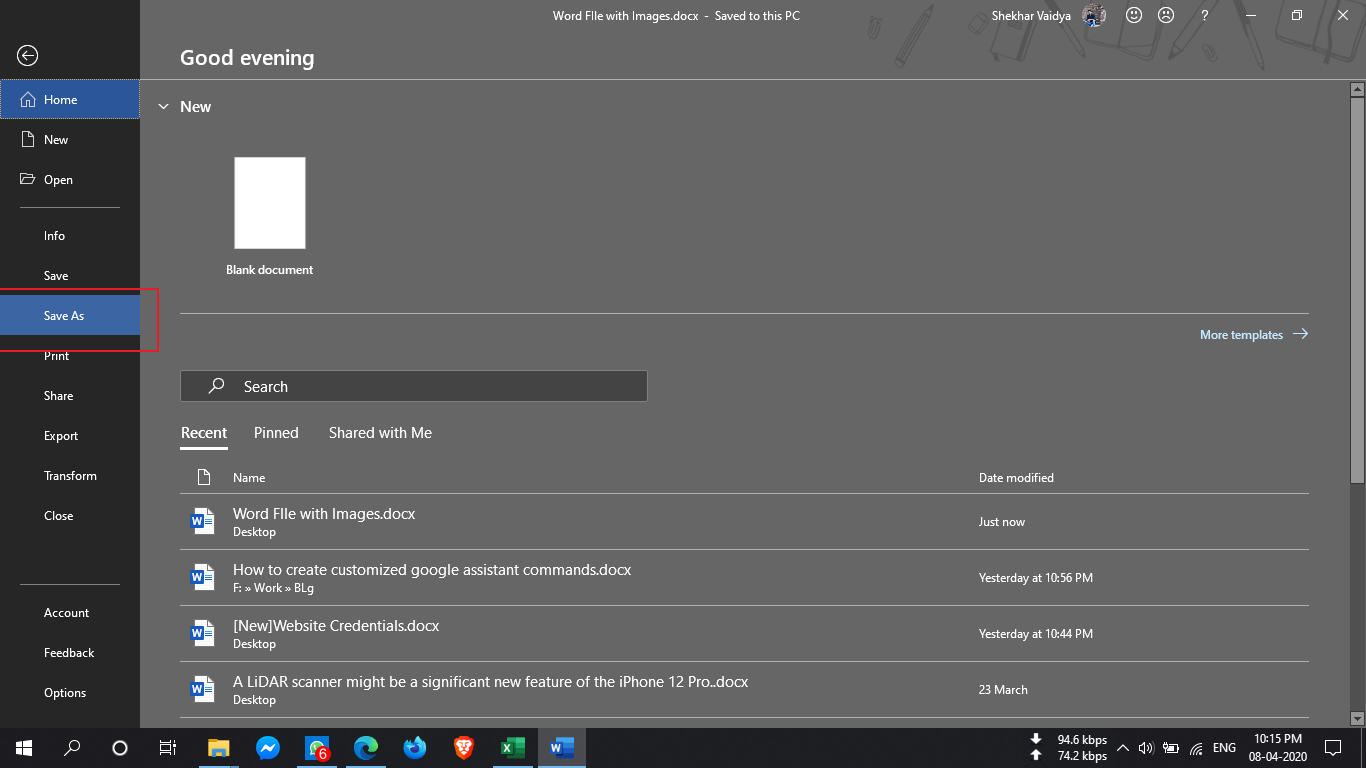
- Now, click on the “File” button on the top left of the document and select “Save As”.
- Select the location where you want to save.
- Now, under “Save As” dropdown, select “Web Page”.
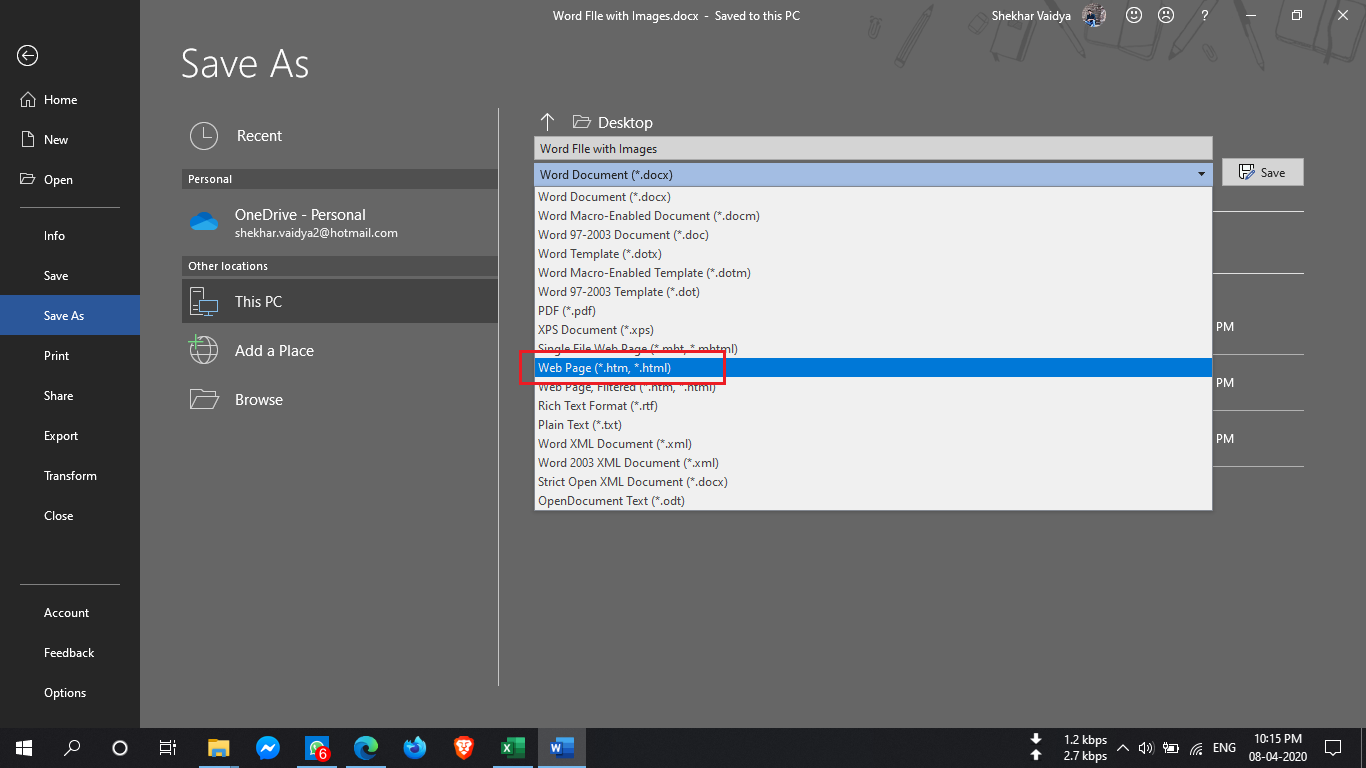
- You will also see “Web Page, Filtered” but do not select it as it may reduce the resolution of images.
- Click on the “Save” button to save the Word document as the Web Page.
- Go to the location where you have saved the document and you would see ‘.htm’ file and the folder with the given name will be created.
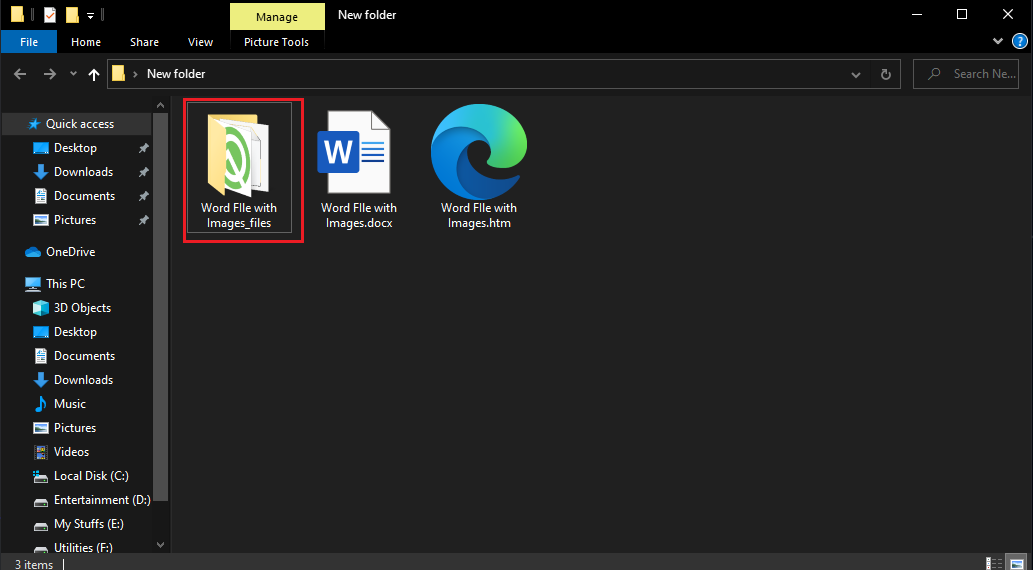
- Open the folder and you could see all the images listed there.
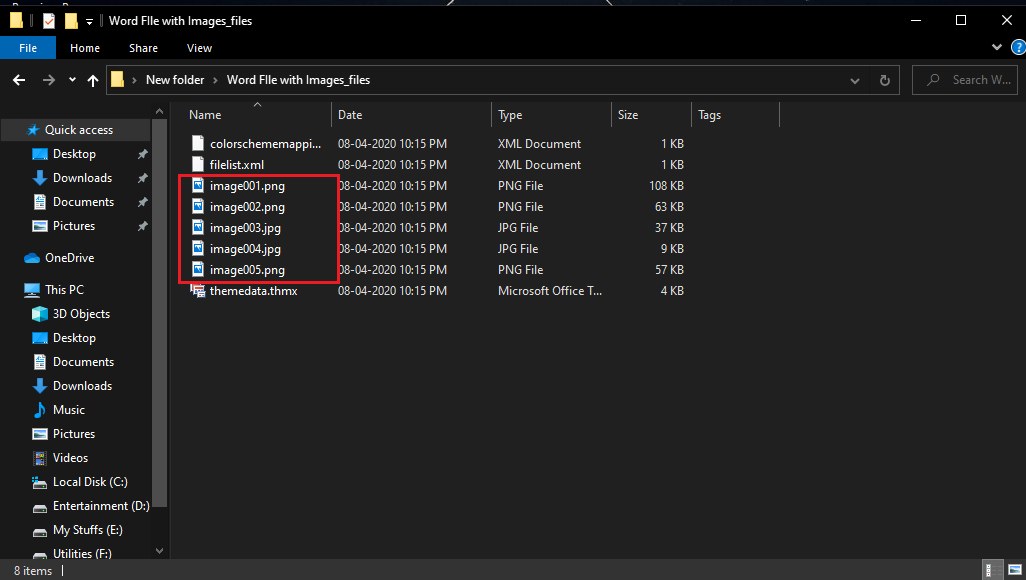
Method 3: Changing the Extension
This method to extract all images as a batch from the document is so simple that all you need to do is rename the extension of the file from ‘.docx’ to ‘.zip’.
- Select the required document, right-click on it and select “Rename”.
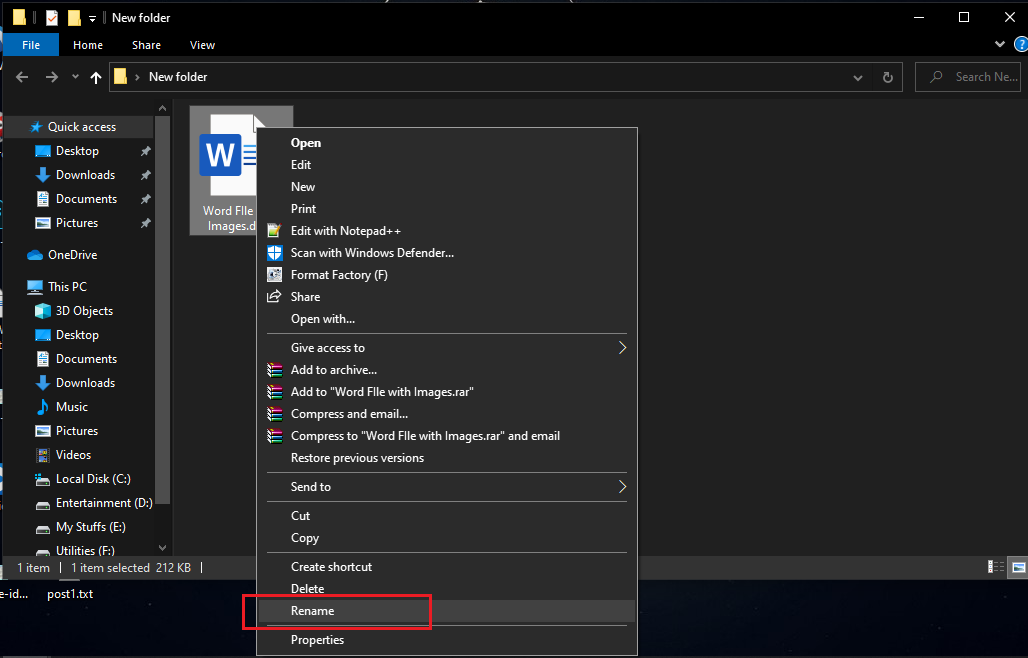
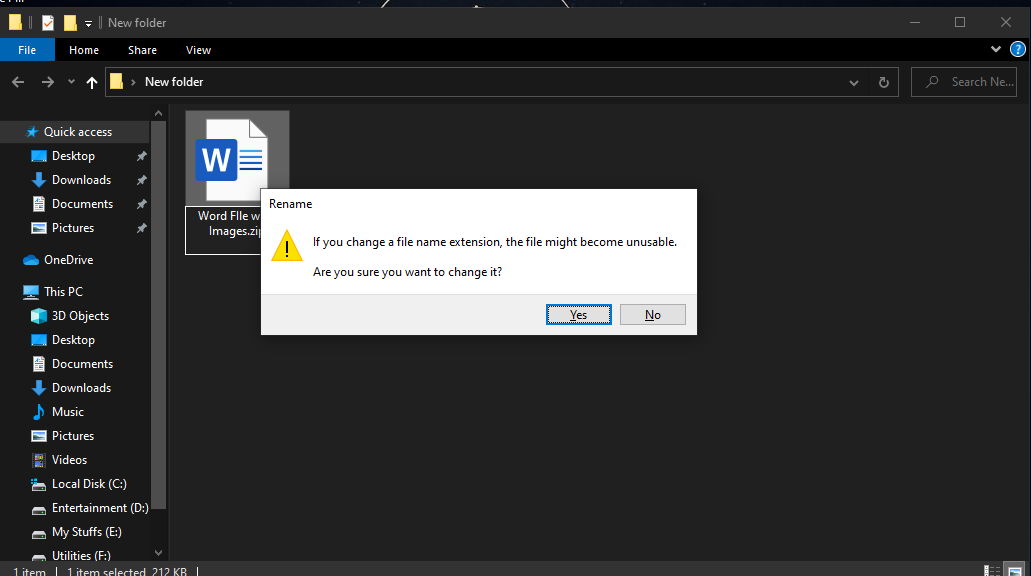
- Now, change the extension from ‘.docx’ to ‘.zip’ and hit Enter.
- It will show you this dialog box, but do not worry and click “Yes”.
- Use any of the zip extraction software like WinRAR, etc, to extract this zip file.
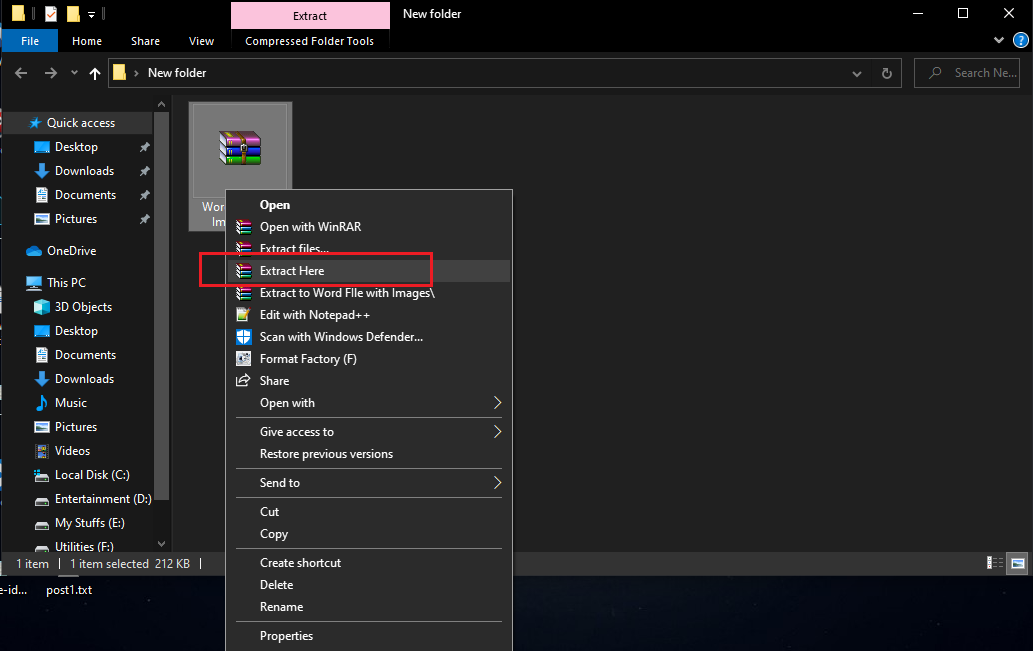
- Give the location where you want to extract the zip folder.
- Now, open the folder you have extracted and go to Word > Media.
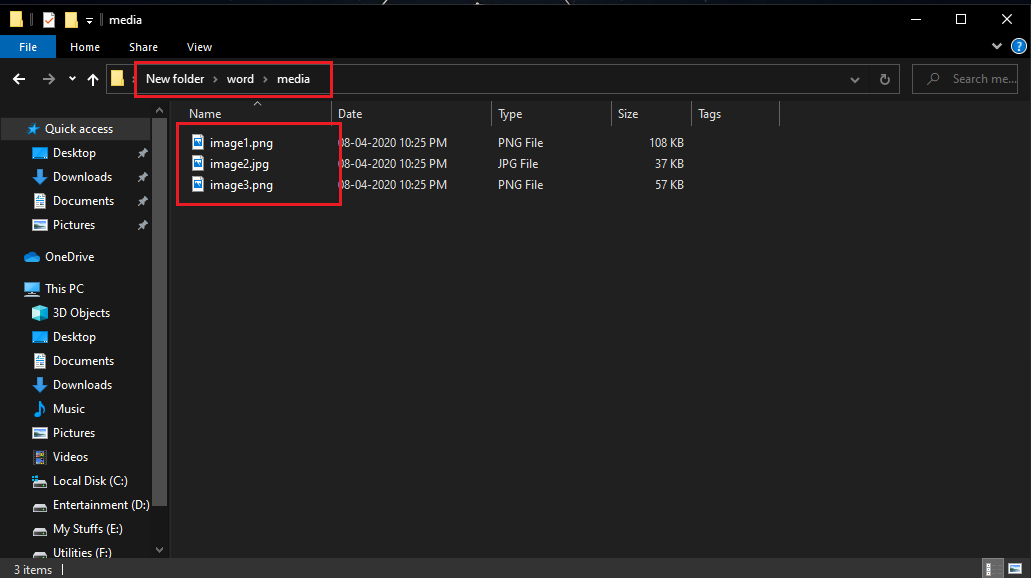
- Now, in the ‘media’ folder, you will find all images which you can copy to another folder if you want.
If you have any queries regarding this, the comment section always available for you.

