Group Policy Client API files like Gpapi.dll is one of the DLL file extensions. It’s considered as a Win32 DLL exe file that was developed by Microsoft for its Windows operating system. But most Windows users somehow experience multiple DLL file errors whenever the DLL files go missing or corrupted. These extremely vulnerable DLL file errors can occur due to several reasons. Meanwhile, some of the users are encountering Gpapi.dll Error in Windows 10. If you’re also one of the victims, make sure to check out this troubleshooting guide completely to fix it.
Also Read
How to Fix Binkw32.dll Missing Error?
LogiLDA.dll Missing Error, How to Fix It?
Download Dolby Audio Driver for Windows 11/10/8.1
How To Fix External Hard Drive I/O Device Error in Windows 11/10
Fix: Win+Shift+S Not Working on Windows 11/10
How to Fix DLL File Missing Error on Windows 11/10
How to Fix Msxml4.dll Not Found or Missing Errors
Fix: GTA 5 Error Steam_api64 dll
How to Fix Dao350.dll Not Found or Missing Errors
To recall, DLL stands for ‘Dynamic Link Library’. It contains a set of libraries of functions and other information that can be accessed by the Windows system. The DLL files are important enough to boot the system and even run programs on Windows properly. Even if a single required DLL file goes missing or corrupted, the specific program won’t gonna run by any means on a Windows computer. Gpapi.dll also comes under a DLL file and the error may appear due to the removal of the shared files of any program or Microsoft Office Access 2010 or even affected by malware/virus.
Additionally, the Gpapi.dll file error may happen due to the power outage issue while loading the Microsoft Office Access 2010 program or system crashing or bad sectors in the disk drive, etc. So, if you’re experiencing the particular error which says “Access Violation at address – gpapi.dll” or “Gpapi.dll could not be found” or “Cannot register gpapi.dll” or “Failed to load gpapi.dll” etc then check out this article.

Page Contents
How to Fix Gpapi.dll Error in Windows 10
Now, without wasting any more time, let’s jump into the methods below.
1. Perform System Restore
- Click on the Start Menu > Type System Restore and click on it from the search result.
- If prompted by UAC (User Account Control), click on Yes to allow admin access.
- Follow the System Restore Wizard on-screen instructions to choose a useful restore point.
- Finally, restore your computer to the backup image.
2. Uninstall Microsoft Office Access 2010
The particular Gpapi.dll error can appear due to the issues with the Microsoft Office Access 2010 edition. Therefore, it’s better to uninstall the program and reinstall it completely.
- Click on the Start Menu > Type Control Panel and click on it from the search result.
- Now, select Uninstall a program.
- Locate the Microsoft Office Access 2010 and click on it.
- Select Uninstall > Follow the on-screen prompts to uninstall it.
- Once done, restart your computer.
- Finally, download the Microsoft Office Access 2010 Runtime and install it again.
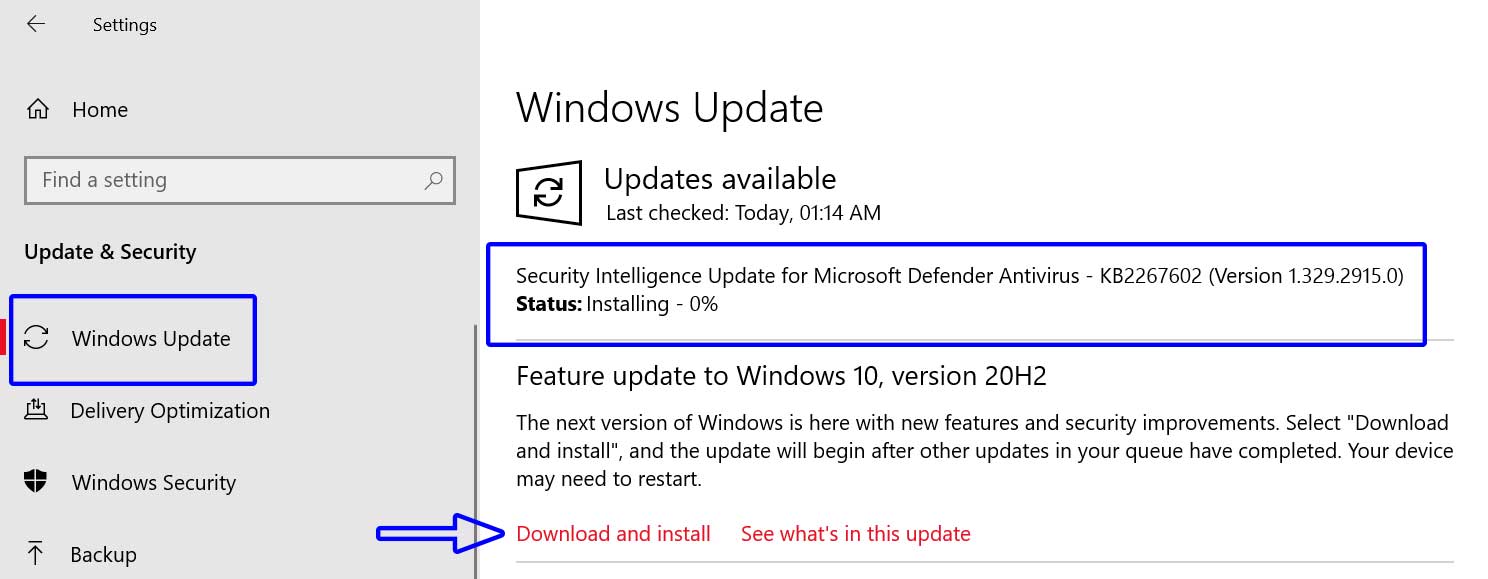
3. Update Windows
It’s needless to say that updating Windows OS builds always brings new features and fixes multiple issues or bugs.
- Click on the Start Menu > Go to Settings.
- Next, click on Update & Security > Select Check for updates under the Windows Update section.

- If there is a feature update available, select Download and install.
- It may take a while to complete the update.
- Once done, restart your computer to install the update.
It should fix the Gpapi.dll error on your Windows 10 completely. However, if this doesn’t resolve your issue, follow the next method.
4. Replace Gpapi.dll File
If none of the above methods worked for you, try downloading and replacing the Gpapi.dll file on your Windows 10 system. To do this:
- Download gpapi.dll Files for your Windows OS build.
- Copy this file to the relevant Microsoft Office Access 2010 folder location:
Windows 10: C:\Windows\WinSxS\wow64_microsoft-windows-grouppolicy-base_31bf3856ad364e35_10.0.16299.15_none_556438238c87db2a\

Windows 10: C:\Windows\WinSxS\amd64_microsoft-windows-grouppolicy-base_31bf3856ad364e35_10.0.16299.15_none_4b0f8dd15827192f\

Windows 10: C:\Windows\System32\

Windows 10: C:\Windows\Temp\527D94AF-D053-4381-B105-0D815D53791E\amd64_microsoft-windows-grouppolicy-base_31bf3856ad364e35_10.0.16299.1004_none_2f9842e418b4cba2\

Windows 10: C:\Windows\WinSxS\amd64_microsoft-windows-grouppolicy-base_31bf3856ad364e35_10.0.16299.1004_none_2f9842e418b4cba2\

Windows 10: C:\Windows\Temp\527D94AF-D053-4381-B105-0D815D53791E\wow64_microsoft-windows-grouppolicy-base_31bf3856ad364e35_10.0.16299.1004_none_39eced364d158d9d\

Windows 10: C:\Windows\WinSxS\wow64_microsoft-windows-grouppolicy-base_31bf3856ad364e35_10.0.16299.1004_none_39eced364d158d9d\
- Finally, restart your computer to apply changes.
However, if nothing works for you, make sure to perform a clean installation of Windows 10 to fix the issue.
That’s it, guys. We hope you’ve found this guide useful. For further queries, you can comment below.
