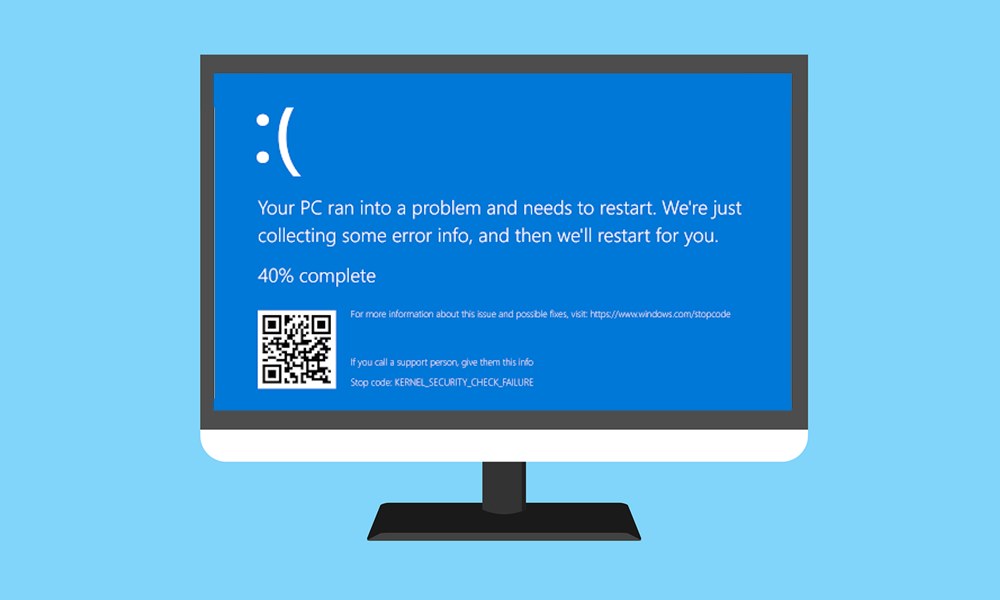
In this tutorial, we will show you how to fix the Kernel Security Check Failure RAM in Windows 10. While the Blue Screen Of Death errors are never a pleasant sight to see, but it escalates even further when it’s related to the kernel or the volatile memory. In this regard, quite a few users have already voiced their concern over at the Microsoft Forum and are looking for ways to rectify the issue.
One of the most common causes of this error stems out from driver incompatibility. But that isn’t the sole and only reason. It could also be attributed to a slew of other factors. With that said, this guide will let you know of all the possible reasons for this error. Along the same line, we will list out detailed instructions set to fix this BSOD error. So with that in mind, let’s get on with the guide on how to fix the Kernel Security Check Failure RAM in Windows 10.
Also Read
Page Contents
What is Kernel Security Check Failure?
Kernel Security Check Failure is a type of Blue Screen of Death error that sometimes accompanies the 0x000000139 error code. You might get this error message while running an app or game, or in some instances, it might even throw up right at the boot-up time. As for the reasons for this issue, it is mostly related to using corrupt or outdated drivers. This would in turn result in the files failing the integrity check.

Along the same lines, there could be some issues with your RAM or hard disk. Likewise, some overclocking or related third-party apps might also conflict with the proper running of your PC and hence could throw in the said error. A virus or malware could also be the root cause of this issue in some instances. With that said, in this guide, we will show you the steps to fix the aforementioned issues, which would ultimately fix the Kernel Security Check Failure issue in Windows 10.
Fix 1: Enable Legacy Advanced Boot
To begin with, you will have to create a bootable media having the Windows 10 installation file. For that, download the Media Creation Tool and select the Create Installation Media option from the setup. Then connect a USB drive to your PC and select the USB Flash Drive option from the setup. Finally, click on Next > Finish. With this, you have created the bootable media. Now proceed with the below steps to enable the Legacy Advanced boot option.
- Insert the USB Flash Drive onto your PC.
- Now restart your PC and while it is starting up, continuously press the F12 or F10 key (depending on the manufacturer). This will take you to the boot menu.
- Select boot from CD/DVD or USB Storage drive option (whichever of the two you see).
- It will now load the Windows Setup screen. Select your language and click Next.
- In the subsequent menu that appears, click on Repair your PC from the bottom left corner.
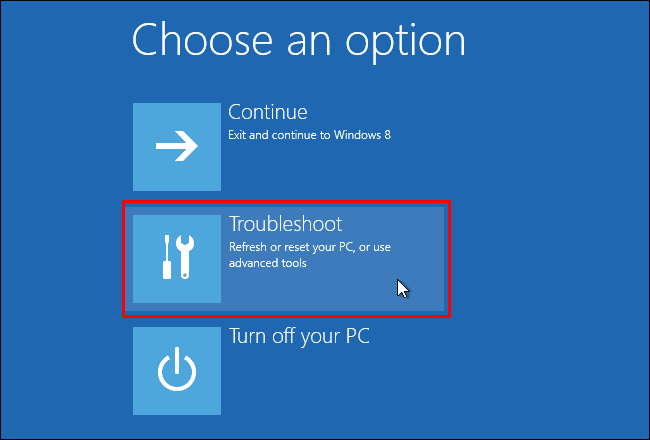
- Then under the Choose an option page, select Troubleshoot.
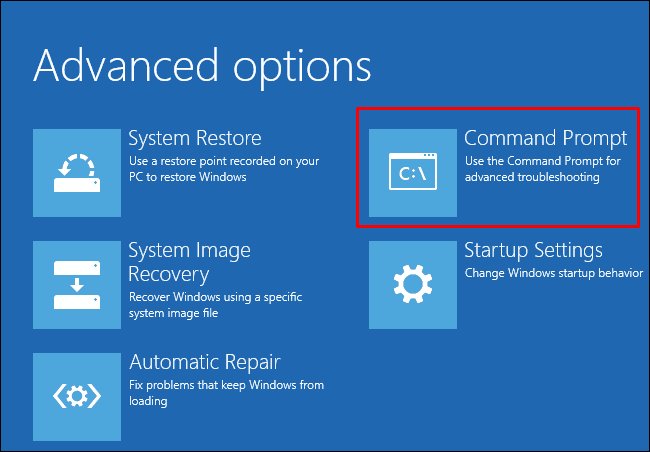
- Next up, select Advanced and then click on Command Prompt.
- When the CMD window opens, type in c: and hit Enter.
- After this, execute the following command:
BCDEDIT /SET {DEFAULT} BOOTMENUPOLICY LEGACY - Once that is done, type in Exit and hit Enter. Go back to the Choose an option page.
- Click on Continue and while your PC is starting, eject the USB Drive.
Once it successfully boots up, check if the Kernel Security Check Failure issue in Windows 10 has been fixed or not.
Fix 2: Use System File Checker
If there are some corrupt files, especially in the C drive, then they are bound to be the cause of concern. Manually finding these files might be a tough job at hand. Fortunately, Windows comes with a built-in Command Line tool that scans for all the corrupt files and fixes them accordingly. Here is how to use this tool:
- Head over to the Start menu and type in CMD.
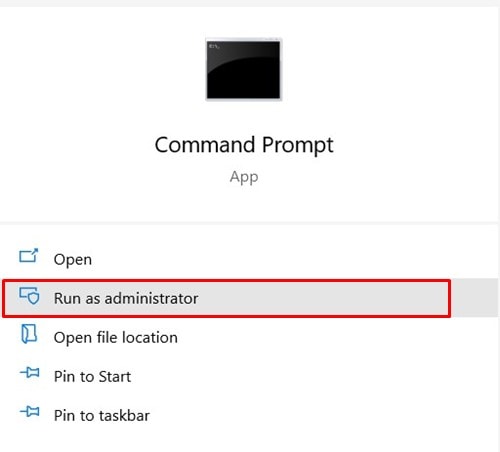
- Launch the Command prompt as an administrator.
- Type in the below command and hit Enter:
sfc /scannow
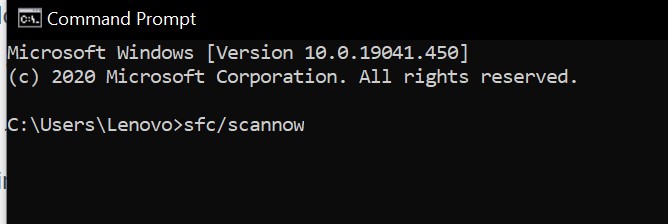
- It will now begin with the scanning process which might take some time. Once done, it will accordingly fix the issue.
You should then restart your PC. See if it is able to fix the Kernel Security Check Failure issue in Windows 10.
Fix 3: Using Memory Diagnostic
Windows also comes with a Windows Memory Diagnostic tool that checks for and fixes memory problems on your PC. But before executing the below steps, make sure to save your work and close all the background running apps.
- Now search for Windows Memory Diagnostic from the Start menu.
- Launch it and select Restart now and check for problems.
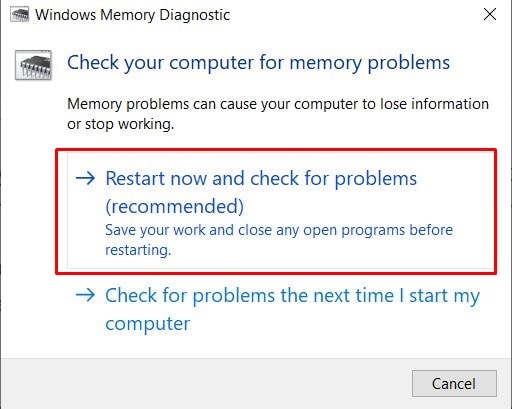
- Your PC will now restart and the tool will diagnose for all possible RAM related issues. It will then take the necessary course of action.
- After this, you should restart your PC again. When it boots up, check whether the Kernel Security Check Failure issue in Windows 10 has been fixed or not.
Fix 4: Scan Disk for Errors
Similar to System File Checker, Windows has another Command Line Tool known as Check Disk. It checks for file system errors and hard drive bad sectors issues and fixes them accordingly. To make full use of this tool, follow the below steps:
- Launch the Command prompt as an admin from the Start menu.
- If you only wish to view the errors but prefers to manually fix them, then execute the following command:
chkdsk C:

- Or if you want the tool to do its job for you (recommended), then the below command will come in handy:
chkdsk C: /f
- As you might have realized, the /f code tells the system that it needs to fix this issue, after completing the scan.
Anyways, once the process is done, reboot your PC. See if the Kernel Security Check Failure issue has been rectified or not.
Fix 5: Uninstall overclocking Software
if you have installed any overclocking software, then it might conflict with the proper functioning of the CPU and other related components. Hence to fix this BSOD error, you could consider resetting your system to default settings by uninstalling overclocking software.
Different software has a diverse set of instructions to disable their functions. So follow the one as instructed by your software. Once you have disabled or uninstalled it, restart your PC. Check if it fixes the Kernel Security Check Failure issue.
Fix 6: Boot to Safe Mode
In some instances, the issue might not be that much technical but the culprit could just be a third-party app. The best way to test is to boot your PC to Safe Mode. When you do so, all the third-party apps would be disabled. Then if in safe mode you don’t face any BSOD issue, the cause might then be attributed to a third-party app.
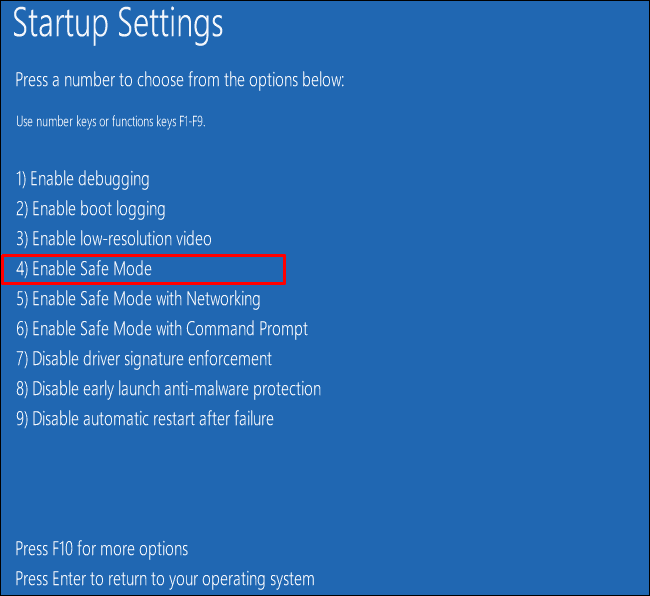
While in the general case, it is recommended to enable all the apps one at a time, to recreate the issue and identify the culprit. However, recreating a BSOD error is never the right thing to do. What you could do in this regard is to check all the apps that you have installed after facing this issue. Then uninstall them one by one until the error is fixed. On that note, here are the required steps:
- So search for Settings from the Start menu.
- Then go to Update and Security and select Recovery from the left menu.
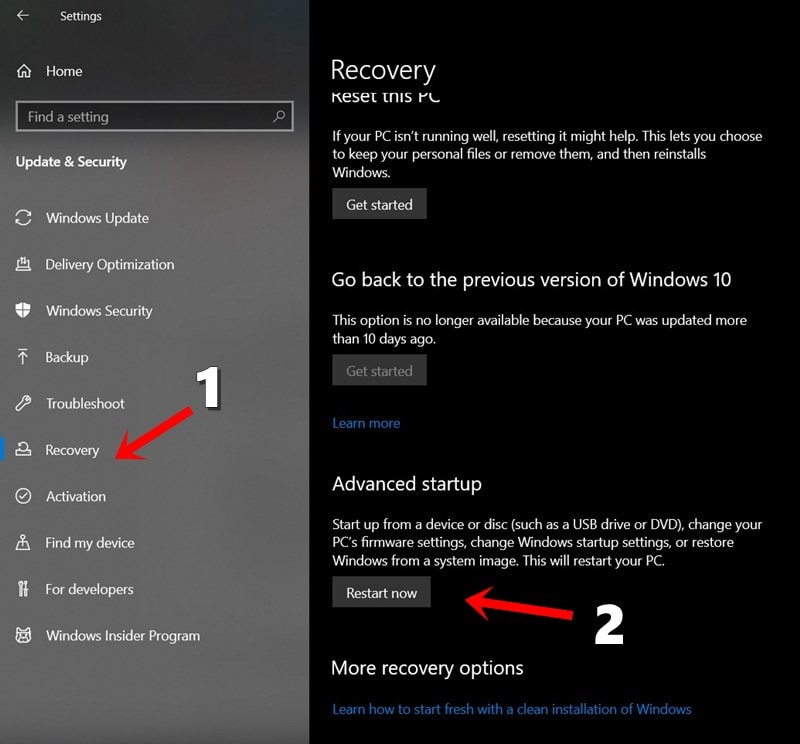
- Under the Advanced startup section, click on Restart Now.
- You will now be taken to the “Choose an option” page. Select Troubleshoot and click on Advanced options.
- Now head over to the Startup Settings and click on Restart.
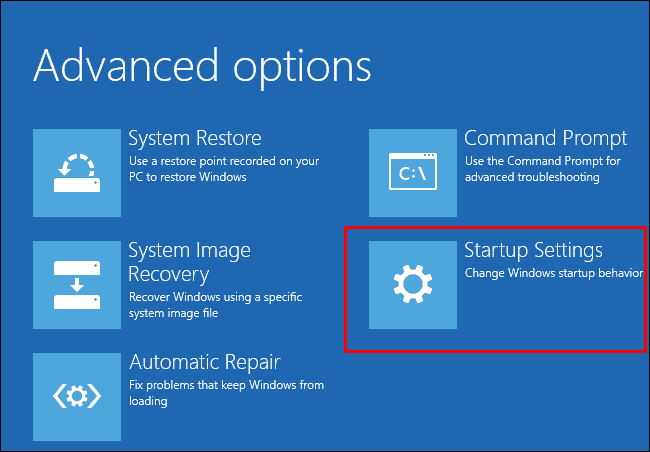
Once your PC boots into Safe mode, see if it fixes the Kernel Security Check Failure error.
Fix 7: Perform Advanced Scan
Likewise, if any malicious program, virus, or malware has sneaked into your system, then also you might get this BSOD error. In this regard, it is recommended to perform a deep scan of your PC. While there are many third-party antivirus software, we would be making use of the Windows built-in Defender program. Here’s how:
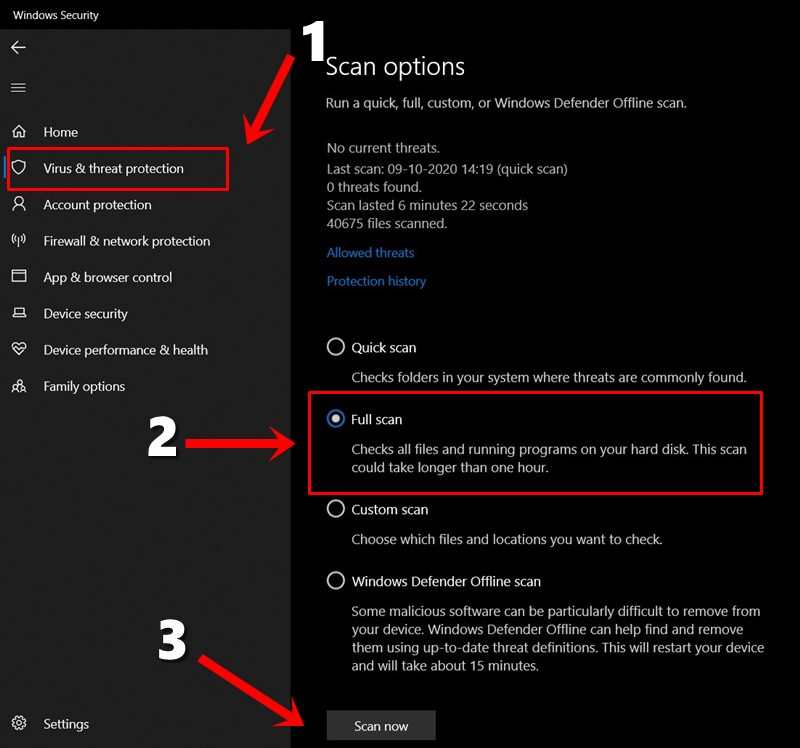
- Head over to the Start menu and search for Windows Security.
- Then go to the Virus and Threat Protection section.
- Within that, click on the Scan option and select Full Scan.
- Finally, click the Scan Now button situated at the bottom of the page.
The entire process would take some time. When the scanning is complete, reboot your PC. Check if it Kernel Security Check Failure error on your Windows PC has been fixed or not.
Fix 8: Update PC
Windows releases new updates after regular intervals of time. These update patches bugs, fix issues and bring in system stability. So it is always recommended to keep your system up to date. Follow the below steps to check for updates and hence install them:

- Use the Windows+I shortcut key combinations to open the Settings page.
- Head over to the Update and Security section and click on Check for Updates.
- If there is an update is available, download it right away and click on Restart Now.
- Once your PC restarts, the new updates would have been installed and the issue might have been fixed as well.
With this, we conclude the guide on how to fix the Kernel Security Check Failure error on Windows. We have shared eight different fixes for the same, do let us know in the comments which one managed to work out in your favor. Rounding off, here are some iPhone Tips and Tricks, PC tips and tricks, and Android Tips and Trick that you should check out as well.
