Here we will list all the Stock Firmware Collection for Samsung Galaxy J7 Prime smartphone. You can flash the Stock Firmware on Samsung Galaxy J7 Prime using the below guide on How to Install Samsung Galaxy J7 Prime Stock firmware. In this list we will update all the region Samsung Galaxy J7 Prime Stock Firmware collection for All models. Stock ROM on Samsung Galaxy J7 Prime came out of box with Android 6.0.1 Marshmallow.

Page Contents
About Samsung Galaxy J7 Prime:
Samsung Galaxy J7 Prime features a 5.5-inches display with a screen resolution of 1080 x 1920 pixels. The smartphone is powered by 1.6 GHz Octa-core Exynos 7870 Octa coupled with 3GB of RAM. The phone packs 16/32 GB internal memory which can also be expanded upto 256GB via microSD card. The camera on the Samsung Galaxy J7 Prime comes with 13MP Rear Camera with autofocus and LED flash and 8MP front shooting camera.
Samsung Galaxy J7 Prime runs on Android 6.0.1 Marshmallow out of the box with a Li-Ion 3300 mAh battery with Fast battery. It also has Fingerprint sensor on the front. It comes with connectivity options such as Bluetooth, WiFi, USB OTG, FM, 3G and 4G.
The Advantage Of Stock Firmware
- Flash Stock To Unbrick your Samsung Galaxy J7 Prime
- Flash Stock ROM to Fix the Bootloop problem
- Upgrade and Downgrade Samsung Galaxy J7 Prime
- Unroot or Fix Bugs on your phone
- To fix the lag or stutter on Samsung Galaxy J7 Prime
- By flashing Stock ROM, you can solve software problems.
- Revert back to stock to gain your warranty.
List of Samsung Galaxy J7 Prime Stock Firmware collection
| Build Number | OS | Security Patch |
| G610MUBS4CSC4 | 8.1 | March 2019 |
| G610MUBU3CRL1 | 8.1 | December 2018 |
| G610FDDU1CRL3 | 8.1 | December 2018 |
| G610FDXU1CRL1 | 7.0 | December 2018 |
| G610MUBU3BRK1 | 7.0 | November 2018 |
| G610MUBU3CRK1 | 7.0 | November 2018 |
| G610FDDU1BRG1 | 7.0 | June 2018 |
| G610MUBU1BRD2 | 7.0 | April 2018 |
| G610FXXU1BRC1 | 7.0 | April 2018 |
| G610FDXU1BRD1 | 7.0 | April 2018 |
| G610FDDU1BRD1 | 7.0 | April 2018 |
| G610FXXU1BRB4 | 7.0 | February 2018 |
| G610FDDU1BRB4 | 7.0 | February 2018 |
| G610FDDU1BQL1 | 7.0 | Blueborne |
| G610FDDU1BQJ7 | 7.0 | August |
| G610YZTU1AQJ1 | 7.0 | August |
| G610FDDU1BQJ4 | 7.0 | August |
| G610FDDU1BQJ3 | 7.0 | August |
| G610KKKU1BQJ4 | 7.0 | August |
| G610FXWU1BQH9 | 7.0 | August |
| G610FDDU1BQI3 | 7.0 | August |
| G610MUBU1AQI2 | 7.0 | August |
| G610FDDU1BQI2 | 7.0 | August |
| G610FDXU1BQH7 | 7.0 | August |
| G610FDDU1BQH9 | 7.0 | August |
| G610FODD1BQH9 | 7.0 | August |
| G610FXWU1AQG2 | 6.0.1 | July |
| G610MUBU1AQG2 | 6.0.1 | July |
| G610FDXU1AQG2 | 6.0.1 | July |
| G610FDXU1AQF1 | 6.0.1 | June |
| G610MUBU1AQD1 | 6.0.1 | June |
| G610MUBU1AQB3 | 6.0.1 | June |
| G610YZTU1AQE5 | 6.0.1 | May |
| G610FXWU1AQE1 | 6.0.1 | May |
| G610YZTU1APL7 | 6.0.1 | May |
| G610FDXU1AQE1 | 6.0.1 | May |
| G610FDDU1AQE4 | 6.0.1 | May |
| G610FXXU1AQE4 | 6.0.1 | May |
| G610FDDU1CSK2 | 8.1 | October 2019 |
| G610MUBU6CSI1 | 9.0 | September 2019 |
| G610MUBU6CSH1 | 8.1 | August 2019 |
| G610FDDU1CSF2 | 8.1 | June 2019 |
| G610MUBU2BRH6 | 7.0 | November 2018 |
| G611MUBU3BRI3 | 8.0 | September 2018 |
| G610MUBU3CRJ3 | 8.1 | October 2018 |
| G610FDDU1CRJ5 | 8.1 | November 2018 |
| G610YZTU2BRJ1 | 7.0 | October 2018 |
| G6100ZCU2CRI1 | 8.1 | October 2018 |
| G610FDDU1CRJ4 | 8.1 | October 2018 |
| G610MUBU2BRH4 | 8.0 | August 2018 |
| G610MUBS2BRH2 | 7.0 | August 2018 |
| G610FDDU1CRI4 | 8.1 | October 2018 |
| G610FXWU1BRG1 | 7.0 | June 2018 |
| G610MUBS1BRF3 / G610MUBU1BRG2 | 7.0 | June 2018 |
| G610YZTU1BRF1 | 7.0 | June 2018 |
| G610FXXU1BRG2 / G610FDDU1BRG2 | 7.0 | June 2018 |
| G610FXWU1BRD1 | 7.0 | April 2018 |
| G610FDXS1BRF5 | 7.0 | June 2018 |
| G610FDXU1BRB3 | 7.0 | February 2018 |
| G610FDDU1BQH5 | 7.0 | September 2017 |
| G610MUBU1AQF3 | 6.0.1 | June 2017 |
| G610YZTU1AQD7 | 6.0.1 | May 2017 |
| G610MUBU1AQC2 | 6.0.1 | March 2017 |
CLICK TO DOWNLOAD THE FILES THAT ARE REQUIRED :
- Download and Install the Samsung Kies Software: CLICK HERE
- Download and Install the Samsung USB Drivers: CLICK HERE
- Click to download and Extract the ODIN ZIP file on Desktop: CLICK HERE
PRE-REQUISITE :
- Remember: This guide is to install Samsung Galaxy J7 Prime Stock Firmware.
- Your device must have 70% Of battery
- You need a Laptop or PC to perform this Action
- You should be using Stock Firmware and not Custom ROM
- Back-Up your Data to make sure you have data’s in case if something Wrong (This Process won’t lose your data)
- You need to Enter Download Mode
- Make sure you have followed the steps properly. Don’t Skip and Read! – We are not responsible for any damage that you make to your Phone.
Steps to Install Samsung Galaxy J7 Prime Stock Firmware.
- If you have downloaded and installed the file from above then you are good to Go – Read from Step 2
- First of all, enable the USB Debugging
- To Enable the USB Debugging you need also to active the developer option, Now Go to your Settings -> About Phone -> Now Tap on the Build Number 7-8 Times until you see a toast message “Developer option enabled“
- Once your developer option is active, Go back to your settings -> Open developer option -> Enable USB Debugging
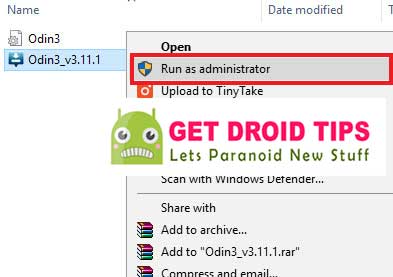
- Open the Extracted ODIN File called ODIN v3.11.1 exe file using the Administrator – Right Click your mouse and Open using Administrator
- Now Reboot your Phone into Download Mode
- So First Turn your Phone off -> press and hold the Home + Power + Volume Down buttons Until you see a download mode.
- Now Connect your Phone to PC using the USB Cables
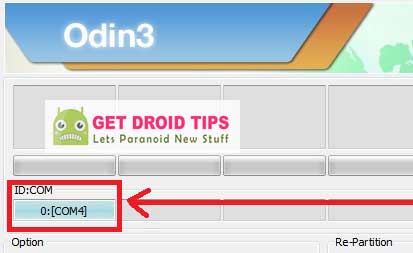
- When you connect the USB cable you will see a blue sign in Odin
- Now Go back again Odin and Add the firmware which you downloaded from Above by Clicking AP/PDA Button

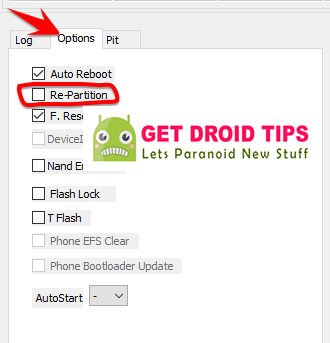
- Now Make sure re-partition is NOT ticked – Go to Option and see (Let the Auto Reboot and F-Reset Time be ticked)
- Click the start button, sit back and wait few minutes until you see a message pass. Once you see PASS then you can remove your Phone from the part. Don’t Panic if you see your Phone restarts while updating.
Note: You should not remove or operate on your device until the flashing process in shown to be completed.
Once the flashing process is completed and if everything has gone as planned, you should be able to see a big green box saying “RESET” or “PASSED.” This will depend on the version of Odin downloader you have downloaded. By now, the device have finished rebooting and it is safe to remove/unplug the phone/device.
That’s ALL! When you restart your Phone you will have the new stock firmware installed on Galaxy Alpha. I hope you learned the procedure on How to Install Stock Firmware on any Samsung Smartphone using ODIN.
super bro and
My name also Syed Abdul Razzaq
Thanks a lot. Your instructions are very useful and are really accurate.