Samsung Galaxy A30s is the slightly upgraded version of the Galaxy A30 model. It comes with a slightly better Exynos 7885 SoC, 3GB/32GB memory, Android 9.0 Pie, triple rear cameras, and more. Android opens the door of the world of customizations on a smartphone and that’s why people love it so much. If you’re a Galaxy A30s user and want to modify or tweak your device then you should root your phone without any second thought. Here in this guide, we have put up the full step-by-step process to Root Galaxy A30s using Magisk without TWRP.
Also Read
Samsung A30s SM-A307G / A307FN FRP Bypass | Remove Google Account
Fix: Samsung Galaxy A30 and A30s No Signal or Network Problem
Will Samsung Roll Android 13 (One UI 5.0) For Galaxy A70S, A20S, A30S?
Fix Samsung A30 and A30s WiFi Issue | Not Connecting, Slow or No Internet
Rooting a device gives you superuser access to take full control over the device system and system apps. That means you’re getting full ability to customize or tweak your device according to your expectations which isn’t possible normally. Although you have to unlock the bootloader on your device first in order to install any custom file into the system. It’s worth mentioning that whether you’re using a Stock ROM or a Custom ROM, you can easily root your device by following the guide below. Sounds great? Let’s proceed to the downloads, pre-requirements, and then the rooting process.

Page Contents
What is Rooting?
By rooting your phone, you will get a superuser or administrator access on your system over the subsystem and apps easily. That means a rooted device user can easily customize, change, or edit system root directory files or tweak system apps as well.
Note that the original device manufacturer wouldn’t normally allow you to do huge customizations or rooting, due to hardware compatibility or any security reasons. However, if you’re going to root your device, that will be your own call and responsibility if anything goes wrong.
Most of the time, a smartphone or a tablet device rooting process will come in handy if you’re using any third-party Custom ROMs. This will increase the device access to the next level and you can easily tweak, edit, or delete root directory files or apps according to your preference. Whereas, any improper rooting or unsupported file flashing may brick your device easily. It’s also worth mentioning that your device warranty will void after rooting if the device is under warranty period.
Advantages of Rooting
- Get access to all root directory files in internal storage.
- Increase or decrease device performance.
- Improve battery life.
- Support to install the Xposed Framework and Xposed module.
- Uninstall Bloatware on Samsung Galaxy A30s.
- Block most of the Ads on any application and system.
Steps to Root Galaxy A30s using Magisk
Before jump into the rooting process, make sure to unlock the device bootloader at first. Then you can continue with the next steps.
Please Note:
- Rooting may void the warranty of your phone
- Rooting may block the official OTA updates
- Supported model: SM-A307F/DS, SM-A307FN/DS (Global); SM-A307G/DS, SM-A307GN/DS, SM-A307YN
Download Samsung Galaxy A30s Stock ROM
Galaxy A30s Stock Firmware – Download Link
Once you’ve downloaded the stock firmware file based on your device model number, you can extract the boot.img file to patch it via the Magisk Manager app.
Guide to Extract Boot Image File and rename to .tar fileSteps to Create a Patched boot image using Magisk Manager
- Download and install the latest Magisk Manager app.
- Then, connect your device to the PC via the USB cable.
- Copy only the boot.img file from the extracted folder to your device storage.
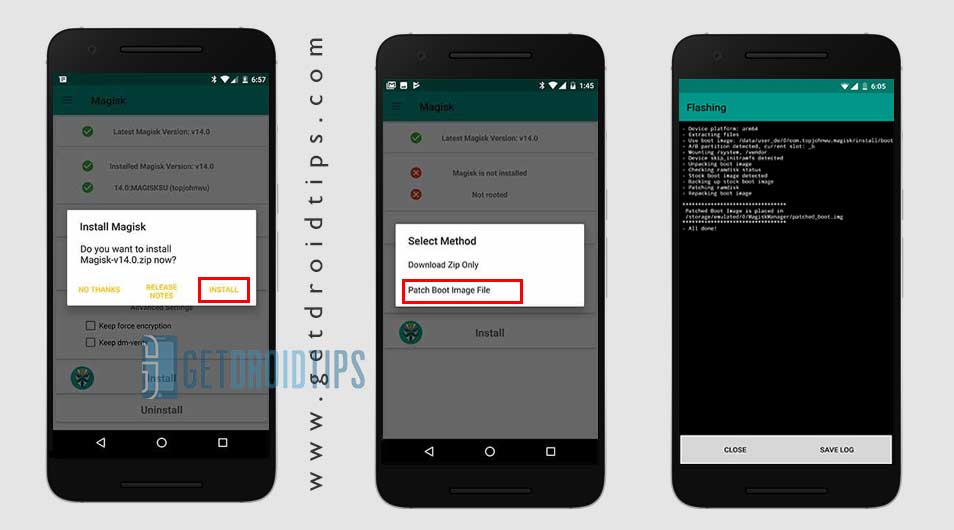
- Next, open the Magisk Manager app and select Install and choose to Install it again.
- Then tap on “Patch Boot Image File”.

- Go to internal storage and select your device boot image that you moved earlier.
- Now, wait for Magisk to start patching the boot image.
- Once the boot image has been patched, copy the “patched_boot.img” from the internal storage and replace it in the same extracted ROM folder on your PC.
Now, follow the second step to flash the patched boot image file.
- Odin flash tool accepts files in .tar format.
- So, you have to use 7-zip and archive it to .tar format. You can even rename the file as boot.img.tar as shown in the below screenshot.

Steps to Install the Patched Boot Image tar file on Galaxy A30s
Now, you have to follow the second method to install the patched boot image file on your Galaxy A30s device. But follow the requirements at first.
Pre-Requirements:
- The guide is for the Samsung Galaxy A30s model only.
- Maintain the device battery charge above 60% at least.
- Make sure to take a complete backup without any Root of the device storage.
- A PC/Laptop and a USB cable are required.
- Download ODIN Flash Tool and install it on your computer.
- Copy the patched boot image file into the ADB & Fastboot directory.
- Download and Install the Samsung USB Drivers on your computer.
Instructions to Root Galaxy A30s Using Magisk
After following all the pre-requirements and unlocking the device bootloader, take a look at the rooting steps below.
- First of all, reboot your device into download mode.
- Now, connect your phone to the PC via the USB cable.
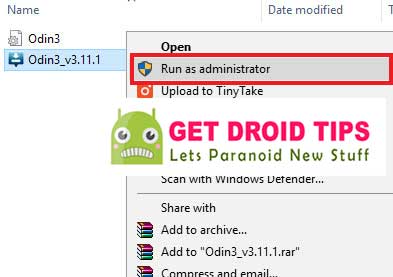
- Once you are connected with your PC, now open the downloaded ODIN.exe file.

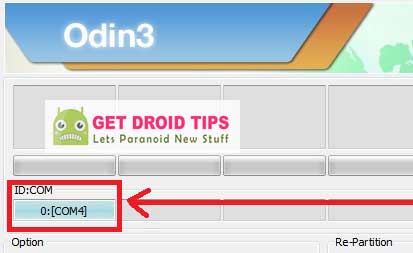
- When you connect the USB cable you will see a blue sign in Odin tool.

- Now, load the patched boot.tar file in the AP section.

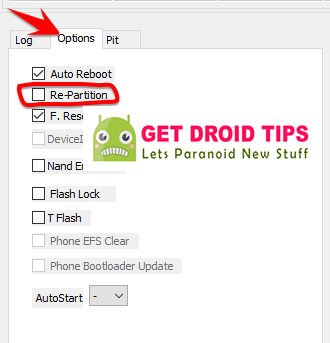
- Head over to the Option and see whether the Auto Reboot and F-Reset Time selected or not. If not then select these two. Don’t select re-partition.

- Next, tap on the Start button to root your device.
- Once the process is done, your device will reboot automatically.
- Wait for a few minutes as the first boot will take some time.
- That’s it.
We hope that this guide is helpful to you and you’ve successfully rooted your Samsung Galaxy A30s device by using Magisk. For any queries, let us know in the comments below.
