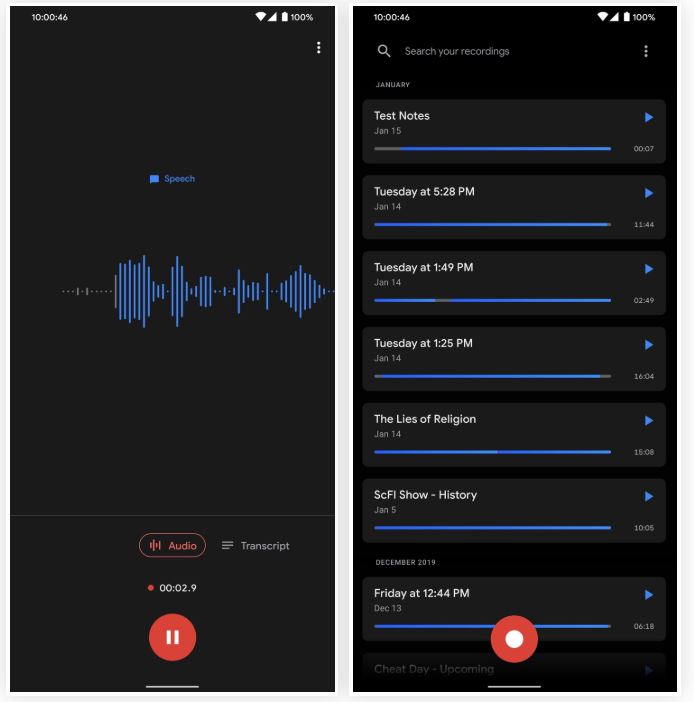
Google introduced the Pixel 4 smartphone back in 2019 and along with came some new features. Firstly, the Project Soli i.e. the hand based gestures system that you can use to navigate and use your Pixel 4 device. However, there was a new feature that went under the radar which is the Recorder application. Though there was quite a bit of confusion in the minds of the people about this application regarding what is so new that Google had to actually needed to make one. Moreover, now you can easily get and install this application on any Android smartphone.
Because in this post, we will guide you on how to take notes on any Android devices without typing anything. This new Recording application lets you transcribe any of your recordings and that’s even without the need for a premium or paid services. In fact, you can share the transcriptions from your device to any other smartphone easily. So, without any further ado, let us get straight into the article itself:
Also Read
![]()
How To Take Notes on Android Device Without Typing Anything
- Firstly, you need to download the application by clicking this link. Note that you do not require to have a Pixel phone in order to run the application. You can easily sideload the application on any other Android smartphone.

- Once you have downloaded the application then you simply need to install the application.
- Now open the application and give it all the permissions it asks.
- Tap the red button to start recording.

- When you are done with the recording select Save.
- Then you can go ahead and share the audio file, text or even both.
- You can even modify the transcription that best suits you.
- In fact, you can even convert the text into bullet points, bold, italics and more.
- That’s it!
So, there you have it from my side in this post. I hope you liked this post and were able to use the application on your Android device. Let us know in the comments below if you like this post or drop a comment if you come across any issues. Until the next post…Cheers!
