While you begin using your computer, all its hardware components run finely, but after some time, the CPU’s temperature increases, either due to resource-consuming software or other reasons. As we know the CPU or the Central Processing Unit is one of the important hardware for your system’s configuration, and the maximum of your computer’s performance is dependent on it.
During long hours and extended usage, the CPU can get abnormally hot, and as a result, at times, it can fail as well. To avoid any such situation and for keeping your CPU’s temperature normal/ cooled down, there are some quick solutions you can try. Here in this article, we have explained methods to increase the CPU fan speed in Windows 10, which will keep the device from getting hot.
Also Read
Page Contents
Methods to “Increase CPU Fan Speed in Windows 10”

Methods 1: Use a third-party solution for fan control:
The fan speed of any CPU is controlled by the in-built resources, though if required, users can also control it manually. Controlling or increasing the CPU’s fan speed manually is quite an easy task, and there are several effective third-party applications available for the same. Some of them include:
- SpeedFan
- NoteBook FanControl
- EasyTune 5
Using this third-party software you can check the current temperature of your CPU and then can further increase the fan speed up to 100%.
NOTE: It is recommended that the CPU must never cross the speed of more than 70 degrees Celsius. The safest temperature is around 60 degrees Celsius, and the risk at this temperature for overheating and related failure is comparatively low.
Method 2: Check BIOS for fan speed options:
As per a lot of suffered users, organizing the Speed of their CPU’s fan via the BIOS setting has helped them controlling the overheating issue. Follow the steps given below in order to enter the BIOS setting and check for the fan speed options:
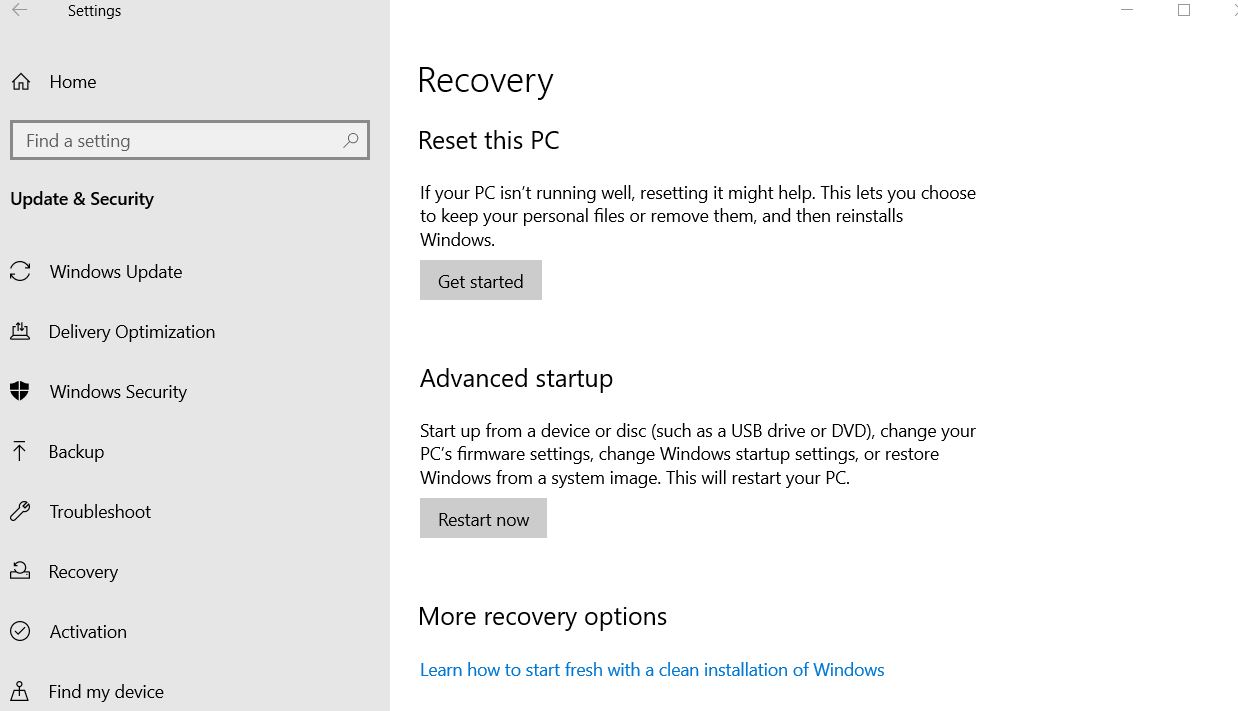
- Firstly, launch the Settings window by pressing Windows + I altogether.
- Now on the Settings window, navigate to Update & Security.
- Here select the option Recovery from the left-pane menu.

- Now on the right-pane menu, under the Advanced Startup section, click on Restart Now tab.
- Now navigate to Troubleshoot -> Advanced options -> UEFI Firmware settings.
- Further click on Restart. It will now boot your computer in BIOS/UEFI settings.
- Lastly, within the BIOS setting, you can find the fan configuration settings easily.
By following the above two methods, one can easily increase the CPU Fan Speed in Windows 10 computers. CPU is a computer’s core, and due to working endlessly, it carries out considerable heat as well.
In case your CPU keeps rising up to an abnormal temperature every now and then, it is advisable to find a quick solution for the same, or it might crash very soon. We hope you will find all the information mentioned in the article above as helpful and relevant. If you have any queries or feedback, please write down the comment in the below comment box.
