There are a lot of services that you can subscribe to on your Apple devices. These various Apple services are Apple Music, Apple tv, etc. Also, there are a lot of third-party apps that provide various subscription services like Netflix, Prime, or some VPN apps, fitness apps, and whatnot. It is easy to buy subscriptions, but when you have a lot of them, you need to manage them according to your needs. You can always manage all type of subscriptions from your iPhone or iPad, but when you don’t have access to your phone and you want to manage them, you can always do it with your Mac.
Managing subscription on your Mac is not that hard, but if you are doing it for the first time, you should do it the right way. There are two ways to do it if you have a Mac. Here in this article, you will get a guide on both the ways to manage your subscription on your Mac.

Page Contents
Method 1: Manage Subscriptions on Mac From Appstore
To manage your subscription on your Mac, firstly go to the app store from your Mac.

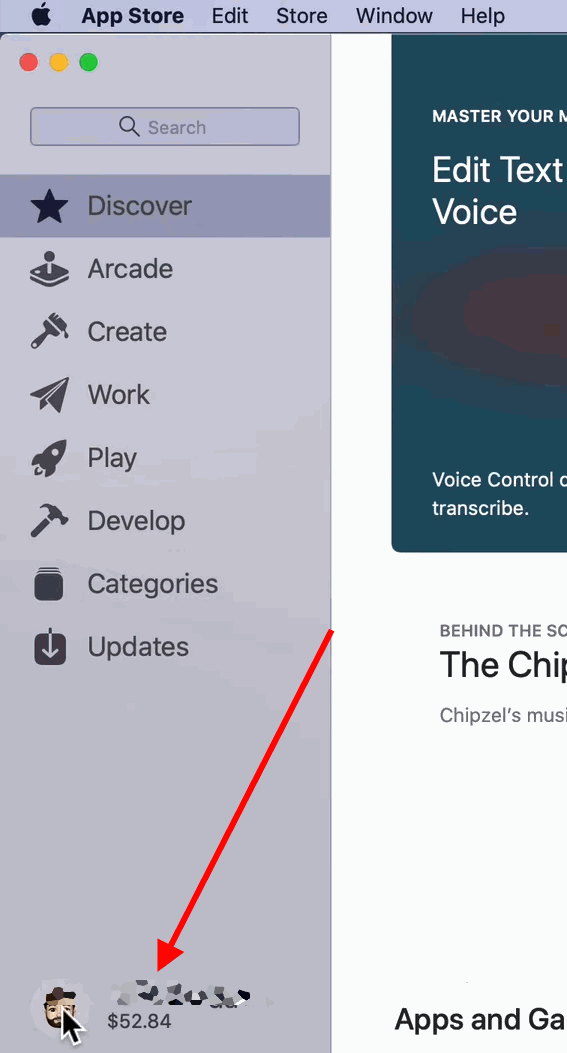
This will open a new window of the app store. In this new window, you will see your Apple ID with your available balance. Click on it to proceed.
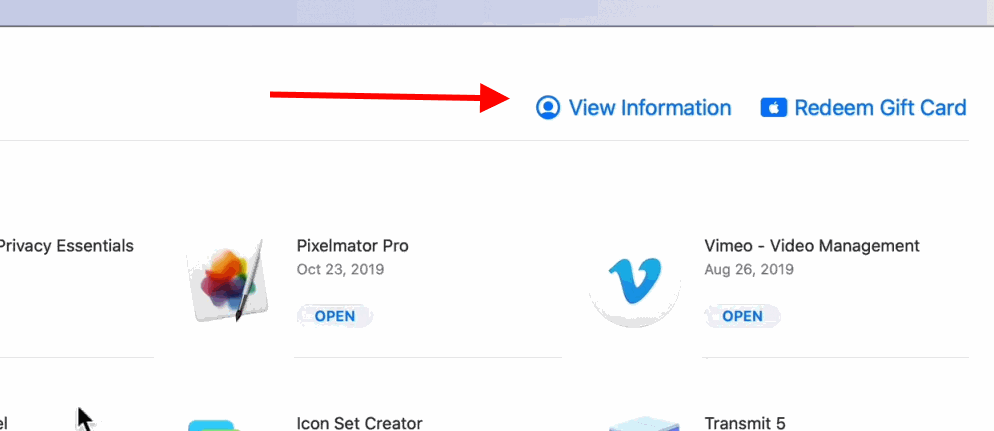
Secondly, When you do that, you will see a new window of your Apple account. Here all your apps which you have downloaded will be visible. You will see an option ‘view information’, click on that.
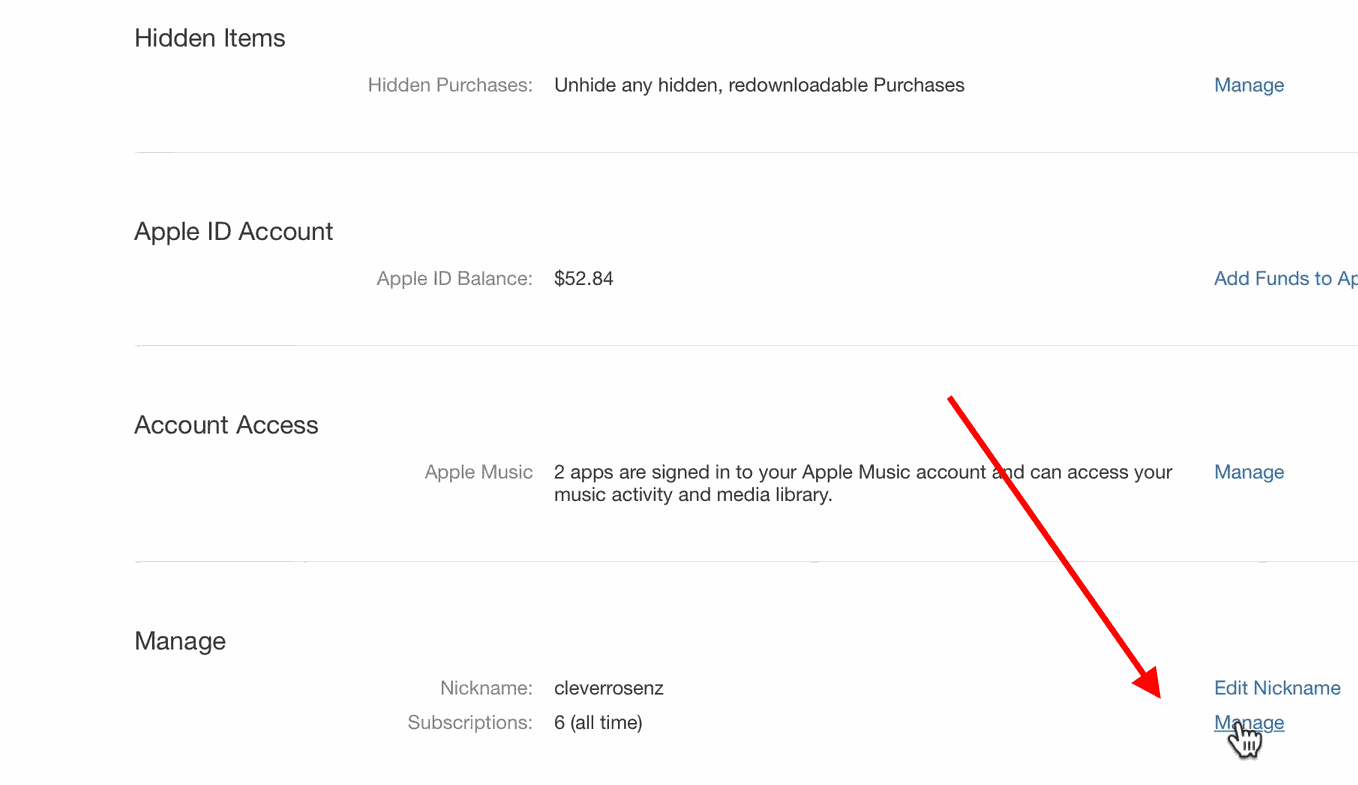
After that, you will see various details of your account on the next window. Look for the manage menu and click on the ‘Manage’ option under that menu.
As soon as you click on manage, you will see a new window that contains all your purchased subscriptions.
Method 2: Manage Subscriptions on Mac with System Preferences
If you are unable to open the subscriptions using the first method, you can use this method as it does the same thing.
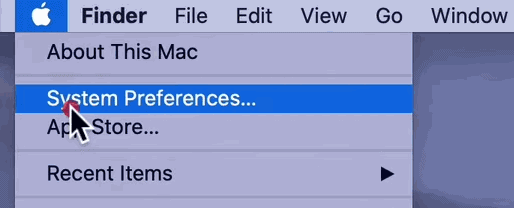
Firstly, click on the apple symbol to open the start menu and click on the system preferences options.
Secondly, click on the Apple ID option on the next window of the system preferences.

Thirdly, you will see a new window of your Apple ID. Here look for the media and purchases option and click on it. This will open a side menu.
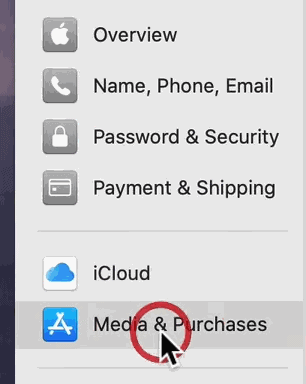
Lastly, click on the manage option on this menu, and you will see the subscription window.
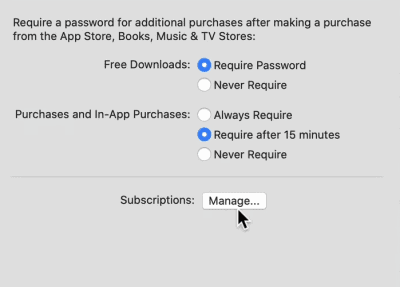
Once you are in the subscription menu, you can manage all the subscriptions from there. To do that, click on the edit option on the right side of any service that you want to manage.

After that, you will see various manage options on the next screen according to the service. Also, You can see the details of your subscription plans.
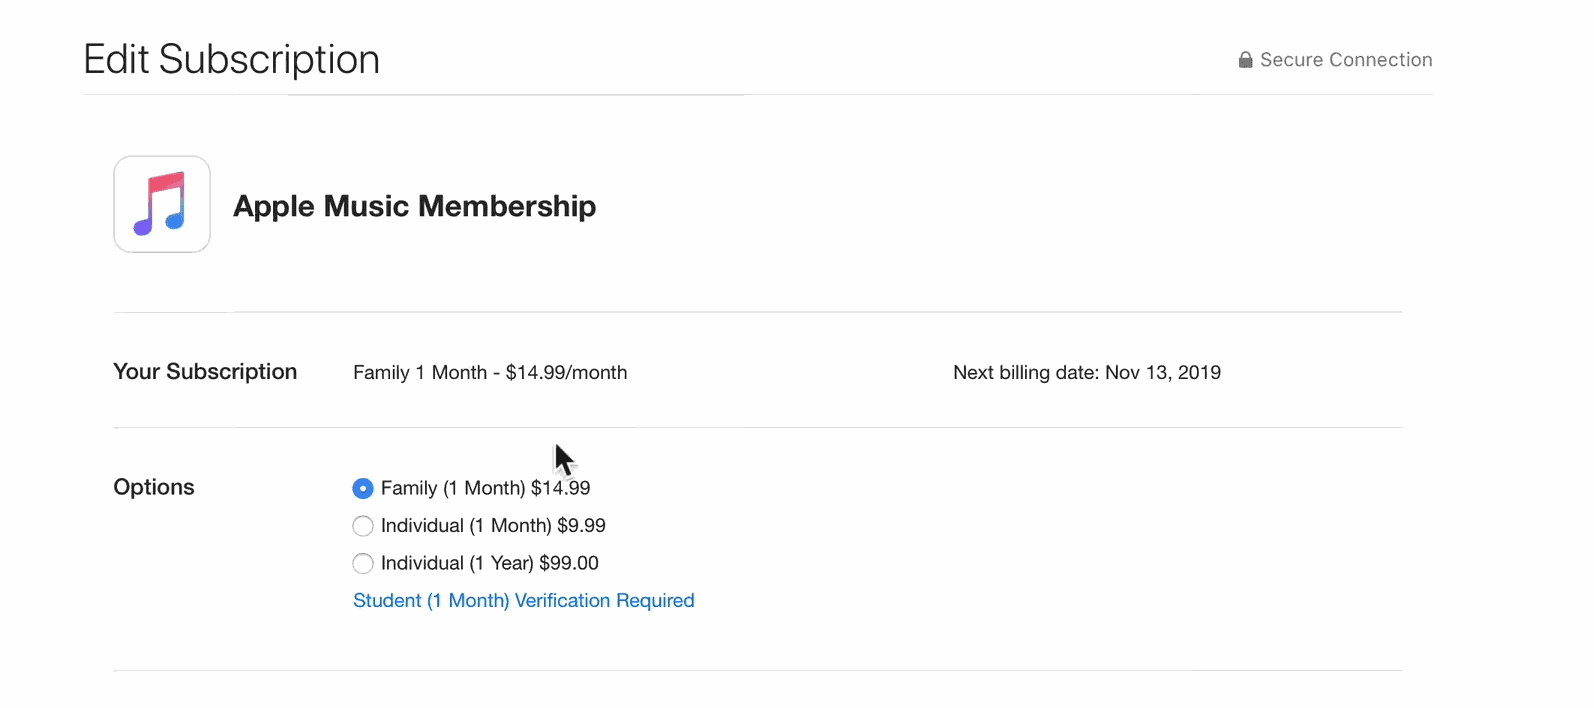
If you have multiple subscriptions, you can choose which one to use from the same menu.
If you are using the free trial and you want to cancel it to avoid the automatic renewal, you can do it by following the same method. Just go to the edit subscription option by following, and you will see a cancel subscription option there. Click on that, and your work is done.
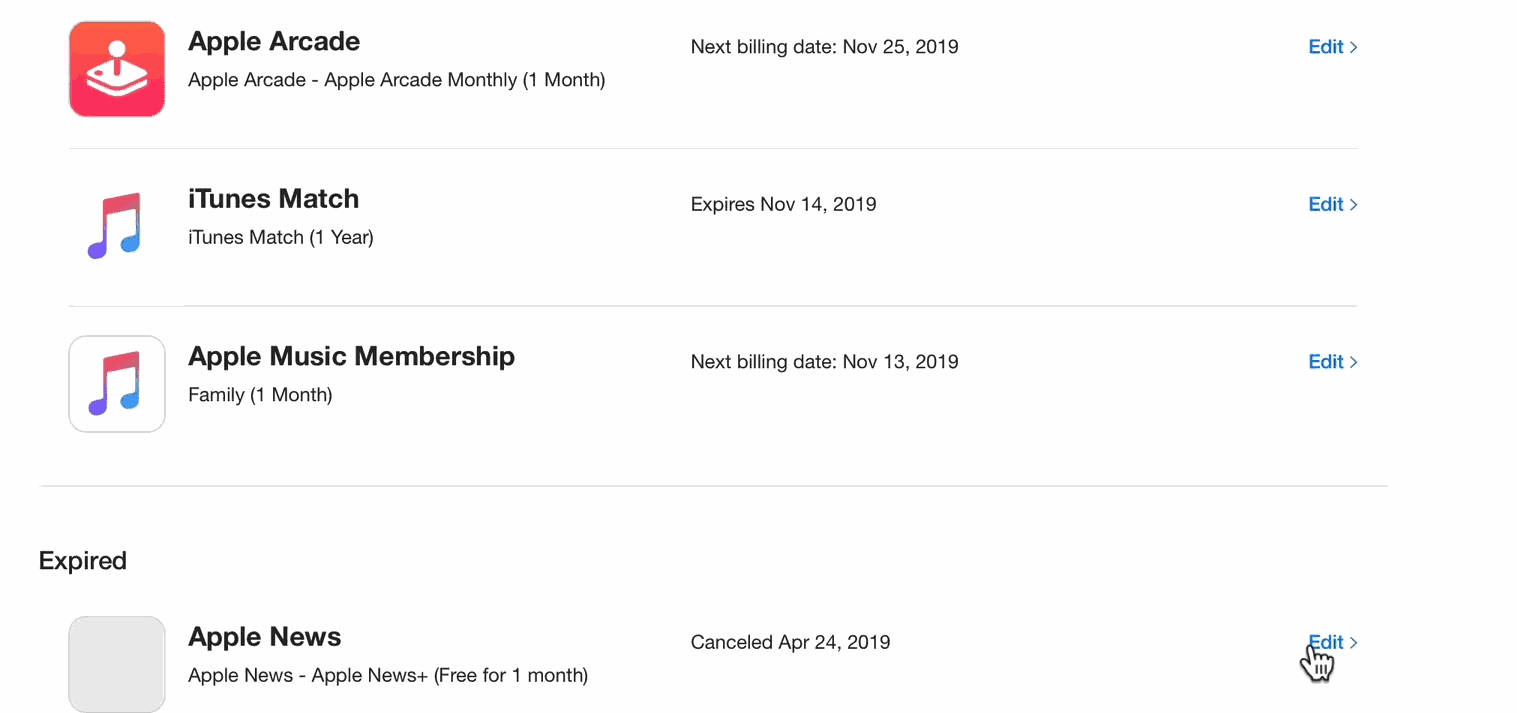
You can renew your expired subscriptions from the subscription menu as well. To do that, firstly, scroll down, and you will see a list with the title ‘expired.’ Click on the edit option on the right of side the subscription that you want to renew.
Conclusion
To sum up, this was the guide to manage all your subscription using your Mac. You can manage, edit, cancel and renew your subscriptions using this method. All you need to do is sign in with the same apple id as your other Apple devices. I hope this guide clears all your doubts and helps you with managing your subscription on your Mac.
