Onikuma is one of the best choices for those shopping for gaming peripherals for their setup. Be it gaming mice, keyboards, speakers, or headphones, Onikuma has them all covered. One of the most popular products that Onikuma has to offer is their top-of-the-line X10 Pro RGB headphones. Besides their flagship headphones, Onikuma offers other headphones at various price points (they even got the cat ear ones!).
If you are somebody who owns a pair of Onikuma gaming headphones but has been facing trouble with sound input, this guide is tailor-made just for you. In this quick troubleshooting guide, we will go over a few of the most effective ways by which you can fix your Onikuma headset’s microphone not working as it should.
Also Read
How to Fix Onikuma Headset Mic Not Working Issue
There could only be a couple of reasons as to why your Onikuma headset’s microphone could not be working properly. We will be going over a few steps that will help you to troubleshoot the issue and find a working solution for this problem.
This is a troubleshooting guide for
- Onikuma X10
- Onikuma X10 Pro
- Onikuma B60
- Onikuma X11
- Onikuma K9
- Onikuma X15 Pro
- Onikuma B3
- Onikuma K10
- Onikuma X7 Pro
- Onikuma K10
- Onikuma K20
- Onikuma X16
- Onikuma X15
- Onikuma K10 Pro
- Onikuma K20
- Onikuma X7
- Onikuma K16
- Onikuma K15
- Onikuma K19
- Onikuma X9
- Onikuma X3
- Onikuma X4
- Onikuma K6
- Onikuma K9
- Onikuma K8
- Onikuma K11
Troubleshoot your Headphones
First and foremost, let’s run a few tests to discover the exact reason why your headphone’s mic could be giving you troubles.
- Make sure your headphones are properly plugged into your PC or laptop.
- Few Onikuma headphones come with a detachable microphone. If you own one of those models, ensure your mic is connected snugly to your headphones.
- Most headphones come with a physical mic kill switch. Check to see if you have yours accidentally enabled.
- Lastly, try plugging in your headphones into a different computer or laptop to ensure that there’s nothing wrong with the hardware itself.
If you have gone over all these checks and have confirmed that the microphone still doesn’t work, follow the fixes below:
Fix 1. Set Onikuma Headset as Default Communications Device
One reason why your microphone could not be working could be because Windows is relying on some other input device to capture audio. To fix this, you must set your Onikuma Headset as the default communications device.
- Open the Start Menu and search for Sound Settings.
- Click on the first result, scroll down and click on More sound settings. This will bring up a popup with further controls.
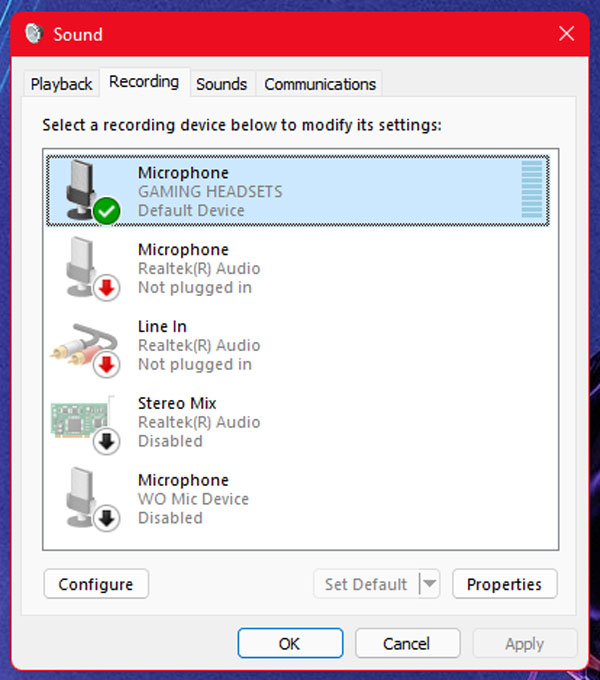
- Click on the Recording tab, select the Onikuma Headset’s microphone and click on Set Default.
- Click on OK and this should fix your Onikuma headset mic not working issue.
Fix 2. Check Privacy Settings
Windows has an in-built privacy manager that allows you to restrict certain apps from accessing your webcam, speakers, or microphone. If none of the apps or games on your computer have been able to pick up your audio using your headphones, there’s a good chance that the privacy setting for the microphone is restricting access.

- Open the Settings app and click on Privacy & security on the tab to the left.
- Scroll down until you find the Microphone option under the App permissions section.
- Click on it and ensure the Microphone access toggle is enabled. Furthermore, check to see if any apps you use or games you play are being denied access to your microphone in particular and enable it.
Fix 3. Run the Audio Troubleshooter
Windows also offers a troubleshooter for virtually any error that you might run into, be it compatibility issues with certain apps, or network troubles. You can run a troubleshooter specifically for your microphone and let Windows automatically look for any problems and fix them.
- Open the Start Menu and search for Troubleshoot settings and click on the top result.
- From the Settings menu that shows up, navigate to Other troubleshooters and click on the Run button next to the Recording audio option.
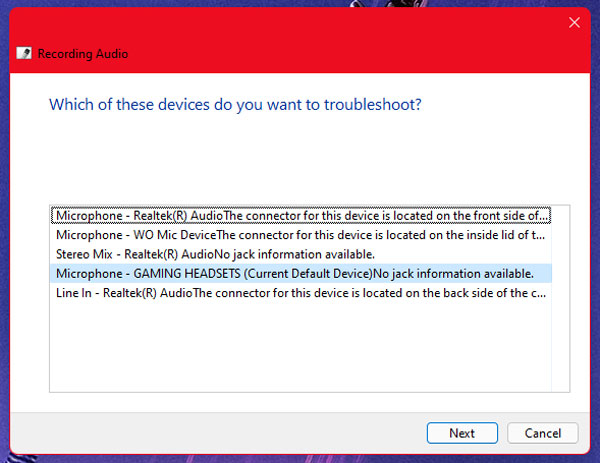
- A troubleshooter window should now pop up. Select the microphone that’s connected to your Onikuma headphones and proceed with the troubleshooting process. Windows should identify and rectify the issue.
Fix 4. Update the Audio Driver
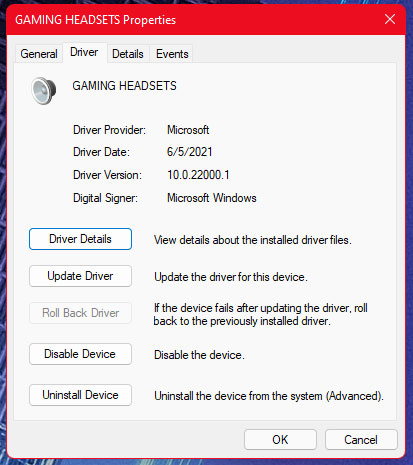
Traditionally, Windows should automatically detect new hardware and install the appropriate drivers for your headphones and their microphone, but it sure doesn’t hurt to ensure you’re on the latest driver. Onikuma doesn’t provide any specific audio drivers for their products, so the next best thing you could do is open up Device Manager on your computer and check for any driver updates for your headphones. Alternatively, you should be able to install new drivers in the Windows Update options.
Fix 5. Contact Onikuma Support
If all else fails and you’re suspicious of a hardware-level defect with your headphones, it’s time to contact support and file for a service or replacement. Fortunately, Onikuma has great support and offers a 30-day refund policy and a 1-year warranty for products purchased through their website. You can contact Onikuma support to see if they’re willing to fix or replace your headphones.
Conclusion
We hope our guide on how to fix the Onikuma headset mic not working was helpful to you. If you have any tips besides what we’ve mentioned, let the other readers know in the comments below! If you have any queries regarding the guide, please contact us, we’d be happy to help!
Discussion
1 Commenthelp me I bought 3 same type and all of their mics hv microwave sound