Microsoft has introduced Paint 3D in Windows 10, and it is the default Windows app for 3D modeling. Using 3D paint, you can create minimalistic, quite detailed 3D models, which you will be able to render. There is various use of this app, one of which is that you can literally use it for creating game assets. However, you can also design a 3D model to print it out in a 3D printer.
From our experience, we know that all applications and the operating system have flaws. These flaws are usually random errors and bugs which affect your productivity. Paint 3D is no exception. People have been reporting recently that their Paint 3D has stopped working suddenly.
Also Read
The reason can be the Windows Store cache files that are in conflict with Paint 3D, or it can be due to corrupted files. Moreover, there is a possibility that the in-app configurations of PAint 3D are messed up, causing the app to crash. The solutions to these issues will be given below.

Page Contents
How To Fix Windows 10 Paint 3D Not Working
Method 1: TroubleShoot Paint 3D
Since windows troubleshooter is the default windows mechanism to fix up the bugs of its native applications and OS, you must windows Troubleshooter at first hand, see if it can fix the issue.
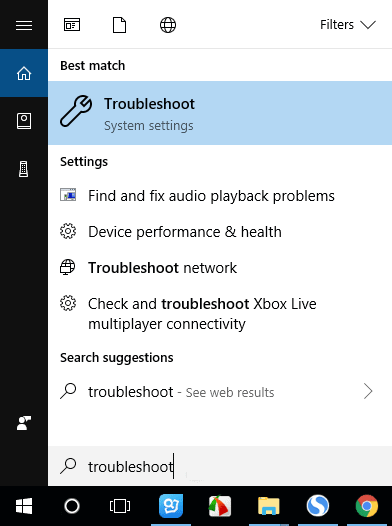
Step 1) To open up the Troubleshoot settings Window, type troubleshoot in the Windows Search Bar and click on the first result you see.
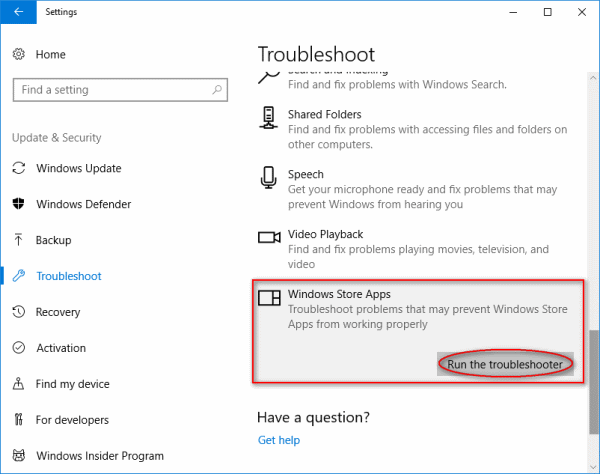
Step 2) Now, in the troubleshooting Settings Window, on the right pane, scroll down and find for Windows Store Apps, click on it and then click the Run the troubleshooter button underneath.
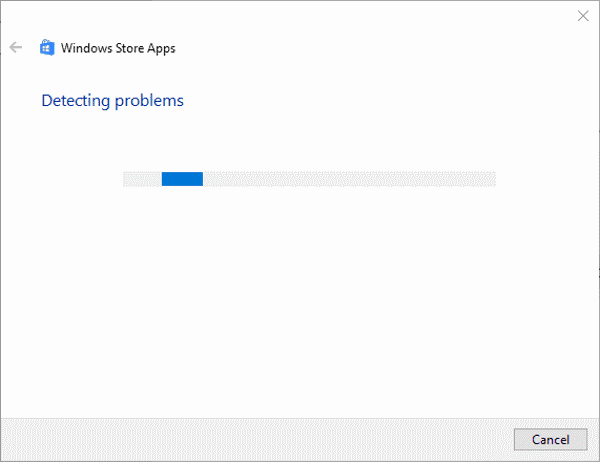
Step 3) Now, just go through the troubleshooting wizard; Windows will automatically detect the issues and fix it for you.
Method 2: Clearing Windows Store Cache Files
If the cache files of the Windows Store are corrupted, then it might be a very reasonable reason for the Paint 3D to stop functioning. However, it is not such a serious issue; you can fix it by just deleting the Windows Store cache files.
To clear the cache of the Windows Store, firstly press the Windows Key + R button on your keyboard to open up the Run Dialog Box. Then there type WSReset.exe.
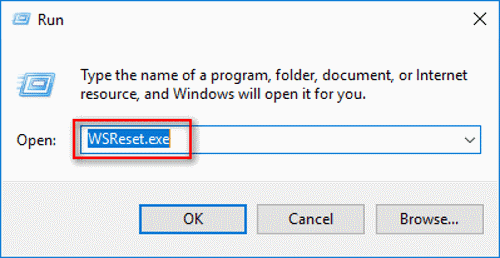
After that, you can either press enter on your keyboard or just press the ok button. You will have to wait for a bit for the completion of the process.
Once it’s done, resetting Windows Store, launch the Paint 3D app, and see if the issue is resolved.
Method 3: Resetting Paint 3D
As we mentioned earlier, the issue you are facing can be due to the incorrect configuration of Paint 3D settings. Also, due to the corruption of Paint 3D cache files. However, only by resetting the Paint app via windows settings you can resolve the issue.
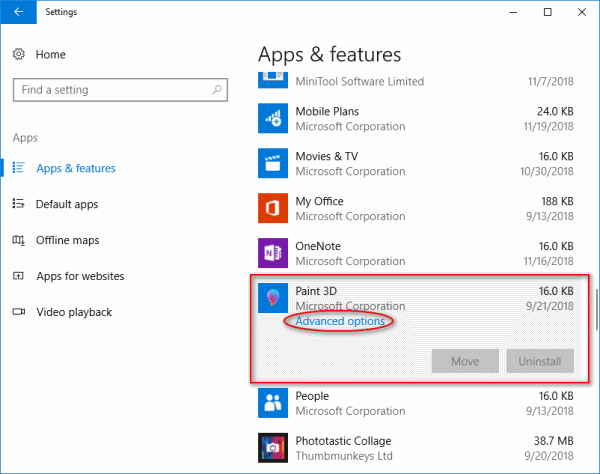
Step 1) Press the Windows Key + I button on your keyboard to open up the Windows Settings, then go to Apps & features. Here, on the right-pane, scroll down and search for the Paint 3D app, click on it and go to the Advanced options.
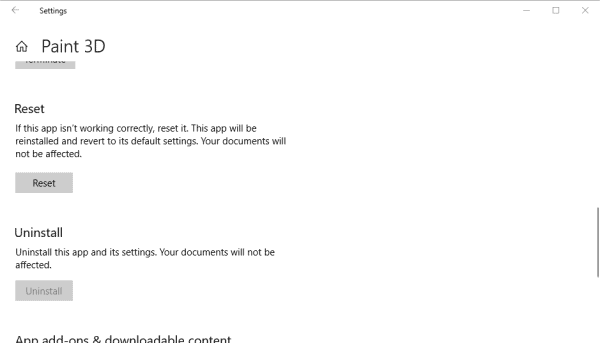
Step 2) Now, on the next page, click on the Reset button to reset Paint 3D, hit the Reset button twice, so you reset Paint twice, it will ensure the deletion of the cache.
After that, you can open up Paint 3D and check if the issue is fixed.
Method 4: Reinstalling Paint 3D
If none of these solutions mentioned above resolve your issue then, the last thing you can try is to reinstall Paint 3D. If the files are corrupted, or any other issues will get fixed. It’s a bit complicated process, but you will do fine if you just follow the steps.
Step 1) Firstly, open up the Run dialog box by clicking on the Windows Key + R buttons on your keyboard. Then type or copy-paste the following path in it and click on the OK button. It will open up the installation folder of Paint 3D.
%LOCALAPPDATA%PackagesMicrosoft.MSPaint_8wekyb3d8bbweLocalState
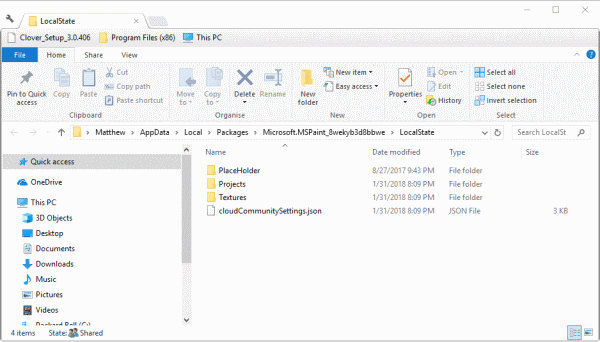
Step 2) Now, select the Project folder and copy it to any other directory, now type PowerShell in the Windows Search Bar, and click on the Windows Powershell application. You must run it as an administrator.
Now type the following command and press the Enter Button to execute and uninstall Paint 3D.
Get-AppxPackage Microsoft.MSPaint | Remove-AppxPackage
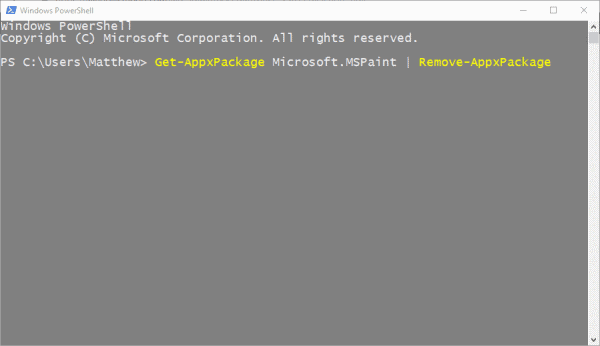
Step 3) Lastly, once it’s done uninstalling Paint 3d, go to Windows App Store. Search for Paint 3D and click on the Get button, reinstall it on your PC, run PAint 3D, and see if the issue is fixed or not.
Conclusion
To fix Paint 3D suddenly stopped working error, the first thing you can try is to open up the Windows Troubleshooter then troubleshoot the Windows Store. If this doesn’t close the deal, then you must clear the Windows Store cache.
To clear the Windows Store cache, open up the Run accessory, type WSReset.exe and hit enter, wait for the process to complete, and check if your issue has been resolved. If not, then go to apps and features in Windows Settings, move over to the Paint 3D app, and head over to the Advance options. Then finally, click on the reset button to reset everything. This should probably fix the issue.
Lastly, you can try reinstalling Paint 3D; therefore, as mentioned above, open up the path and copy the file. You can also move it to another directory, then open up the PowerShell and type the command mentioned above. Once the uninstallation is complete, open up Windows Store and install Paint 3D, this should resolve the issue.
