Paint 3D is a cool in-built application for both 2D and 3-dimensional image editing on Windows PC. It is an augmented avatar of the good old Microsoft Paint. The user interface of Paint 3D is pretty simple to use. The application supports several image formats. It allows us to edit and convert JPG into PNG format and vice-versa. That’s what I’m going to demonstrate in this guide.
I use Paint 3D for a majority of image editing work for my content creation. Sometimes, to use thumbnail images of high quality I have to edit JPG images and convert them to PNG. This allows the image to have a lossless presence and lesser size. You can even create a transparent background if you are trying to edit a logo.
Also Read

Troubleshoot | How to Fix if Windows 10 Mobile Hotspot Turns Off Automatically
Convert JPG into PNG in Paint 3D
There is the basic method of saving the image from JPG to PNG format.
- Edit the image with JPG format
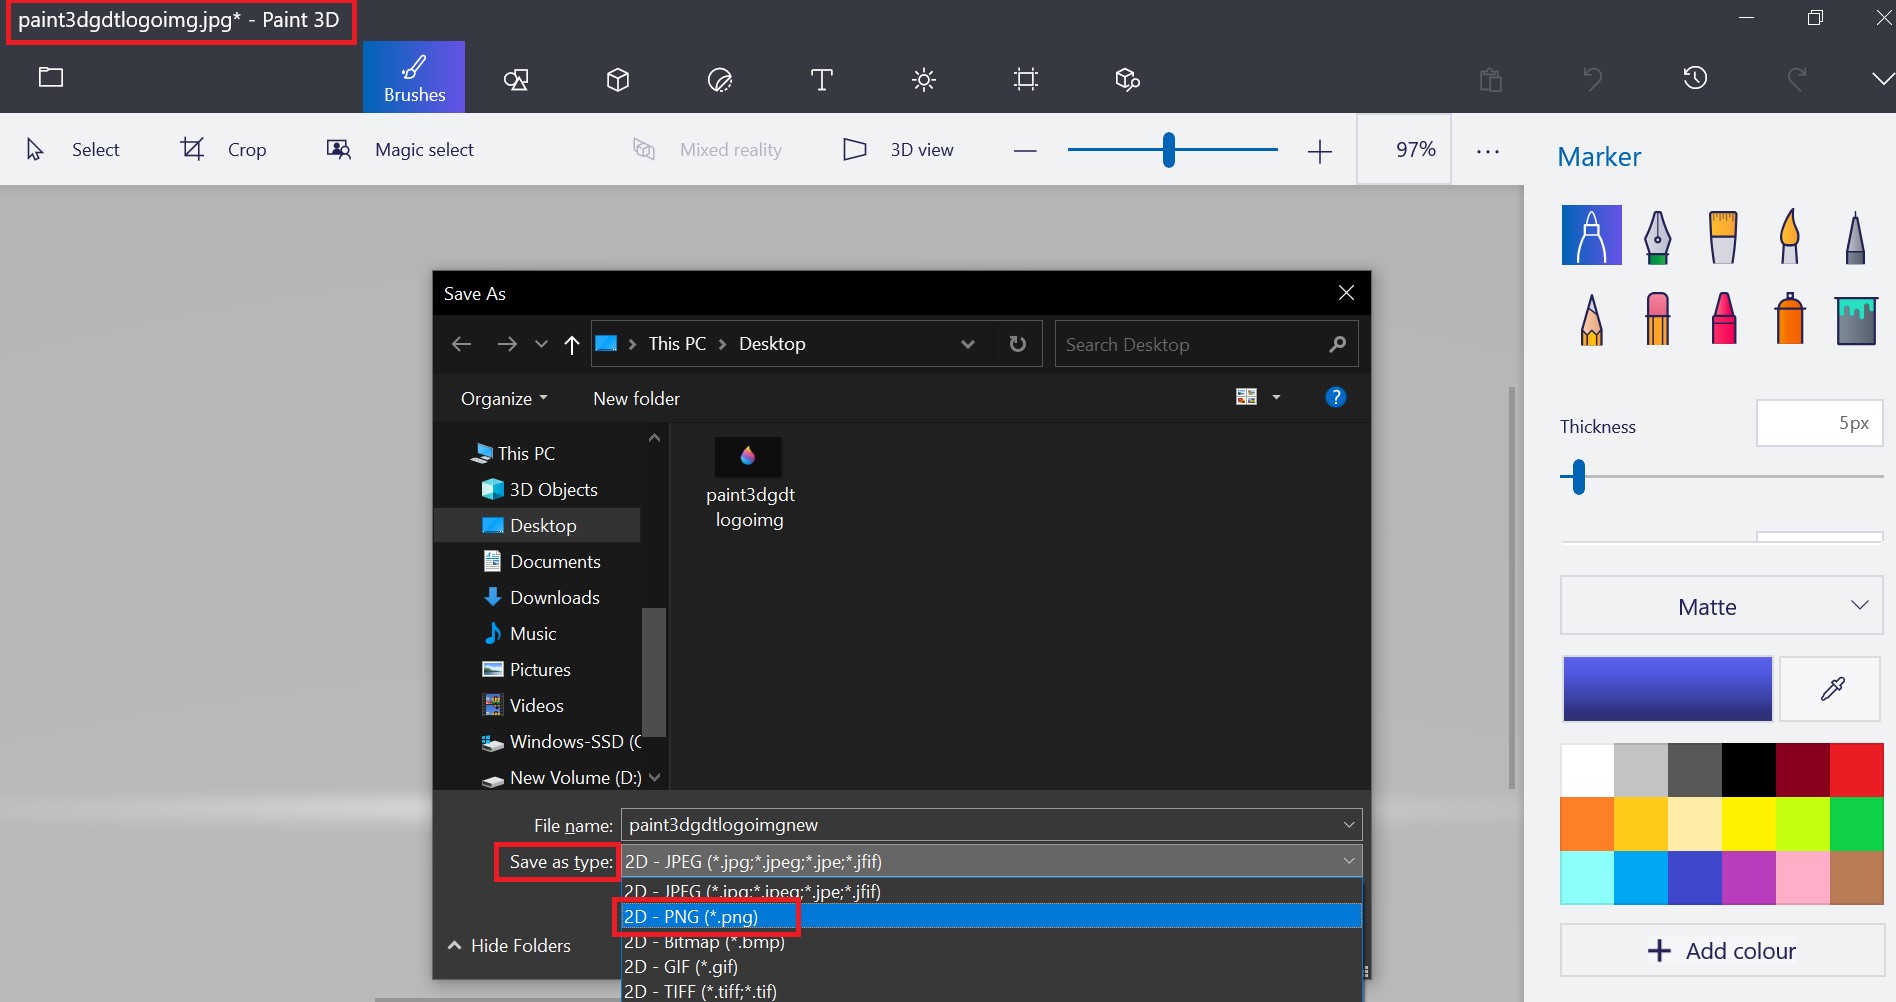
- Once you are ready to save the image, press Ctrl +Shift +S.
- then as shown in the screenshot, select the Save As Type to expand a drop-down menu.

- Select PNG [As you can see I’m saving a jpg file by converting into PNG]
- Then click Save. Done.
Save an Image as PNG with Transparent Background
Let’s say you want to create an image and save it to PNG format by making it’s background transparent.
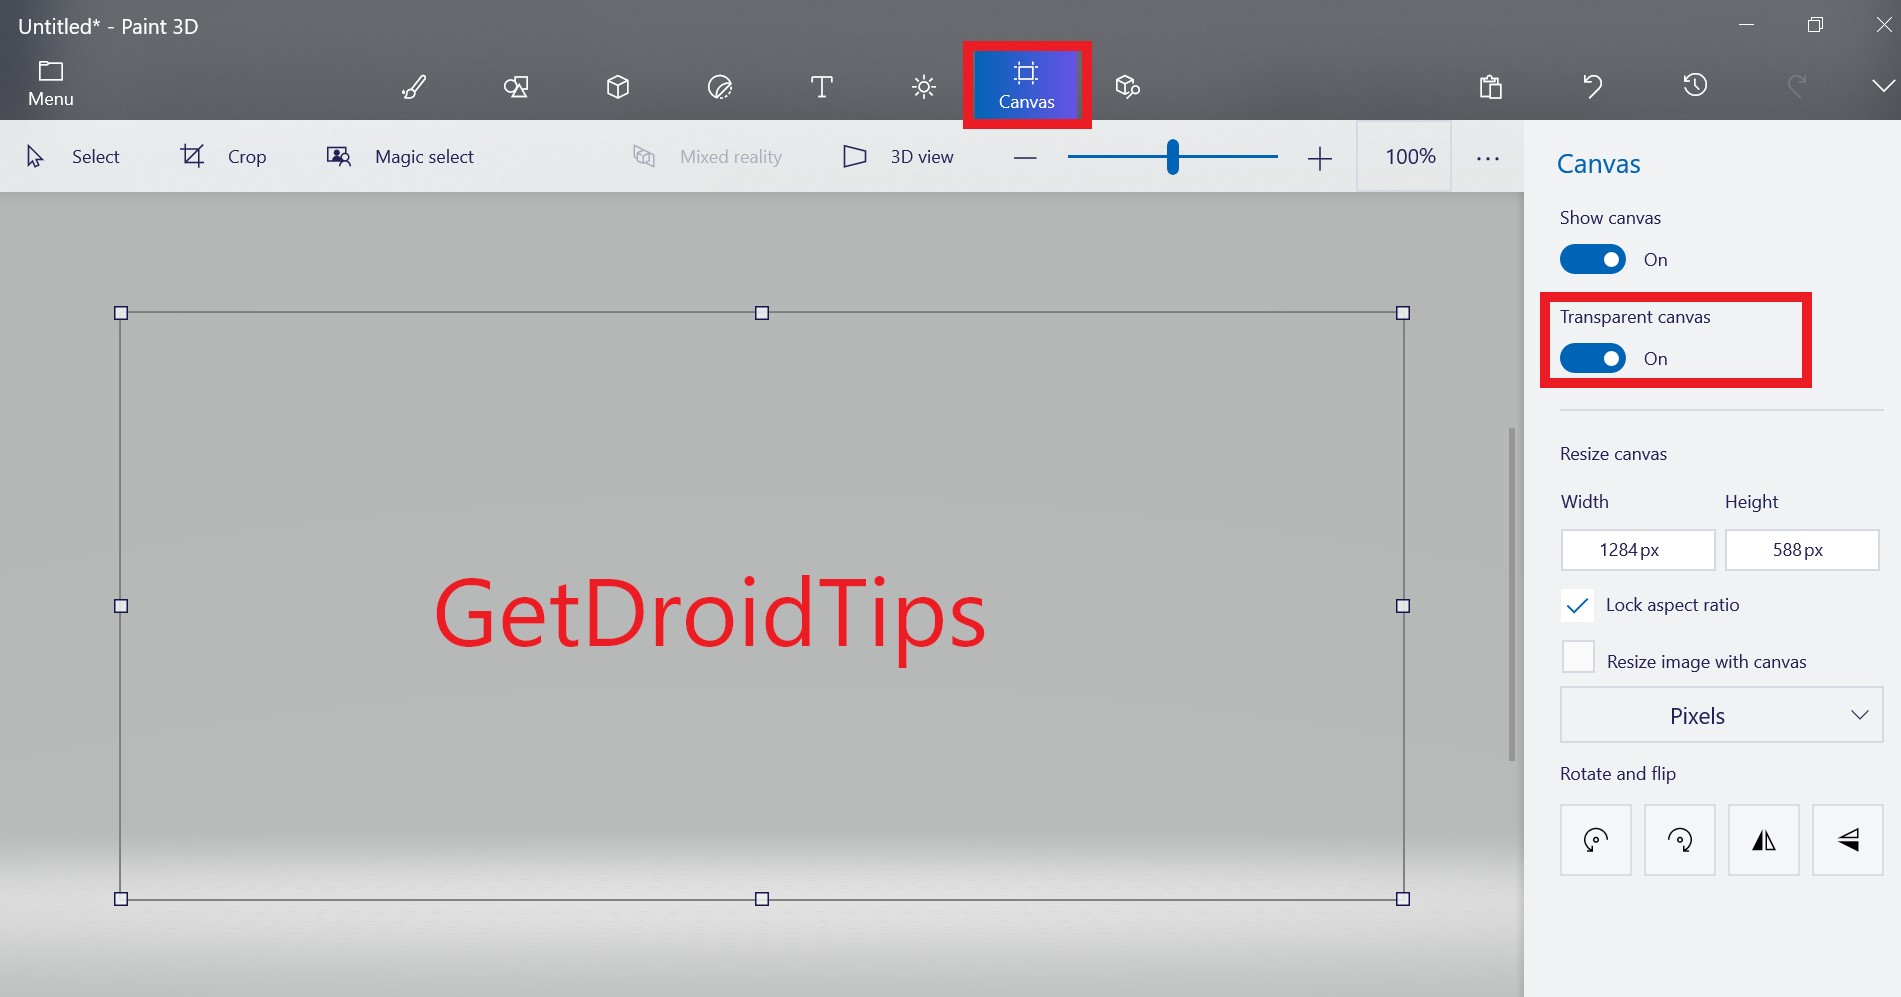
- I created a textual content GetdroidTips on the white canvas background in Paint 3D.
- When you edit a jpg image it has a background color. This is what we have to remove and convert to PNG.
- So, when you want to make an image transparent, then click on Canvas in the menu bar

- On the right-hand side, there will be an option, Transparent Canvas. Enable it [follow the screenshot]
- Now, press Ctrl + Shift + S to trigger the Save As dialog box. Enter a file name and ensure the save as type is set to PNG.
In another case, if the image you want to save in PNG has a background image that is not plain, then you have to use the magic tool to remove the background section you do not require. Then just enable the transparent canvas as we did above. Finally, save the image with PNG extension via Save As.
So, these are the easiest methods that you can use to convert an image from JPG to PNG format. I hope that the guide was helpful.
Read Next,
