Hotspot as we know allows various devices to connect to the internet by linking to a source device. A PC running Windows 10 has the mobile hotspot feature. You can connect your cellphone, tablet to the internet via your PC hotspot. However, sometimes users complain that the hotspot turns off automatically on its own. Once disconnection happens, manual re-connecting takes a few minutes. This for sure is undesirable for folks in today’s busy life. So, how do we fix this so that Windows 10 Mobile hotspot doesn’t turn off on its own..?
There are a few tweaks that you have to carry out to stop the hotspot from turning off on its own. I have mentioned them all in this guide. Normally, the hotspot shuts down if it remains idle for some time. This mechanism aims to save power for the PC/laptop. Also, it happens when it doesn’t find any active network to link up. The former is good for preserving battery life but task-oriented users may not relate to this. I mean they always look for constant seamless connectivity without any kind of hindrance. So, let’s follow the guide and see how we can achieve that on a Windows 10 PC.
Also Read
Guide | How to Fix Netwtw06.sys Failed Issue on Windows 10
Page Contents
Windows 10 Mobile Hotspot Turns off: Troubleshoot
Let’s start by turning off the power save feature that disables the mobile hotspot automatically.
Disable Power Saver for Mobile HotSpot
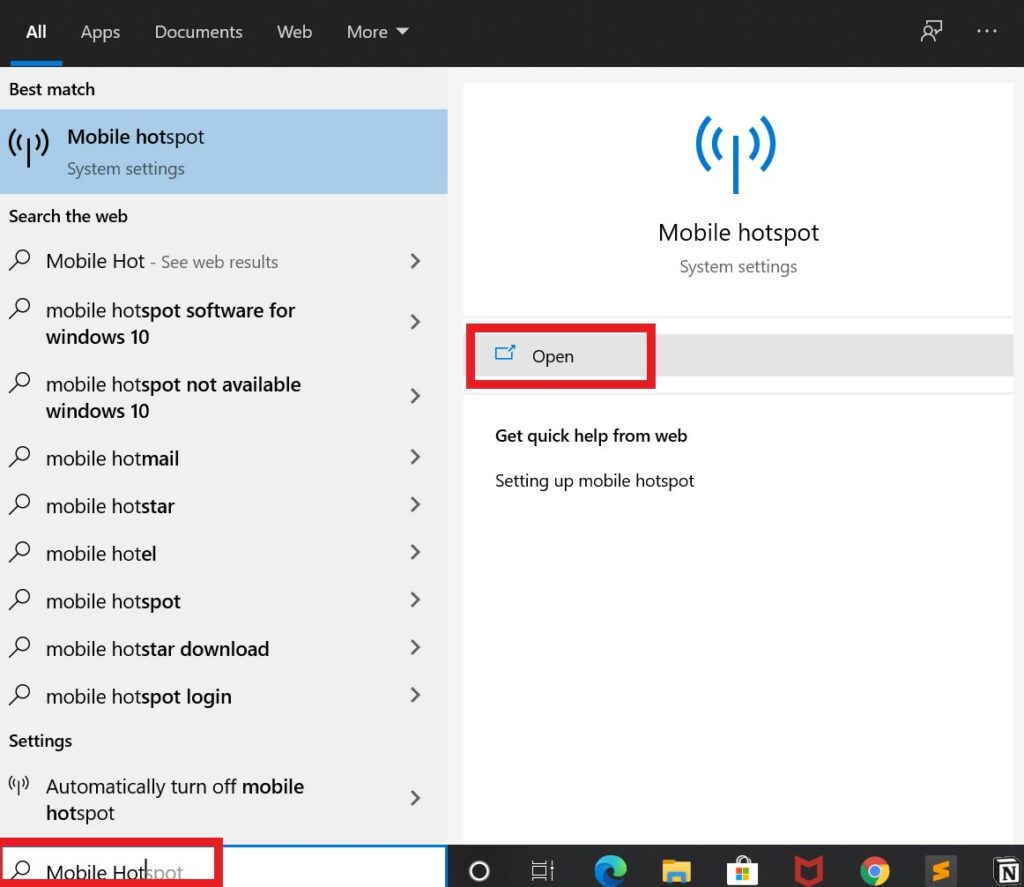
- On the Windows 10 home screen, in the Type here to Search box type Mobile Hotspot
- Click on Open when the Hotspot Shows up
- Next, click on the toggle below Share My Internet Connection With Other Devices
- Now, scroll down a bit and you should see a new option When No Devices Are Connected, Automatically Turn of Mobile Hotspot. It is set to On by default.
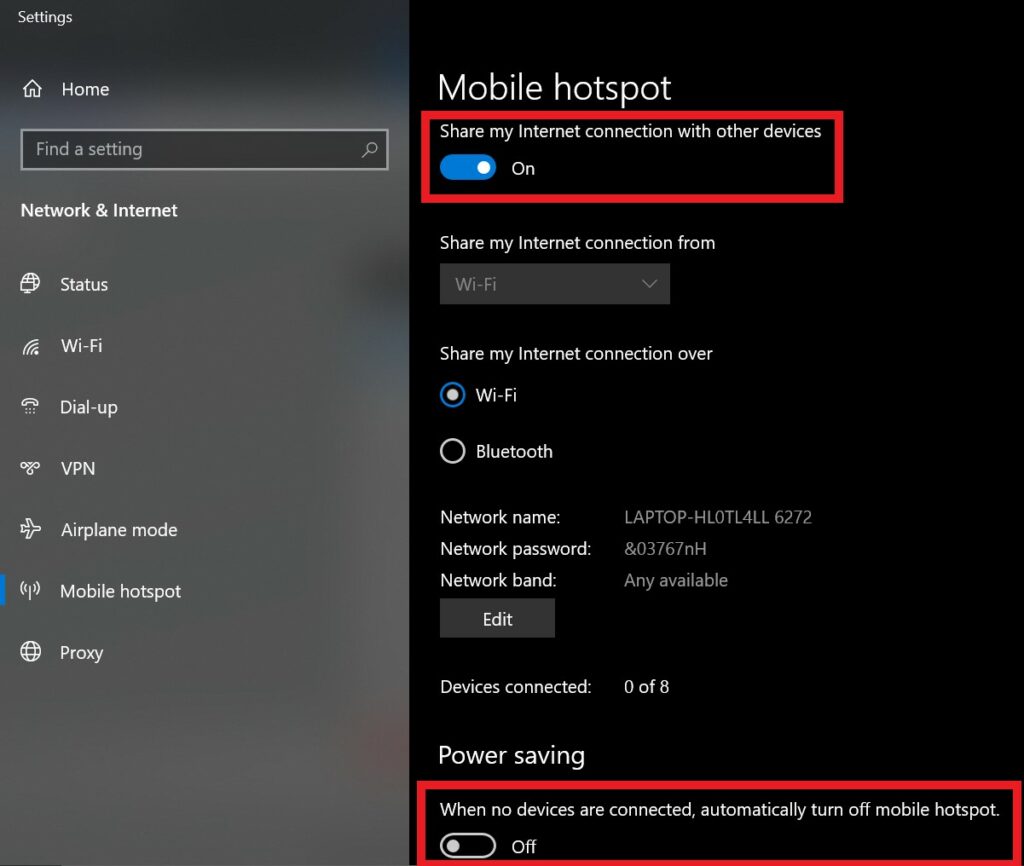
- Click on the toggle to disable it or turn it off.
Now, even though you have no active hotspot connections, the Hotspot will not disable.
Use PowerShell Command to Keep the Mobile Hotspot Enabled
To keep the PowerShell enabled for all the time, you can also make use of PowerShell and issue a command for that.
- Open command prompt by typing cmd in the box Type Here to Search
- Once the command prompt opens up, then type the following command
powershell -windowstyle hidden -command "Start-Process cmd -ArgumentList '/s,/c,net stop "icssvc" & REG ADD "HKLM\SYSTEM\CurrentControlSet\Services\icssvc\Settings" /V PeerlessTimeoutEnabled /T REG_DWORD /D 0 /F & net start "icssvc"' -Verb runAs"
Note
Disable Power Management of Network Adapter on Your PC
Some power-saving options are present under Network Adapter settings that you can disable. That will help to keep the mobile hotspot of Windows 10 on for all the time your PC is active.
- On your Windows PC search box, type Device Manager > tap on Open to open it
- Click to expand Network Adapter
- Then right-click on Wireless Network Adapter [refer screenshot] > click Properties
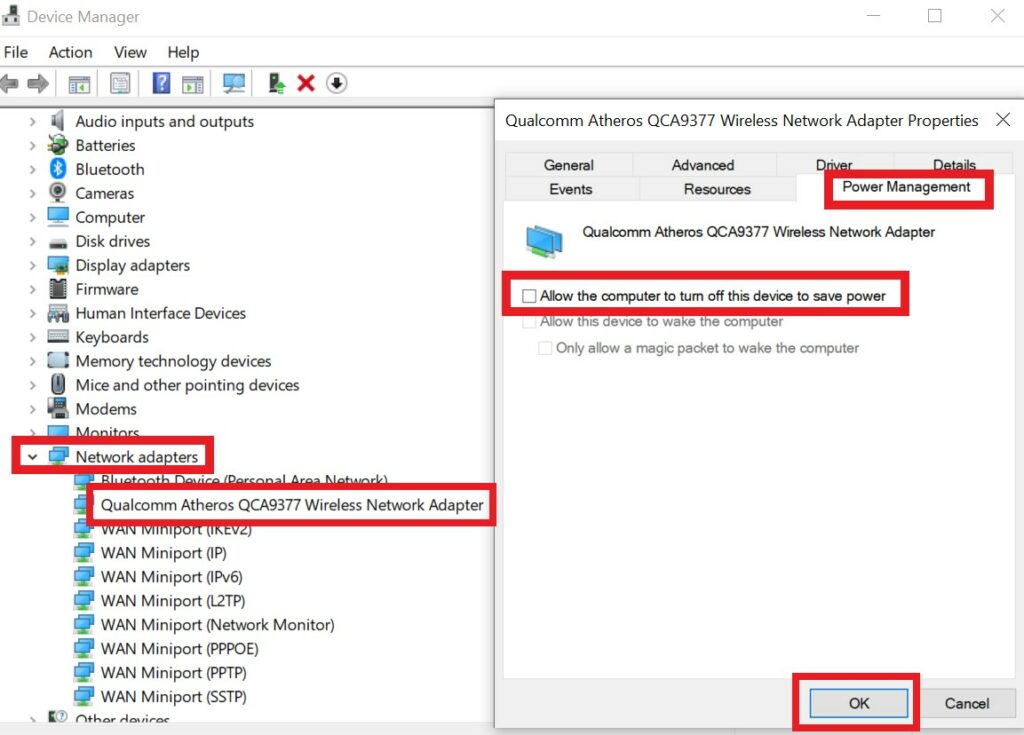
- from the dialog box that opens, select Power Management
- There will be an option with a checkbox beside it: Allow the Computer to Turn off the device to Save Power
- Uncheck that box
Tweak the HotSpot Timeout Period if Windows 10 Mobile Hotspot Turns off
Normally, when there is no active connection available, the Windows 10 Mobile Hotspot disables on its own. So, this means there is a particular timeline where it waits for a connection to set up. If that frame of time passes and no connection is set up then, the hotspot disables itself. That default time is of 20 minutes. We have to increase the timeout period.
- Go to type here to search and type registry editor > click Open
- On the left panel, of Registry Editor expand HKEY_LOCAL_MACHINE > SYSTEM> ControlSet001
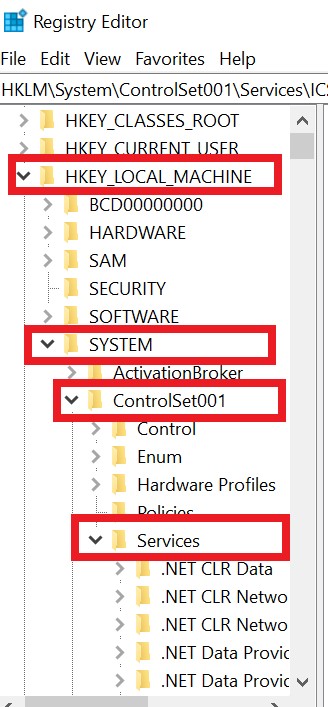
- under ControlSet001 > expand Services.
- There will be a lot of folders under Services. Scroll down till you find icssvc. Expand it
- Under that expand Settings folder by clicking on it
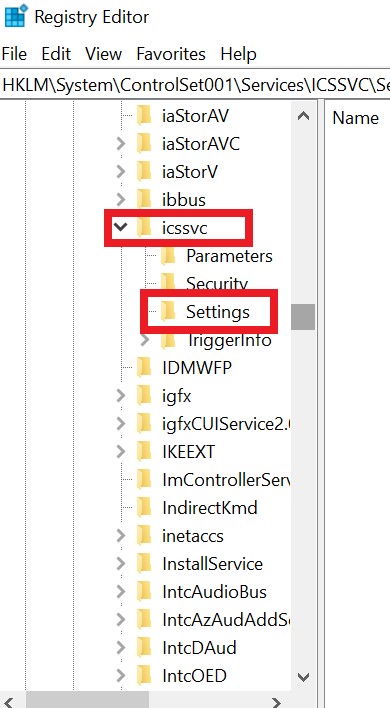
- On the right-hand side, you will see 3 or 4 settings
- Double click on Peerless Timeout Enabled
- Set the value somewhere between 1 to 60.
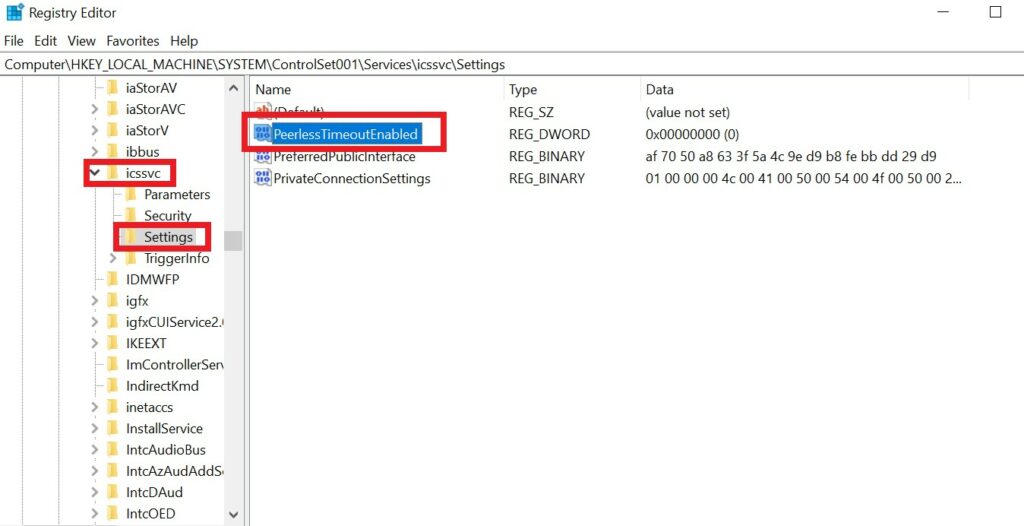
- Click OK and then close everything.
Disclaimer
So, that’s it. These are some of the methods you can try to keep the Windows 10 Mobile hotspot active all the time even when there are no devices or internet connection. If nothing works, then you can always carry out a manual connection. Let me know what worked for you in the comments section.
Read Next,
