iPhone and Mac can be a little tricky when it comes to file size and dimensions. This becomes a problem when you need to send images required to be of a certain size. If you’re stuck in such a situation, then here is a walkthrough on reducing photo file size on iPhone and Mac devices.
Sometimes you have to reduce the file size before uploading into some places like a job application or a college application etc. But the file size of an average photo will be around 2 to 4 megabytes. This makes it difficult because most websites and portals allow only up to 1MB. Some even go low as 200 to 500 Kb in size. So, in that case, you have to reduce the file size of the photo somehow.
If you have a mac or an iPhone and wonder how you can reduce the file size in it, then read this article. Because in this article, we are going to demonstrate how you can reduce the file size of your photo on both your Mac and your iPhone.
Also Read

Page Contents
How To Reduce Photo File Size In Mac
Actually, the process becomes easier if you have a mac. Here’s how you can reduce a photo file size in mac:
- Open the image in the preview application on your Mac.
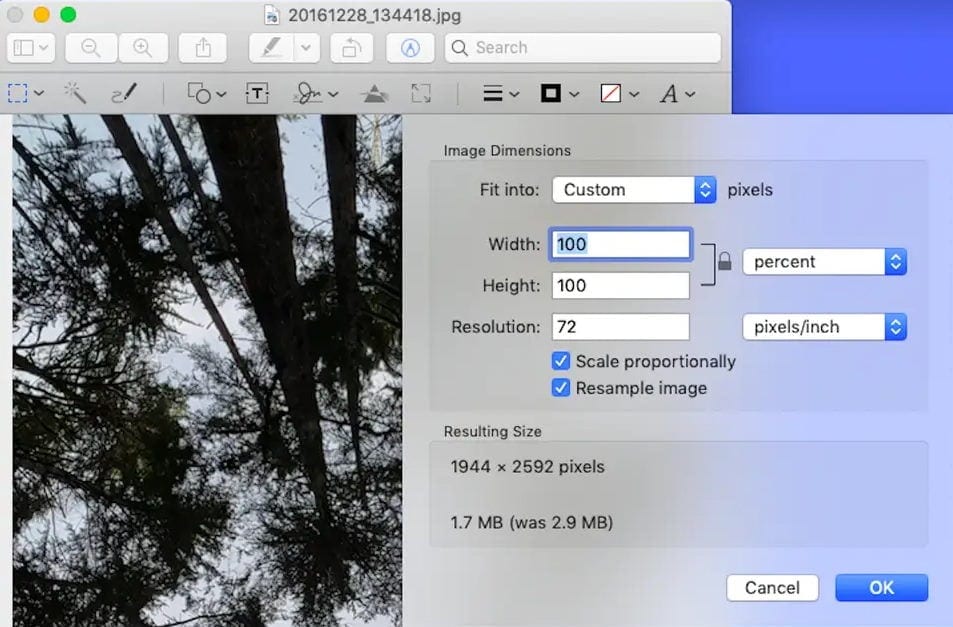
- Now click on Tools and select Adjust size.
- Finally, select the “Resample Image” option.
- Enter a small value in the resolution field.

(Image credits: Business Insider)
The final resolution is displayed at the bottom. If the change is ok, click on that’s it the image will be converted to a smaller size.
How To Reduce Photo File Size In iPhone
Although there aren’t any apps or functions in the iPhone that can reduce your photo or image’s file size, however, there are many workarounds that you can do to reduce the image size on your iPhone. One of them includes the following method.
Send yourself the image through email
Since when attaching image files to the email, iPhone can resize the image to fit into the email. So we can utilize this function and email ourselves the image to get it reduced.
- Open the image in the Photos app on your iPhone.
- Now tap on the share icon and select Mail from the options.
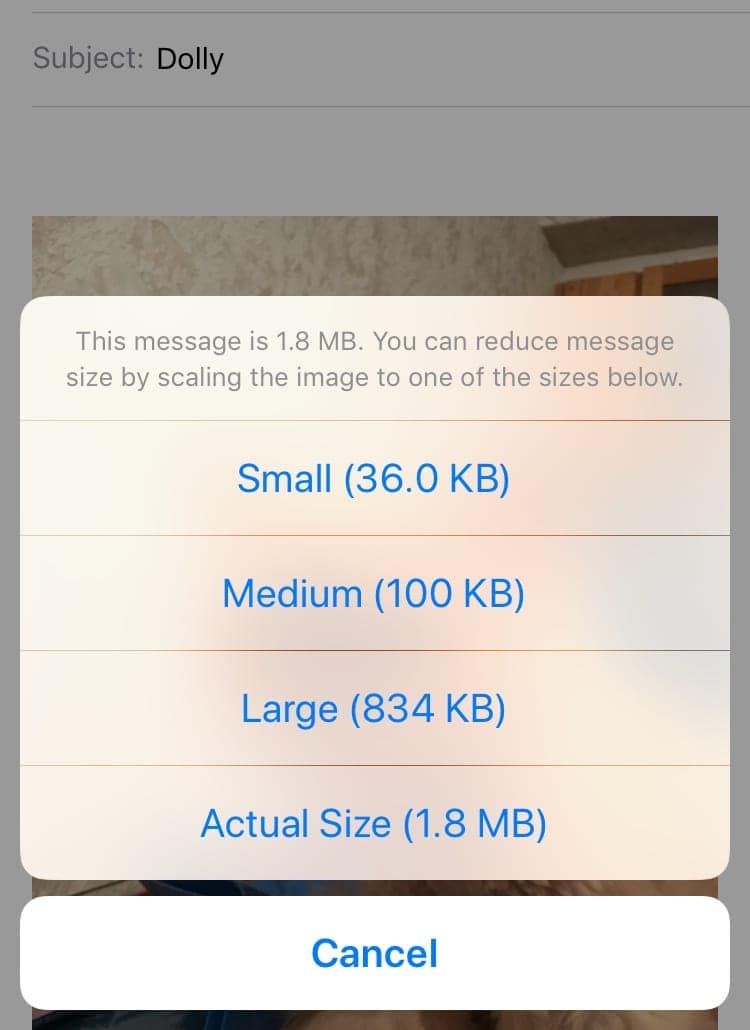
- You should be given an option to select from small, medium, and large. Select the one that suits your need.

(Image credits: discussions.apple.com) - After that, on the to address field, enter your email address.
- Tap on send, and you should receive an email with the attachment.
You can save the attachment on your phone and use it for your needs.
Using Whatsapp
In that case, you can use WhatsApp as well to reduce file size. If you send a photo to Whatsapp, then WhatsApp will reduce the file size to save bandwidth and time. You can also use this feature and send the image to one of your friends and ask them to send it again to you. Then you can use that converted image for whatever purpose you need it for.
Using Other apps
If you don’t like sending a copy of the image to your self, then there are many apps available on the iPhone that can take care of resizing the image. There are many apps available for iPhone. But one simple app that many people use and recommend is the Compress Photo app.
There are many online photo compression websites which provide free to use services to compress and crop photos. If none of the above methods seems viable to you, you can take advantage fo such free websites. It is an easy and fast method to compress any photos on your iPhone or iPad.
Conclusion
These were some methods you can try to reduce your Photo’s in your Mac or iPhone. It’s easy for mac users since there is an option within the preview app itself. However, it’s not the same case for iPhone users. But as you can see, we have also mentioned some workarounds. Be sure to use them.
