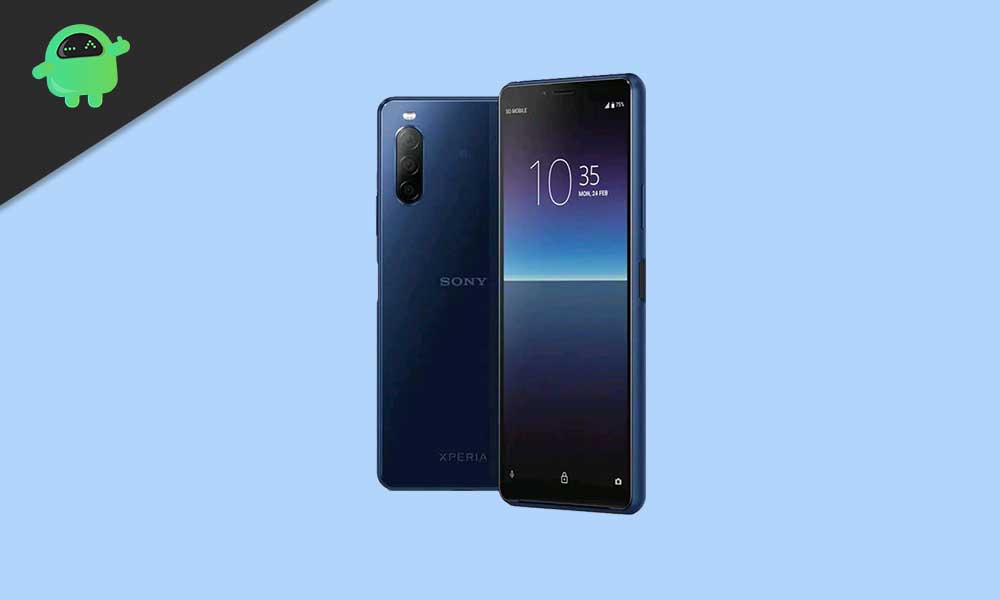
Although Sony Xperia devices are not popular ones as of now since the company fails to hold the smartphone market competition by any means, the expensive price tag is undoubtedly one of the major drawbacks. Well, leaving all that aside, if you’re a Sony fanboy or an existing user and want to Relock Bootloader on your Sony Xperia Device then you should follow this fully comprehensive guide.
Well, unlocking the device bootloader on the Android platform is one of the advantages if you’re crazy about flashing a third-party custom firmware or modding or tweaking the device elements. But if in case, you do not so geek to continue using your primary device with custom firmware or root access, etc then you should go back to the Stock ROM again. But what about the unlocked bootloader?

Why Should I Relock Bootloader?
As we’ve already mentioned, having an unlocked bootloader on your Android device is really a handful for you if you’re an Android geek who flashes custom firmware, installing mod files, enables root access, installs custom recovery, and more. However, it can also lead your device to brick easily or stuck into the bootloop issue in most cases.
Additionally, you’ll encounter multiple security or privacy issues because a device with an unlocked bootloader is more prone to security threats, malware attacks, and more. Whereas unlocking the bootloader will void the manufacturer’s warranty on the device (if any).
So, if you require the device warranty for some reason or don’t want to continue using an unlocked bootloader, make sure to relock the bootloader as early as possible.
How To Relock Bootloader on Any Sony Xperia Device
Here we’ve mentioned a full in-depth guide on how to relock the bootloader but we’ll highly recommend you to follow all the requirements properly before jumping into the main guide.
Pre-Requisites:
Now, without wasting any more time, let’s jump into the requirements below.
1. Charge Your Phone
Make sure to keep your Sony Xperia device charged at least up to 50% or higher to avoid any kind of occasional shutdown during the bootloader unlocking process.
2. Take Backup of your device
As the relocking bootloader method will wipe out all the internal data from your Xperia device, you should take a full data backup of the important files before performing the method.
3. Download ADB and Fastboot Binaries
It’s necessary to download and install the ADB and Fastboot Tools on your Windows computer because you’ll require it while using the Fastboot mode on your Sony Xperia device.
4. Download Sony USB Drivers
Make sure to download and install the latest Sony USB Drivers on your Windows computer so that you can easily create a communication bridge to your PC/Laptop with the mobile device.
Successful and stronger connectivity between both the devices will ensure that all the file transfers or ADB and Fastboot commands will work & execute properly.
It’s needless to say that you’ll also require a computer and a USB data cable.
Steps to Relock Bootloader on Sony Devices
Now, you’re ready to jump into the actual method to relock the Sony Xperia bootloader completely.
Must Read: How to Install Stock Firmware on Sony Xperia using Xperifirm and Flashtool
Please Note: What will happen after relocking?
- The Bootloader will be locked. But make sure to flash the Stock ROM before relocking.
- Widevine L1 level will be restored depending on the model.
- All internal data, installed apps/games, and user settings will be lost after bootloader relocking.
- DRM key may or may not be lost depending on the model. [If lost, you should try repairing the Xperia firmware using the Xperia Companion Tool]
- Even if you’ve rooted your device or installed TWRP custom recovery, make sure to flash the official Stock ROM before relocking the bootloader.
- Do not try relocking the bootloader on custom firmware because it may cause several issues with your phone. Keep in mind that you’ll have to flash the stock firmware on your Xperia device first and then you should try relocking the bootloader.
Warning: Make sure that what you’re doing. GetDroidTips won’t be responsible for any kind of damage or error that may happen on your device by following this guide. So, do this at your own risk.
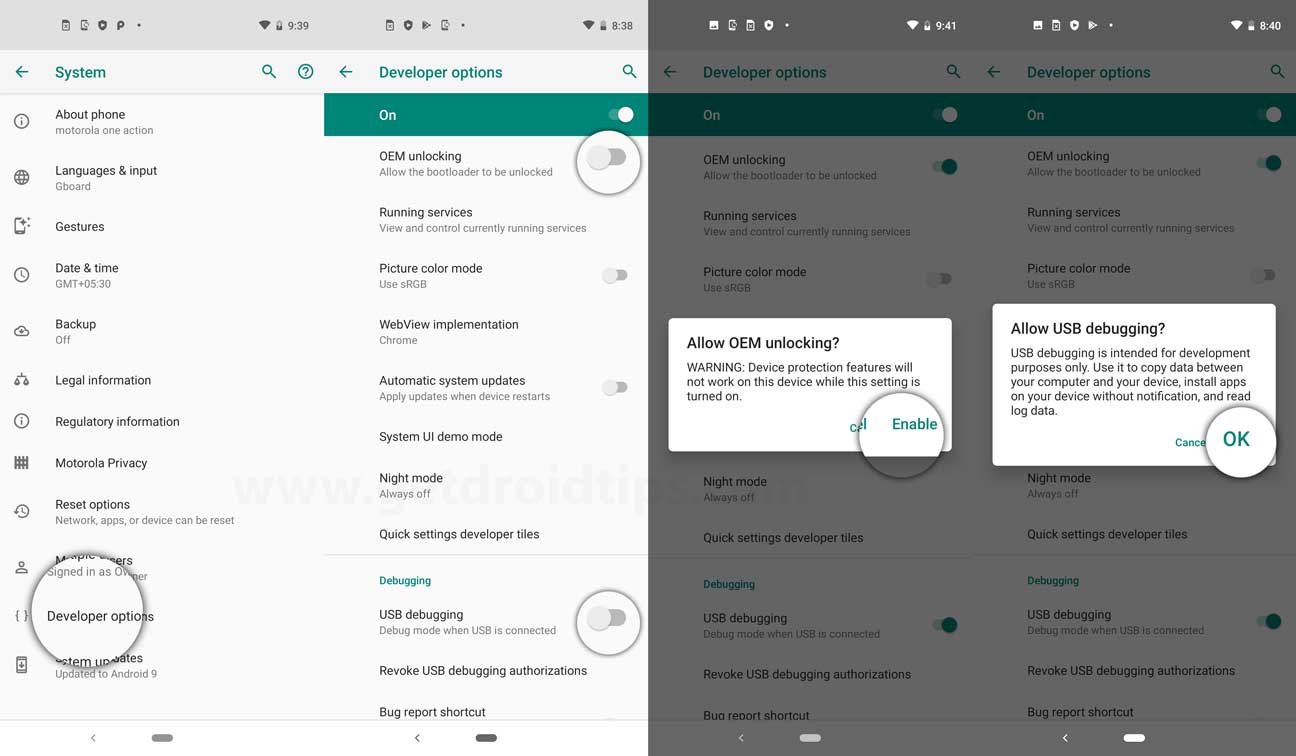
1. Enable Developer Option and USB Debugging
First of all, you’ll have to enable the Developer Options on your Sony Xperia device.
- Go to Settings > About Phone > Tap on the Build Number 7 times until you see a message on the screen that ‘You are now a developer’.

- Under the Developer Options, you need to enable OEM Unlocking and USB Debugging option as well.
- To do that again go to Settings > Developer Options > Turn on OEM Unlocking.
- Once done, scroll down a bit, and you’ll find a USB Debugging toggle. Just enable it too.
2. Boot into Fastboot Mode
- First of all, make sure to connect your Sony Xperia device to the PC using a USB cable.
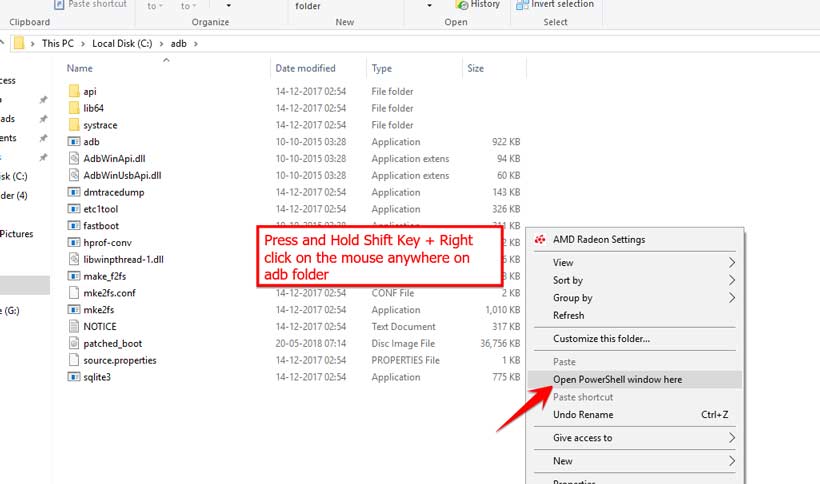
- If you’ve set up or installed the ADB and Fastboot Tools on your PC, head over to the ADB and Fastboot folder.
- Next, press and hold the Shift key + right-click on the mouse on a blank space.

- Then select Open PowerShell window here.
- Run the following command to boot your device into bootloader mode:
adb reboot bootloader
- Type the following command and execute it to reboot into fastboot mode:
fastboot devices
3. Relock Bootloader Process
- Once your device boot into the Fastboot mode (download mode), you’re only one step away.
- Now, execute the following command to relock the device bootloader completely:
fastboot oem lock
- Enjoy!
However, if the device won’t boot and the status is showing “device can’t be trusted…Your device will be powered off in 5 seconds” or if it says “Phone is locked” then you’ll need to use the Xperia Companion tool to repair the firmware. Still, facing any kind of issues, you can visit the XDA thread link below and ask for help in the community.
Conclusion
So, this is how you can easily relock your Sony Xperia bootloader. Again we’ll mention that you’ll have to install the Stock ROM first and then relock the bootloader. This is important for all. Relocking the bootloader on custom firmware is really a bad idea because it will brick the device or stuck into the bootloop issue in most scenarios.
That’s it, guys. We hope this guide was helpful to you. For further queries, let us know in the comment below.
Credit: XDA
Read More:
- List of Android 11 Supported Sony Xperia Devices
- Sony Xperia Android 12 Update Tracker | Supported Device List
- Download Newflasher Tool: How to Flash Firmware on Sony Xperia device

I am getting FAILED (remote: ‘unknown command’) while using fast boot oem lock in Xperia xz2.I tried all the ways even with flash tool but shows error your device cannot locked. please help, I have reverted back to stock rom.
Did you finally found a way to lock your xz2 ?