Often I see a lot of folks not being able to remove the printer from their Windows 10 PC. It may be troublesome for those who wish to uninstall an old printer and use a new one. Some face this issue while trying to troubleshoot the printer for some malfunction. However, if they try to uninstall the printer, it doesn’t happen. In this guide, I have put up a few important methods that can help you to remove a printer for good from your PC.
Again some users report that when they initiate the removal of the printer, then it begins the process but gets stuck. eventually, when the person shuts down and restarts the PC, the printer is still stuck. This denotes some bug with the driver of the printer. The troubleshooting methods I have put up will surely help to fix up the issue. So, let’s begin with the tutorial.
Also Read

Related | How to Backup and Restore Taskbar Pinned Apps in Windows 10
Page Contents
How to Remove the Printer in Windows 10
Before trying out the methods I must mention that you do not have to use all of these methods. For various users, any method may work. If one troubleshoot doesn’t work for you, then try the others.
Deleting Keys/Subkeys of Faulty Printer from the Reg editor
Here are the steps that will help you out in performing this troubleshooting
- Press Windows + R
- type Regedit > hit enter
- Now, go to the following path
HKEY_LOCAL_MACHINE > SYSTEM > CurrentControlSet > Control > Print > Printers
- Go to Printers
- Right-click on the entry related to Printers you see and select Delete.
- Once done with the deletions, then close the registry editor
- Restart your PC
Now, check whether the printer has been removed or not.?
Clear the Pending Print Jobs
It is quite easy to clear. Here is all you have to do.
- Press Windows + R
- type the following command
C:\Windows\System32\spool\PRINTERS
- Press Enter
- Click Yes [to remove the pending print jobs in the Printers folder]
- Delete every component in the folder
- Then try to remove the printer
Remove Printer from the Settings
- Hit Windows + R
- Type the following and hit enter
ms-settings: connecteddevices
- Under Connected Device section, click Printers and Scanners
- Click on your Printer > Select Remove device > confirm removal
- Restart your PC
Uninstall Printer from Control Panel
- On the search box type Control Panel
- Click on View Devices and Printers
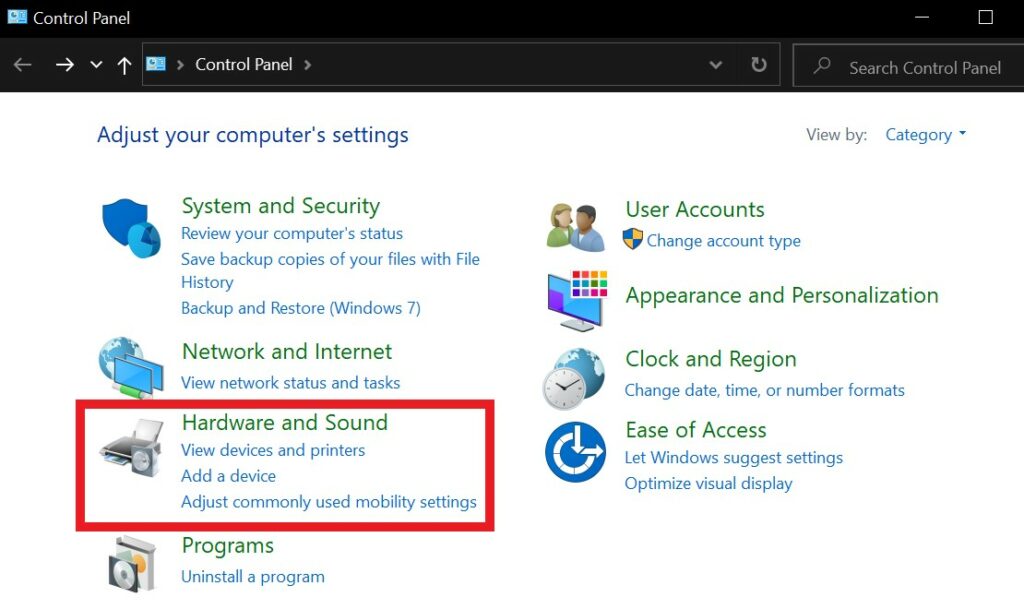
- Right-click on the printer you wish to remove > select Remove device
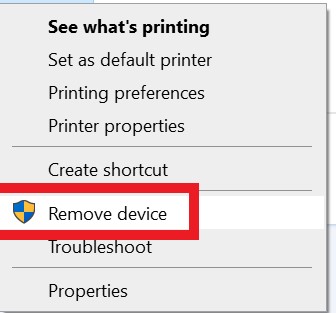
- Confirm the deletion
- Reboot your PC/laptop manually.
Remove the printer from Device Manager
- On the search box type Device Manager > hit enter
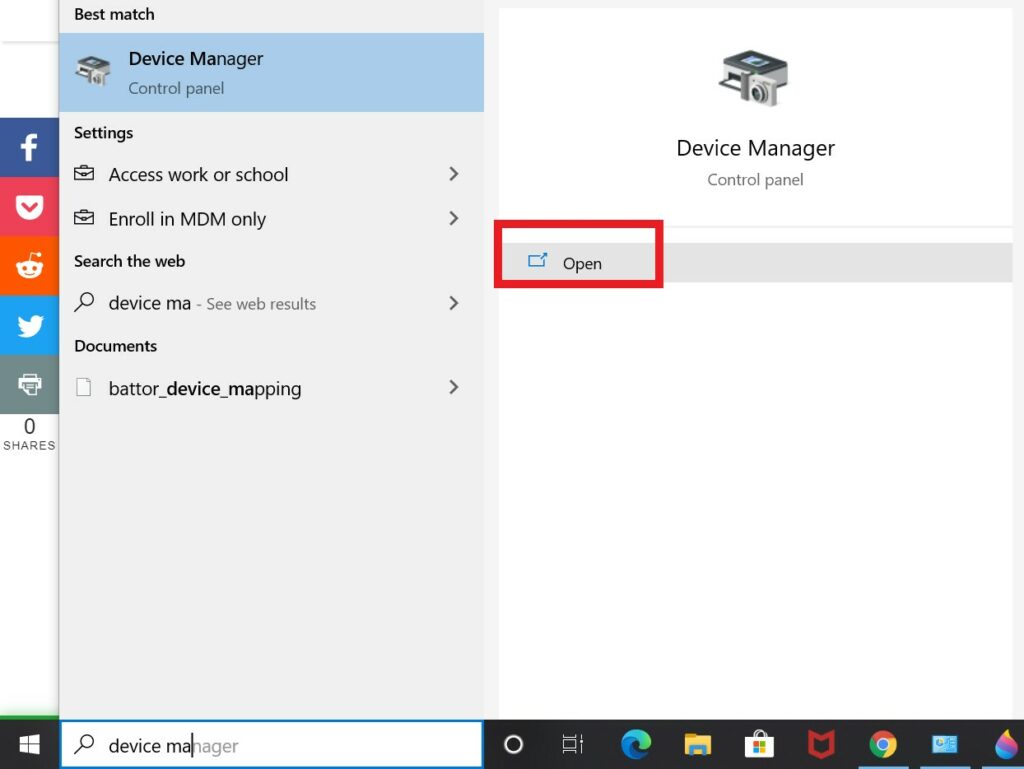
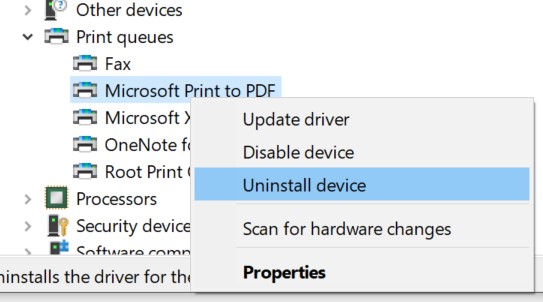
- Scroll down to Print Queues
- Select the printer that you wish to remove
- Then right-click > select Uninstall device
Delete Device drivers from Print Server Properties
Now, this troubleshooting guide is for those users who are getting stuck on printer “being removed” scenario. This process doesn’t exactly uninstall the printer. That you have to do manually as I demonstrated in some of the above methods.
- On your home screen, type Printers & Scanners on the Search box
- Click Open as the tab shows up upon typing
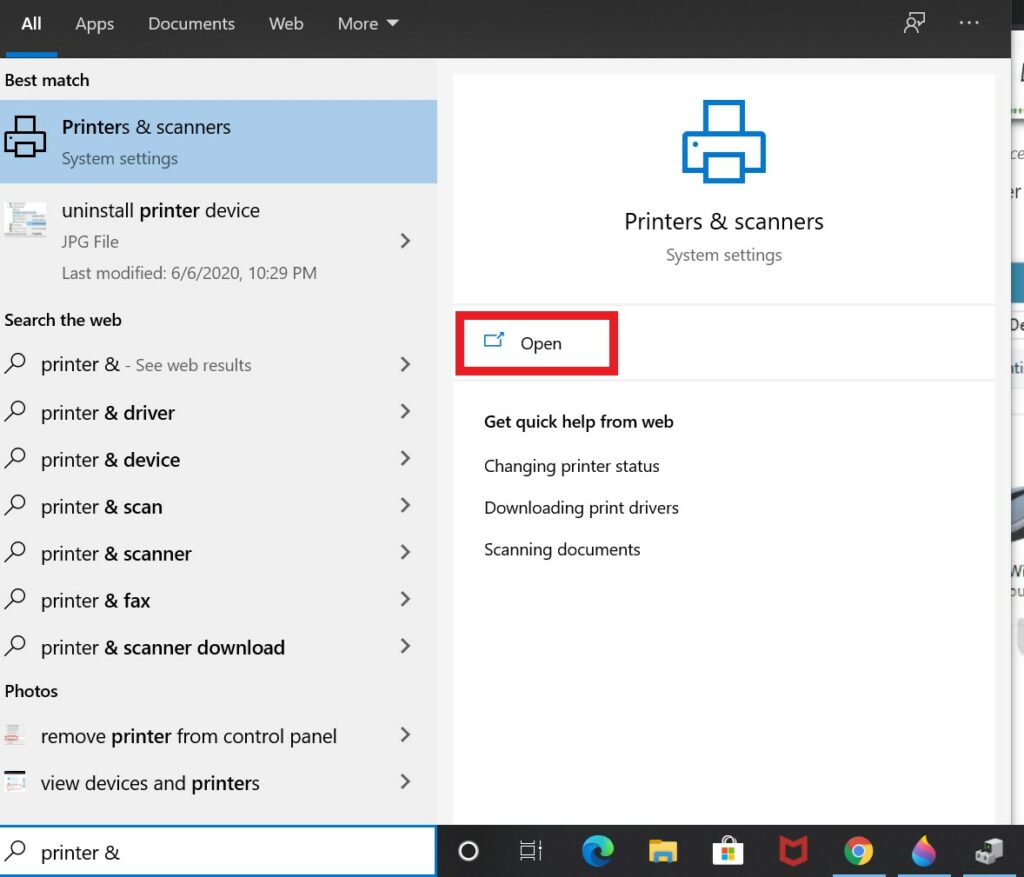
- In the next screen look at the right side for the Print Server Properties link.
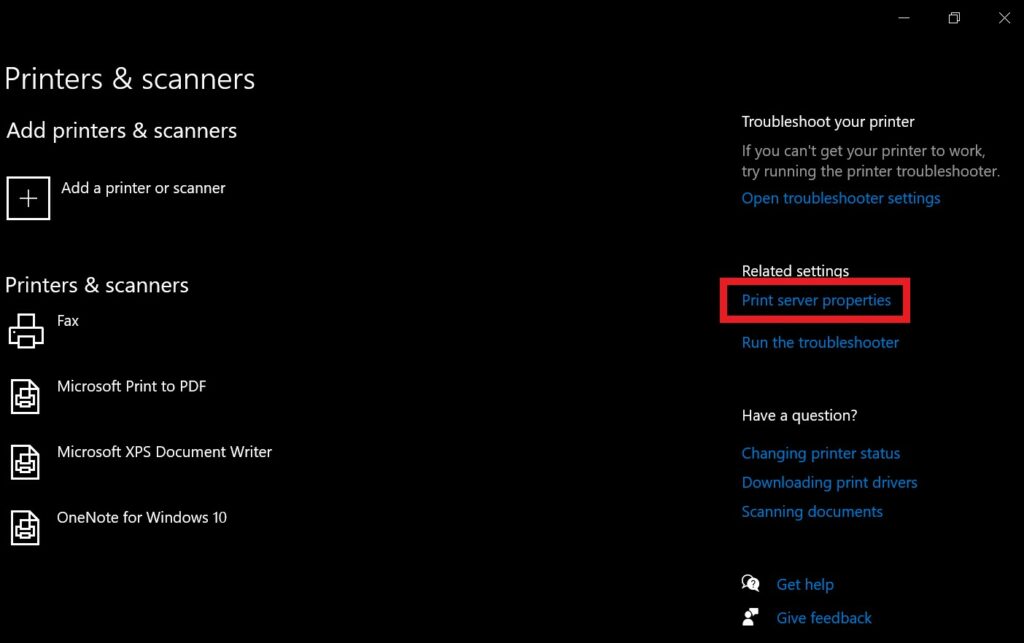
- Then a small dialog box will show up.
- Select the printers you wish to remove
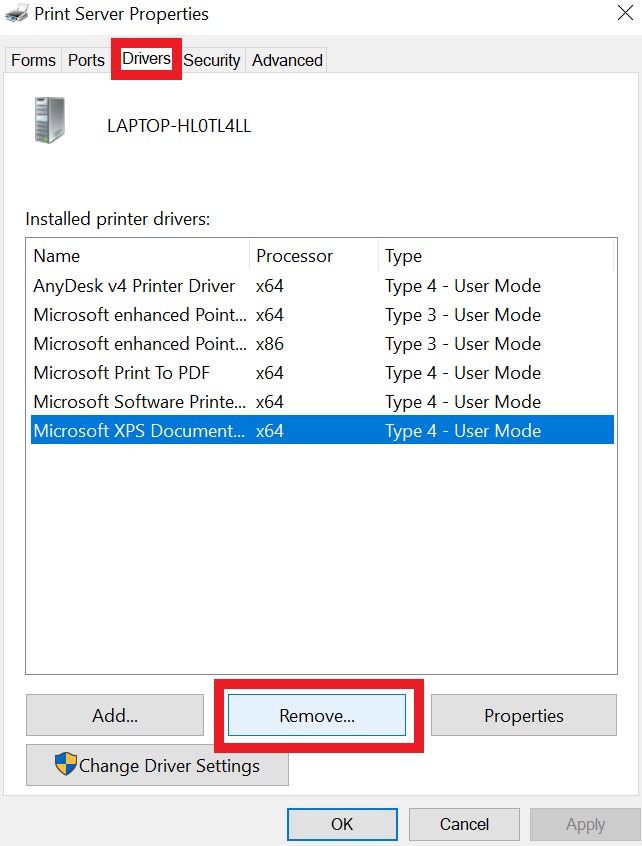
- Click Remove > Apply > OK
Do You Know | How to Use Snip & Sketch to Take Screenshots on Windows 10
So, that’s it, guys. Use the above methods and try to remove the printer which is stuck on your Windows 10 PC. I hope that you will find the guide helpful. Do let us know which method worked for you.?
Read Next,
- How to Reset A PC Using Windows 10 Cloud Download Option
- How to Download YouTube Kids on Windows 10 PC
