Windows is a simple and secure operating system that is very easy to navigate and use; therefore, maximum people are using Windows on their computers. As time passed by, Windows has introduced us with many latest features. Some of the early features of Windows are most probably dead. However, the useful features got updated along with the new version of Windows.
The screenshot tool in Windows exits from the early days of Windows Vista. The application is named Snip & Sketch, and it is a screenshot and scribbling tool for the window. With the help of the Snip & Sketch tool, you can take screenshots and edit them to some extent in Windows 10 PC. By default, the tool comes pre-installed on Windows.
Snip & Sketch is a modified version of the earlier Snipping Tool with a screen sketch, released on October 2018 Update. The application can take annotate screenshots of any games, apps, videos, and much more without any third-party tool. Also, the application has a feature to add scribbles, lines, or sketches to the taken screenshot.

Page Contents
How to use Snip and Sketch to take screenshots on Windows 10
There are quite a few ways in which you can take a screenshot using the Snip & Sketch application. To know how to use Snip & Sketch tool in every way, follow the methods mentioned below.
Method 1: Using the Snip & Sketch application
You can take screenshots by launching the app and using it in one of the modes.
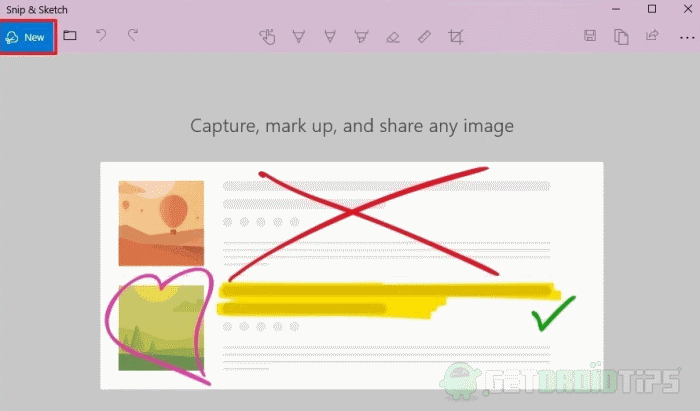
Step 1) Press the window key or click on the Start Menu, type Snip on the Windows Search bar, and it should be on the top, click it to launch the Snip & Sketch app.

Step 2) To take a new screenshot of the Window, just click on the New button on the app, located at the left-most corner.

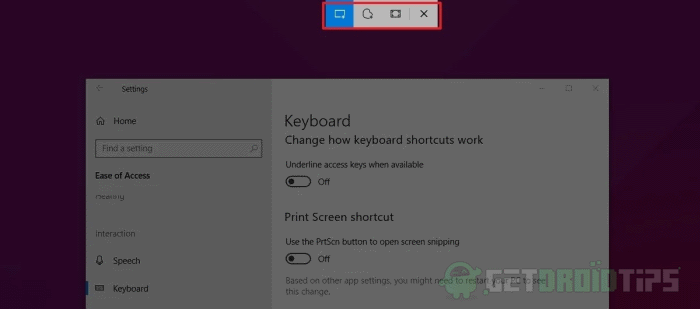
Step 3) You can then select one of the options to select the mode. The modes you will get is the Rectangular clip, Freedom Clip, and the Fullscreen Clip. The Freefrom clip option will enable you to select a part of the Window for the screenshot. Therefore select one of the option located top of the screen and the screenshot will be taken,
Method 2: Using the Action Button
Since Snip & Sketch is a default application in Windows, therefore you can access it from the Action center.
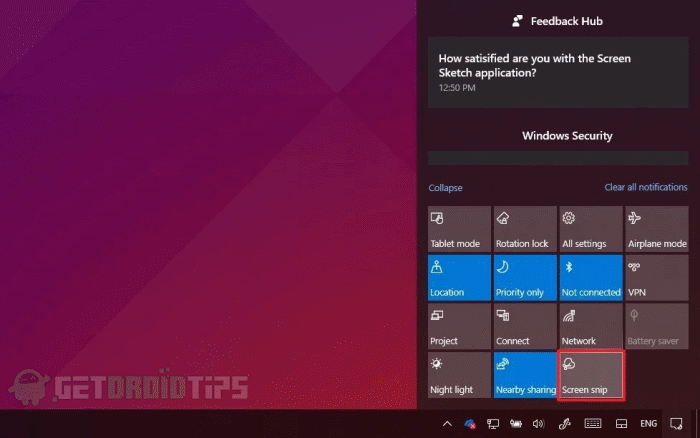
Step 1) Click on the Notification Icon on the taskbar and click on expand to expand the quick buttons. However, you can also hit the Windows Key + A to open up the Action Center.
Step 2) Now, on the Action Center, click on the Snip & Sketch button.

Step 3) Select the snip option from the top of the window, and the screenshot will be taken.
You can activate the Snip & Sketch tool by simply pressing the Print button on your keyboard. By default, the shortcut may be inactive; therefore, you will have to turn it on.
Step 1) To activate the Print button shortcut for the screenshot, open up the Windows Start menu and click on the Settings icon to open up the Windows Settings.
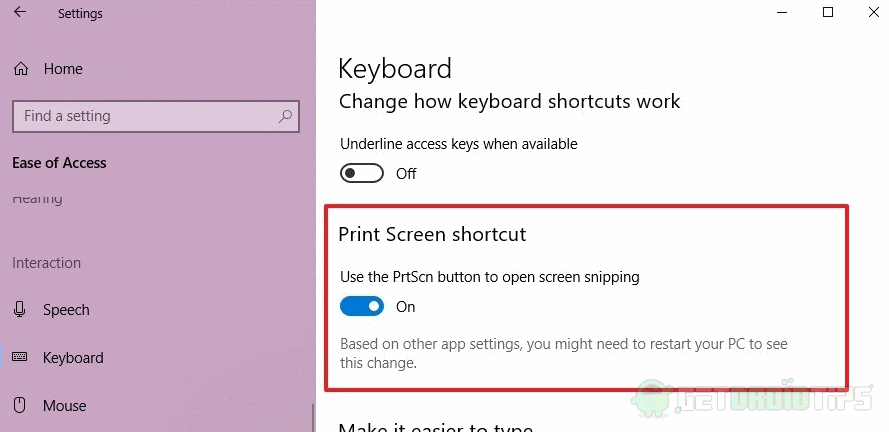
Step 2) Click on the Ease of Access option and on the right pane of the Window go to the Keyboard tab.
Step 3) Toggle on the option under the label Print Screen Shortcut to turn on the Use the PrntScn button to open the screen snipping.

Step 4) Now, to take a screenshot, you just have to press the PrntScn button on your Keyboard, and then you will have to select one of the options from Rectangular Clip, Freeform Clip, and Fullscreen Clip to take a screenshot, located on the top of the screen.
Conclusion
This is how you can use the new Snip and Sketch feature to take screenshots in your window 10 computer. The new feature is again made using the original Snipping tool, which used to come in an earlier version of windows. To get more such trips, follow our PC tips and tricks section to know more.
