Screen Recording is coming as an inbuilt feature in the newest Android 11 before that. They also have given a glimpse of it in its preceding version Android 10. But when trying to use it, you can see a red dot indicator flashing in your status bar as long as the video is recording. Which sometimes divert you from the video. So the only ideal option is to remove that flashing screen recording indicator from your screen.
When you start the screen recording the screen, you can see a countdown appear on the status bar. When it reaches zero, a red dot will appear, which will tell us that the screen is recording. But you can also remove that screen recording indicator from the Android 11 system UI if you wish to. Today we share a step by step method to do so.

How to Remove Screen Recording Indicator from Android 11 Status Bar
There is an app that can help us to Remove the Screen Recording Indicator from the Android 11 Status Bar. For using this app properly, you will have to execute a command, ADB. For this, you needed a few requirements which are given below:
- macOS, Windows or Linux computer
- USB data cable
Step 1: Download Platform Tools from Google
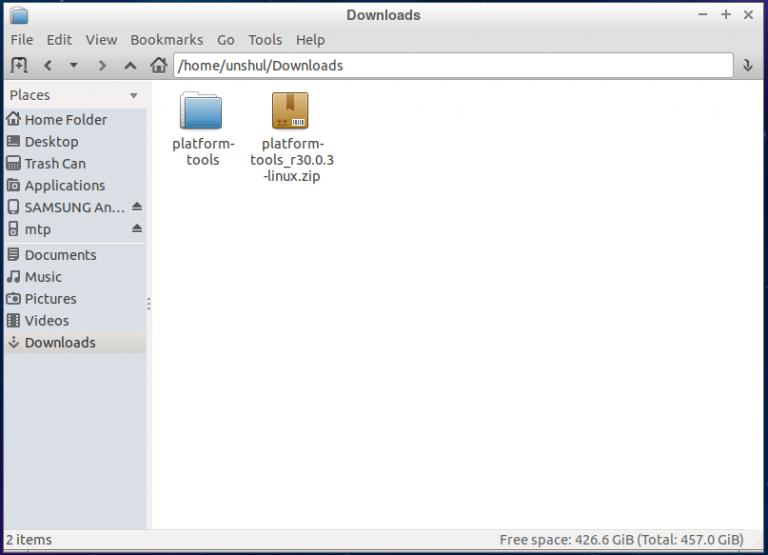
The first step is to download the platform-tools from google on to your computer. The files are opensource, so you can download them for free, and the versions are available for anyone of the operating system, which I have mentioned.
Download Platforms tools from google:
Step 2: Extract the Zip File
After downloading the Zip file, extract it. You can extract the file through any inbuilt unzipper software or can download software to extract it. If you are using Linux, then you can easily zip it through the terminal.

Step 3: Open a terminal from the platform-tools folder
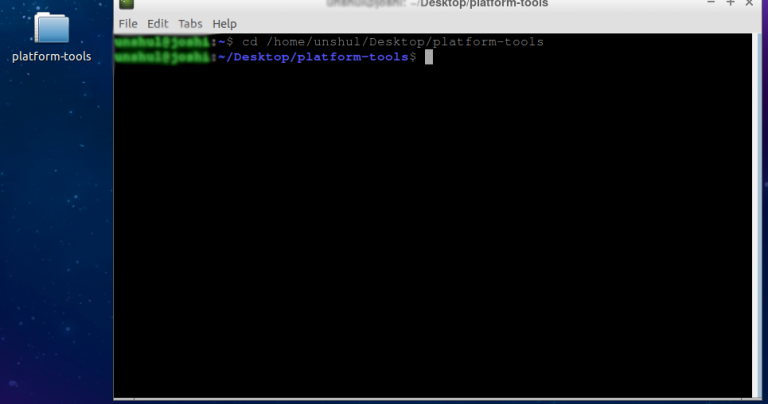
Now, if you have windows, then you have to open the command prompt by pressing the windows key and R button, then a run dialog box will appear, type cmd, and hit enter. If you are using Linux or macOS, you can directly open the Terminal app.

After opening the terminal type cd in the command, put a space, and stop there and follow the next step.

After entering cd command, now take the platforms-tools folder from your downloads and drop it to the command line after the cd command, then it will automatically enter the location on it. Then after the platforms-tools path is entered, press enter button.
Step 4: Enable the Developer Options
After this head over to your phone, enable developer options from the setting app by going to “About Phone” then tap “Build Number” seven times. If you have enabled security lock in your phone then, It will ask for your lock screen passcode after entering it will give you a pop-up message that you have enabled the Developer Options. If you wanted to go to a new menu, then you can return to the main page of the setting and select “System” then “Advanced”.
Step 5: Allow USB debugging
Open the Developer options and enable an option next to “USB Debugging”, then it will ask for your confirmation.
After this step connects your mobile phone to your computer through any USB data cord. When you will connect it, a window will appear, asking you to allow USB debugging. You have to tick that box “Allow USB debugging from this computer” and then press the allow button.
There could be a case if you don’t see this window, then you have to input a command on your computer’s terminal after that it will pop up on your device.
adb devices
![]()
Note
And if you receive any error after using the above command, then use a “./” before the command, which is shown above.
./adb devices
![]()
Step 6: Install SystemUI Turner
Now, on your smartphone, install an app called SystemUI Tuner by Z. Wander. The main feature of this app is that it gives so many options for customization of Android system elements, like the notification bar.
[googleplay url=”https://play.google.com/store/apps/details?id=com.zacharee1.systemuituner&hl=en_US”]
Step 7: Give the Permissions
After installing the app, for setting it up, you need to follow some instructions which it will give you at the startup of the app. You would be able to see some commands of ADB that is needed for the app to send the order to get the required permission. It will be necessary for modifying your status bar and remove the screen recording indicator.
While you on this screen, connect your phone to your computer with a USB data cord. Come back to the command line and of your computer and copy all the command given below one by one and press the enter button after every command.
adb shell pm grant com.zachareel.systemuituner android.permission.WRITE_SECURE_SETTINGS
adb shell pm grant com.zachareel.systemuituner android.permission.PACKAGE_USAGE_STATS

adb shell pm grant com.zachareel.systemuituner android.permission.DUMP
Again if it gives you an error that “ command not found” then you can again put a “./” before the command as I told in the last step.
Step 8: Hiding the Recording Icon
When you use those commands, after that, you have to checkmark in the SystemUI Tuner app, then it will automatically closeout. You have to open it again.
On the home page of the app, choose “Status Bar” then the “Auto Detect” option. After some time, it will give you all new pages with the options of every status bar icon available on your mobile, also the screen recording icon.
You just have to disable that option of “Screen_record”, and your main work is done. Now you will not see that red dot indicator in the status bar.
- How to Discreetly Stop Screen Recording on an iPhone
- How To Enable Android 11’s Built-in Screen Recorder on Android 10 Device Without Root
- Download Transsion Software Download Tool – All Latest Version 2020
- Restore missing Pocket Mode toggle in OxygenOS on OnePlus 7/7 Pro
- Fix Samsung Video DRM Errors for Amazon, Netflix, my5, and Others?
- How To Revert X-Ray Vision On OnePlus 8 Pro Camera app
