Here in this article, we will share with you Easy Method To Root Galaxy Note 10 Using Magisk [No TWRP needed]. The Galaxy Note 10 delivers impressive performance with Snapdragon 855 inside. If you’re using any of the Galaxy Note 10 devices or plans to purchase it then this guide is for you. Even if you’re an advanced user who likes customizations, flashing files, modding, etc then follow this full article properly.
We will use the Magisk by patching the Stock ROM boot image file and then flashing it to the device boot partition. The Galaxy Note 10 device comes with variants like SM-N970F (Europe); SM-N970F/DS (Global); SM-N970U (USA); SM-N970U1 (USA unlocked); SM-N970W (Canada); SM-N9700/DS (LATAM, Brazil, China); SM-N970N (South Korea). Just follow the full article with all the requirements, download links, and flashing steps with images.
Also Read
![How To Root Galaxy Note 10 Using Magisk Patched Boot Image [Without TWRP]](https://www.getdroidtips.com/wp-content/uploads/2019/08/Galaxy-Note-10-Stock-RIngtones.jpg)
In order to root, you will require to download the patched image file from Magisk Manager and flash it. It’s worth mentioning that your Galaxy Note 10 device bootloader should be unlocked at first. Without the bootloader unlocking, it’s not possible to enable root access on your phone. By rooting your handset, you will get a superuser or administrator control on your system over system apps and subsystem.
Now, head over to the device specifications and features as well.
Page Contents
Samsung Galaxy Note 10 Specifications and Reviews
This smartphone has some of the excellent reviews to date. You will probably love to own this smartphone after knowing them. When it comes to style and appearance, it has been given a highly professional appearance by Samsung. Also, it let the users simply keep up the pace with every task they want to perform. This is because of some of the powerful features which are loaded in this gadget. As already mentioned, it’s the best of Korean smartphone manufacturer which they ever introduced in the International smartphone market; you need not to worry about anything. Surely this smartphone is going to add more on your overall experience of using a gadget like this. It is recommended to you to go ahead with this gadget if you actually want to without thinking much.
When it comes to the specifications of this smartphone, the users can simply keep up the pace with everything. It packs a 3500mah battery and is powered by Android pie 9.0The 6.3-inch dynamic AMOLED capacitive touchscreen gives you a resolution of 1080×2280 pixels. The phone has an Exynos 9825 processor that is unbeatable when it comes to speed and performance. There is no micro SD card slot available but you can easily store 256GB of data in this device. The powerful 8GB RAM is something that always makes sure of excellent efficiency. As far as the matter of cameras is concerned, this device packs a 10MO selfie camera and a triple primary camera with 12+12+16MP. This assures excellent image quality captured even in low lights. When it comes to sound, there is no 3.5mm jack on this smartphone. It supports all major wireless earpieces and gives perfect sound quality.
Definition of Root
Smartphone Rooting is just like a jailbreaking the device to get the admin access over subsystem, system apps, the root directory of the device and more. It will give you the superuser control to use your device over an Android subsystem. After rooting a device, the user can delete, edit, or change the system files or settings easily. The rooted users can also increase or decrease the system performance, battery performance, etc.
Mostly, the rooting process will come in handy if you’re using any third-party Custom ROMs. This will increase the accessibility up to a broader extent. Though sometimes improper rooting may brick your device or void your device warranty as well (if applicable). Most commonly, people use rooting to change themes, icons, fonts, install other mod files, tweaking Android settings for visual changes, etc.
Additionally, a rooted device user can also tweak notification panel, system user interface, accent color changes, install Xposed modules, lock screen changes, widgets, camera improvements, and more.
Advantages of Rooting
- You can get access to all files on your Galaxy Note 10, even the files which present in the root directory of your phone.
- You can increase the performance of your device by overclocking.
- By rooting you can increase battery life by underclocking device.
- Install the Xposed Framework and Xposed module support.
- Uninstall Bloatware on Galaxy Note 10.
- You can block Ads on any applications like YouTube, Browser.
- By Rooting your device, you can View, Edit, or Delete any system file inside the root directory.
Steps To Root Galaxy Note 10 using Magisk
Before starting the rooting process, make sure to unlock the device bootloader at first. Then you can continue with the next steps.
Please Note:
Please Note:
- Rooting will block the official OTA updates
- After Rooting, it may void the warranty of your phone
- Supported model:
- SM-N970F (Europe); SM-N970F/DS (Global); SM-N970U (USA); SM-N970U1 (USA unlocked); SM-N970W (Canada); SM-N9700/DS (LATAM, Brazil, China); SM-N970N (South Korea)
Download Firmware
- Galaxy Note 10 Firmware:
- SM-N970F: Download Here
- SM-N970U: Download Here
- SM-N970U1: Download Here
- SM-N970W: Download Here
After you have downloaded the exact firmware file based on your device model number, you can extract the boot.img file to patch it via Magisk manager app.
Guide to Extract Boot Image File and rename to .tar fileSteps to Create a Patched boot image using Magisk Manager
- First, download and install the latest Magisk Manager app.
- Next, connect your device to the PC via the USB cable.
- Copy only the boot.img file from the extracted folder to your device storage.
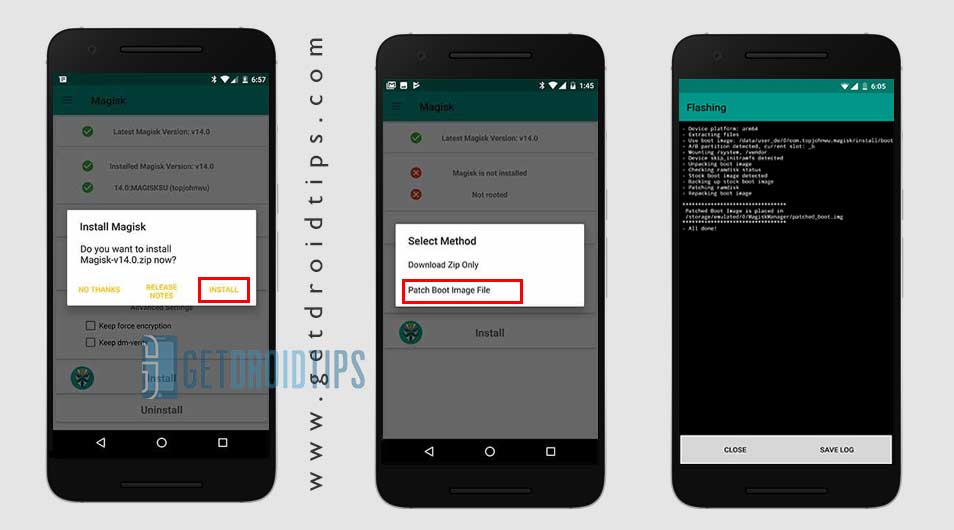
- Now, open the Magisk Manager app and select INSTALL and choose to install again.
- Then tap on “Patch Boot Image File”.

- Go to internal storage and select your device boot image that you moved earlier.
- Now, wait for Magisk to start patching the boot image.
- Once the boot image has been patched, copy the “patched_boot.img” from the internal storage and replace it in the same extracted ROM folder on your PC.
Now, follow the second step to flash the patched boot image file.
- Odin flash tool accepts files in .tar format. So, you have to use 7zip and archive it to .tar format. You can even rename the file as boot.img.tar as shown in the below screenshot.

Steps To Install the Patched Boot Image tar file on Galaxy Note 10
Now, follow the final or second method to install the patched boot image file on your Galaxy handset. But first, follow the requirements.
Pre-Requirements:
- ROM Supported for – Samsung Galaxy Note 10 model only. Don’t try it on other devices.
- Keep your device battery charged up to 60% at least before doing anything.
- Take a full backup without Root of the device internal storage.
- A Windows PC or Laptop and a USB cable are required.
- Download Latest ODIN tool and install it on your computer.
- Download and Install the latest Samsung USB Drivers on your computer.
- Copy the patched boot image file into the ADB & Fastboot directory.
Instructions to Root Galaxy Note 10 Using Magisk
After following the pre-requirements and unlocking the bootloader, in order to Root Galaxy Note 10 Using Magisk, let’s take a look at the rooting steps.
- First, reboot your device into download mode.
- Now, connect your phone to the PC via the USB cable.
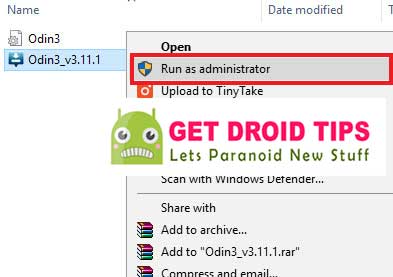
- Once you are connected, now open the downloaded ODIN.exe file.

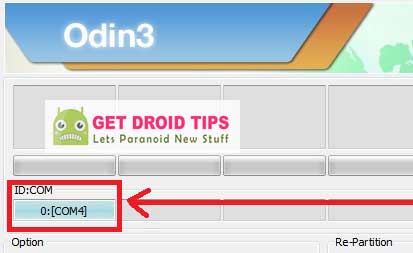
- When you connect the USB cable you will see a blue sign in Odin.

- Now, load the patched boot.tar file in the AP section.

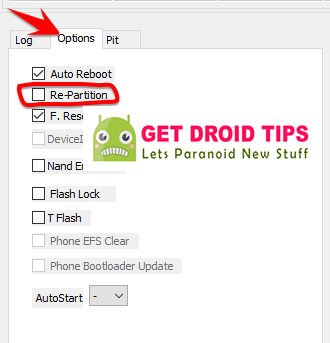
- Go to Option and see whether the Auto Reboot and F-Reset Time selected or not). If not then select these two. Don’t select re-partition.

- Now, tap on the Start button to root your device.
- Your device will reboot when the process will complete.
- Then wait for a few minutes. The first boot will take some time.
- You’re done. Enjoy!
We assume this guide is really helpful to you and you have successfully rooted your Samsung Galaxy Note 10 device by using Magisk. In case any issue, do let us know in the comments below.
