In this guide, we will show you how to root Google Pixel 5 based on Android 11 or higher. The Pixel series from Google has always been the fan favorite, and there are many reasons for the same. To begin with, the cleanest stock Android experience. Along the same lines, you are guaranteed the fastest OS upgrades and security patches. Then it beholds probably the best smartphone camera that one could think of. But that’s not it.
Once you step into the custom development, you will able to explore the device’s full potential. Pixel devices have are always the most active devices in this domain, and its fifth iteration is no different either. Many custom binaries, tweaks, and modifications are already available for this device. And this guide will make use of one of the most important ones. Today, we will show you the steps to root the Google Pixel 5 based on Android 11 or higher.
![]()
Page Contents
Benefits and Risks of a Rooted Device
There is a plentitude of advantages that a rooted device could make full use of. These include the ability to gain access to the system partition, flash tons of mods, Magisk Modules, Xposed Frameworks, etc. Furthermore, if you root the device via TWRP, then the latter has a plethora of associated benefits as well. For example, you could install ZIP and IMG files, take Nandroid backups, and use other advanced recovery functionalities.
However, rooting might lead to a few issues as well. Since the process requires unlocking the bootloader, it will make your device warranty null and void. Along the same lines, apps such as Pokemon Go, Netflix, and Google Pay might not function as expected. The entire process is quite risky and might result in a boot loop or bricked device if not done correctly. So with that said, if you are ready to proceed ahead, then here are the steps to root Google Pixel 5 based on Android 11 or higher version.
How to Root Google Pixel 5
Before we list out the instructions, there are a few prerequisites that you need to go through. So head over to the below and make sure to check-mark all the mentioned requirements.
Prerequisites
- First and foremost, take a backup of all the data on your device. The below process will require formatting the device, hence a backup beforehand is a must.
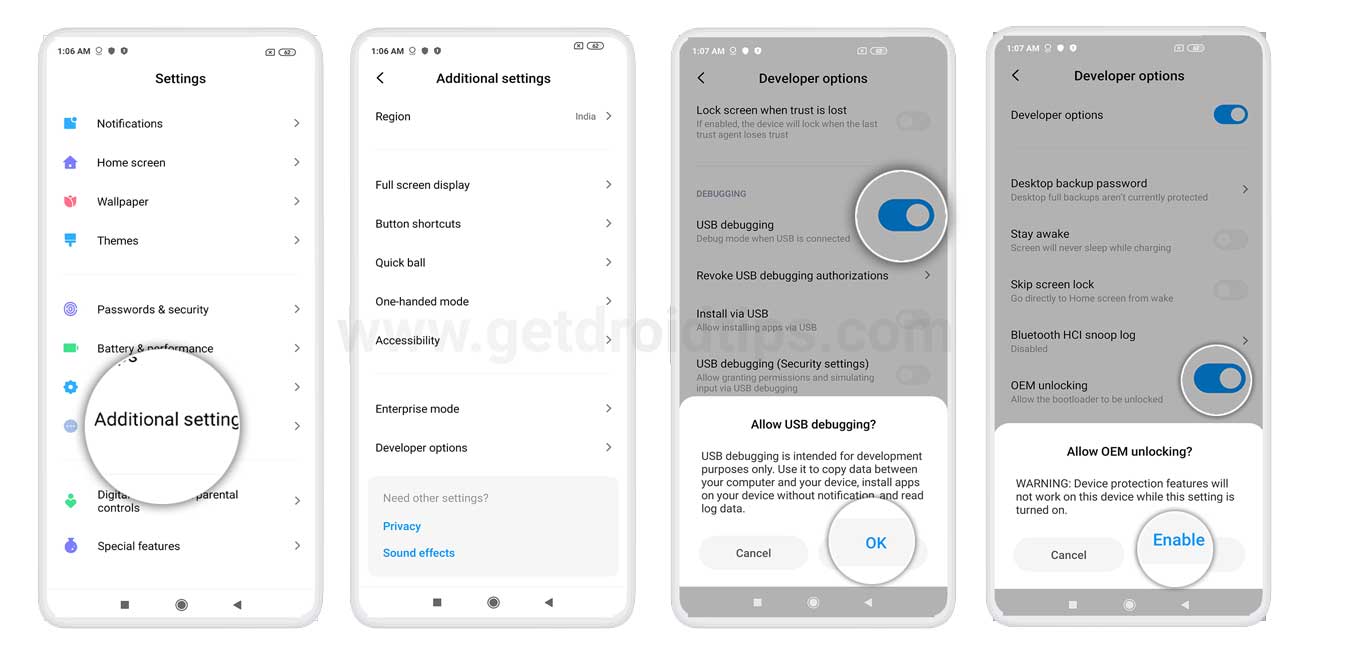
- Likewise, enable USB Debugging as well as OEM Unlocking on your device. For that, head over to Settings > About Phone > Tap on Build Number 7 times > Go back to Settings > System > Advanced > Developer Options > Enable USB Debugging and OEM Unlocking.

- Download and install the Android SDK Platform Tools on your PC.
- Likewise, install the Magisk Manager APK on your device. This will be needed to patch the stock boot.img file. As of now, only the Magisk Beta/Canary build is working, so you should only download either of the two builds. In that regard, you could also use the direct Github link to download these files: Magisk Beta | Magisk Canary
- Finally, download the factory image for Pixel 5 (redfin). You could do so Google Developers Page. At the time of writing, the November build is the latest one, which we have provided below as well.
That’s it. These were the required files. You may now proceed with the steps to root Google Pixel 5 based on Android 11 R.
STEP 1: Unlock Bootloader
To begin with, you will have to unlock the bootloader on your device. Make sure you have enabled OEM Unlocking and USB Debugging and then follow the below steps.
- Connect your device to the PC via USB Cable.
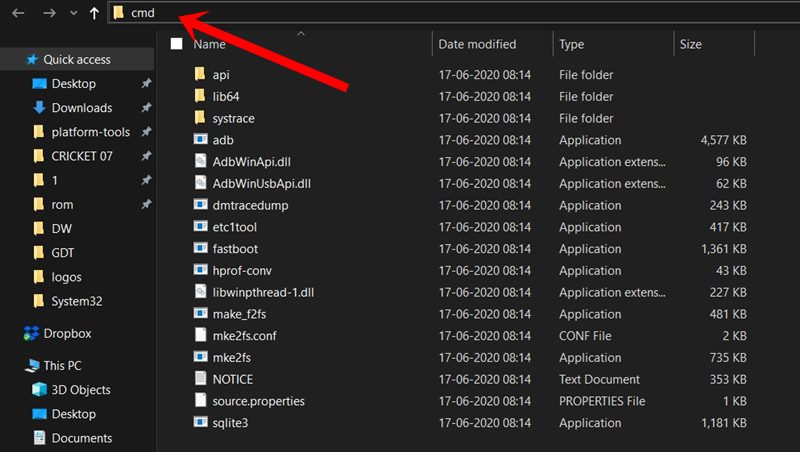
- Head over to the platform-tools folder, type in CMD in the address bar, and hit Enter. This will launch the Command Prompt.

- Type in the following command in the CMD window to boot your device to Fastboot Mode:
adb reboot bootloader
- Now execute the following command to unlock the device’s bootloader
fastboot flashing unlock
- You will now get a prompt on your device. Use the Volume keys to select Yes and then hit the Power key to confirm the decision.
That’s it. The device should now boot to the OS. The first boot will take some time, this is completely normal. Once booted up, sign in with your Google ID and set it up. Then proceed with the below steps to root your Pixel 5.
STEP 2: Extract Stock Boot Image
The factory image that you have downloaded for your device will be in ZIP format. Extract it and then you should see another folder by the name image-redfin-version.zip (where version will be the current firmware build number). Now extract this ZIP file and you should see various partition files. Copy the boot.img file from there and transfer it to your device.
STEP 3: Patch Stock Boot Image via Magisk
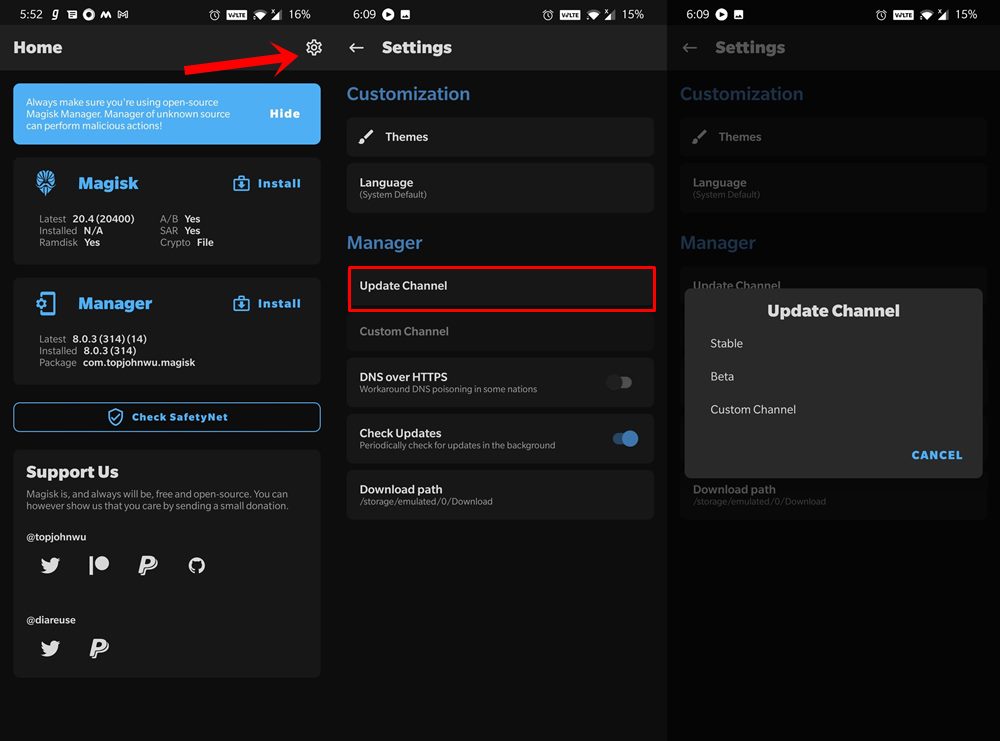
- Launch the Magisk Manager on your device.
- Depending on whether you have installed the Beta or Canary version, set the Update Channel accordingly.
- This could be done by going to Settings > Update Channel > Select Beta or Canary.

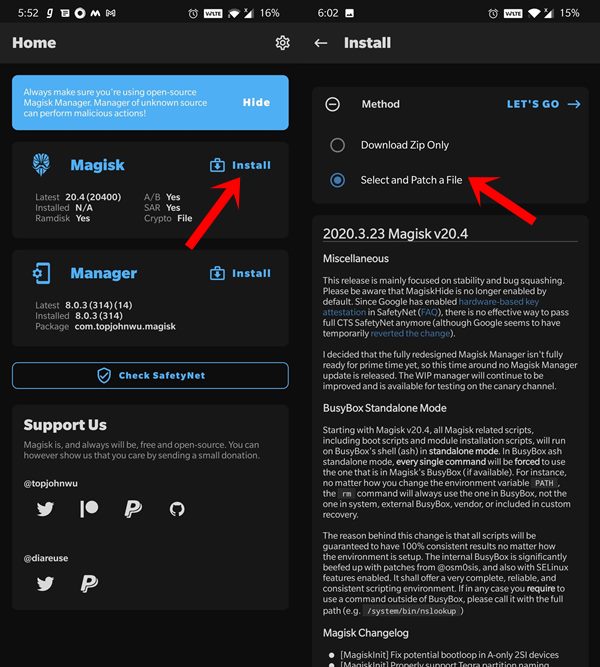
- Once that is done, tap on Install next to Magisk.
- Then choose Select and Patch a File.

- Browse to the extracted stock boot.img file and select it.
- Finally, hit the Let’s Go button situated at the top right.
The patching process will now begin and should only take a couple of seconds. Once done the magisk_patched.img file be stored under the Downloads folder. It’s now time to flash this file and gain root access on your Pixel 5 running Android 11.
STEP 4: Flash Patched Boot Image
- Connect your device to the PC via USB cable. Make sure that USB Debugging is enabled.
- Now transfer the magisk_patched.img file from your device to the platform-tools folder on your PC.
- Inside the same folder, type in CMD in the address bar, and hit Enter to launch the CMD window.
- Then type in the following command to boot your device to Fastboot Mode:
adb reboot bootloader
- Once that is done, execute the following command to flash the patched boot.img file:
fastboot flash boot magisk_patched.img
- You may now reboot the device to the OS using the below command:
fastboot reboot
That’s it. These were the steps to root your Pixel 5 running the Android 11 or higher version. If you have any queries concerning the steps above, do let us know in the comments section below. Rounding off, here are some iPhone Tips and Tricks, PC tips and tricks, and Android Tips and Tricks you should also check out.

Can You Root pixel 5 devices and how much do you charge?
We don’t do it, it’s user’s responsibility.