Everyone who runs a computer always wishes to run various apps efficiently. Efficient refers to the execution of tasks by the apps without lagging, crashing, or causing heating issues. These days most modern Windows PC use multiple GPUs. With more than one graphics unit user can dedicate a particular GPU to an individual app. This will allow the app to work smoothly without consuming much battery life or causing any technical hindrance. In this guide, I will show you how to set the default GPU for apps on Windows 10.
Normally, the requirement of heavy GPU usage comes into consideration during gaming. In the current times, games are having top-notch quality graphics. So, they require a PC that can manage such intense graphics. Besides gaming, a PC has tons of other utility as well. So, multiple GPUs can come very hand although it will be an expensive affair. When you have multiple graphics drivers on your PC you can assign one as a default GPU for any app on your computer.
Also Read
Set Default GPU for Apps in Windows 10
Here are the steps you have to follow to set the default GPU for the classic desktop apps of your Windows PC.
- Press Windows + I to access the Windows settings
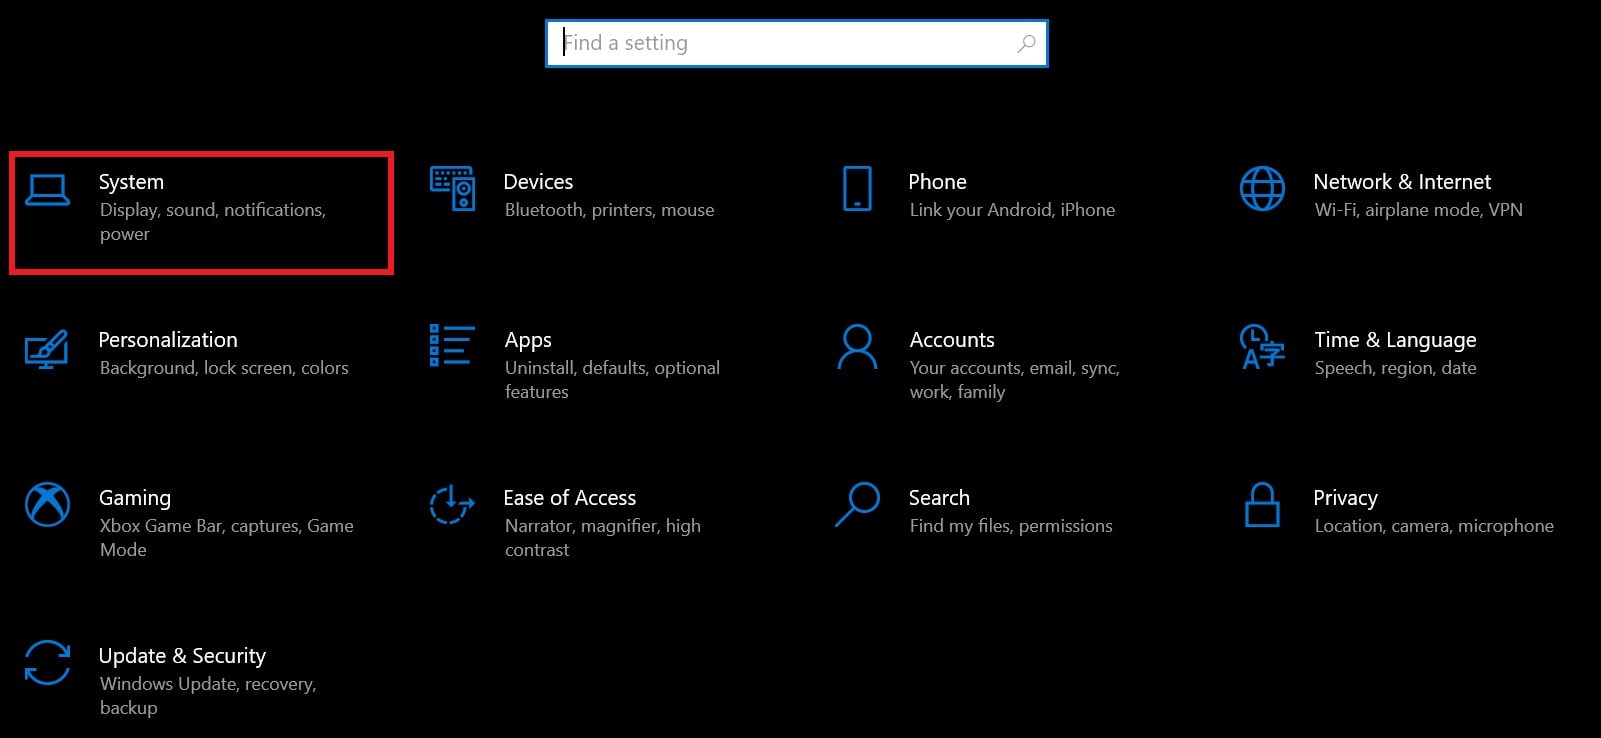
- Then click on System
- On the left-hand panel in the next screen click on Display
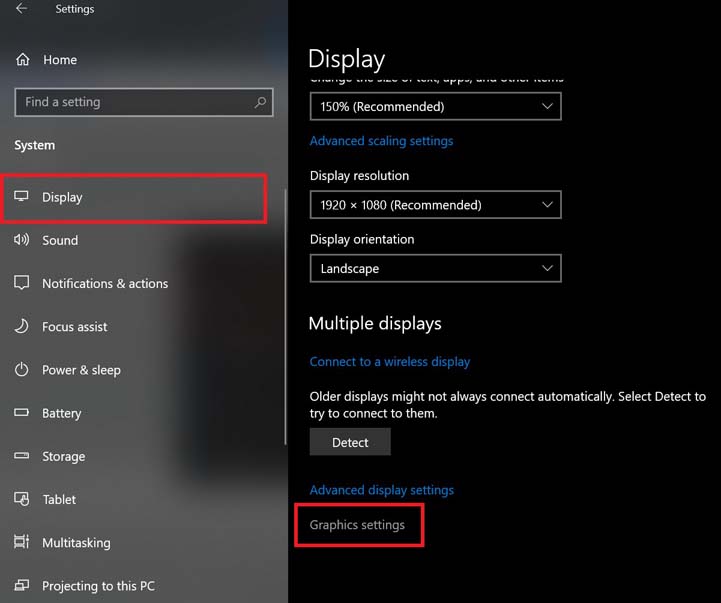
- Click Graphics Settings
- If you wish to assign GPU for desktop apps then click on Desktop Apps from the drop-down list
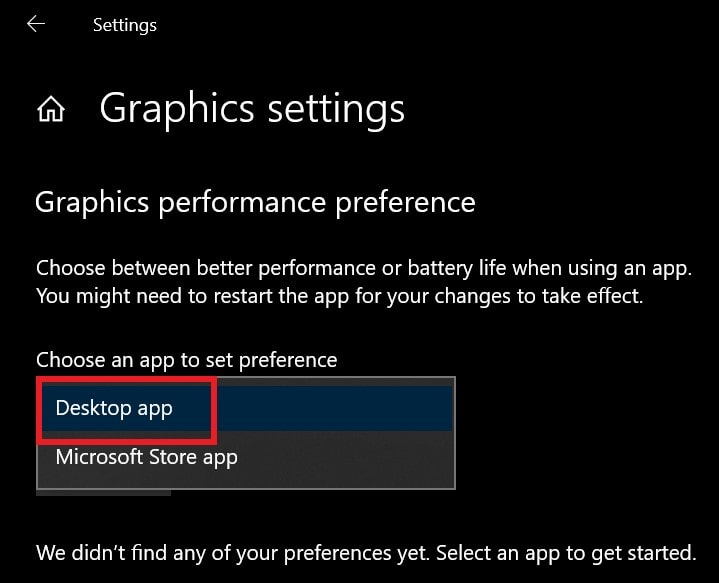
- Select the .exe file for that app [I mean the application file that you normally double-click to launch the app]
You will find this application file in the directory of that corresponding app normally situated in the C:/drive of the PC.
- Select the .exe file as I mentioned and click Add
- Then click on Save
Setting GPU for Microsoft Store Apps
On the other hand, if you wish to set the GPU for Microsoft Store Apps, then the steps will be a little different from the Graphics Settings. The steps below are a continuation of the steps in the previous section. In the previous section we set default GPU for desktop apps but here do the same for Microsoft Store apps.
- Click on Graphics Settings
- Then from the drop-down select Microsoft Store App
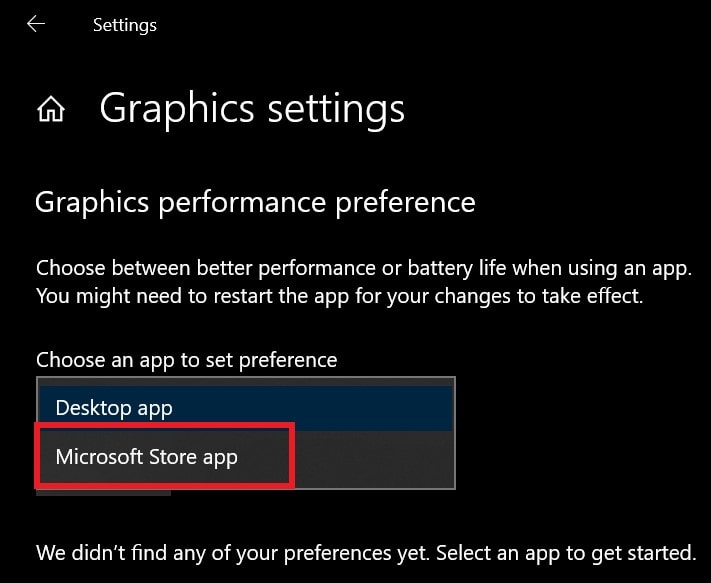
- Another second drop-down list will appear
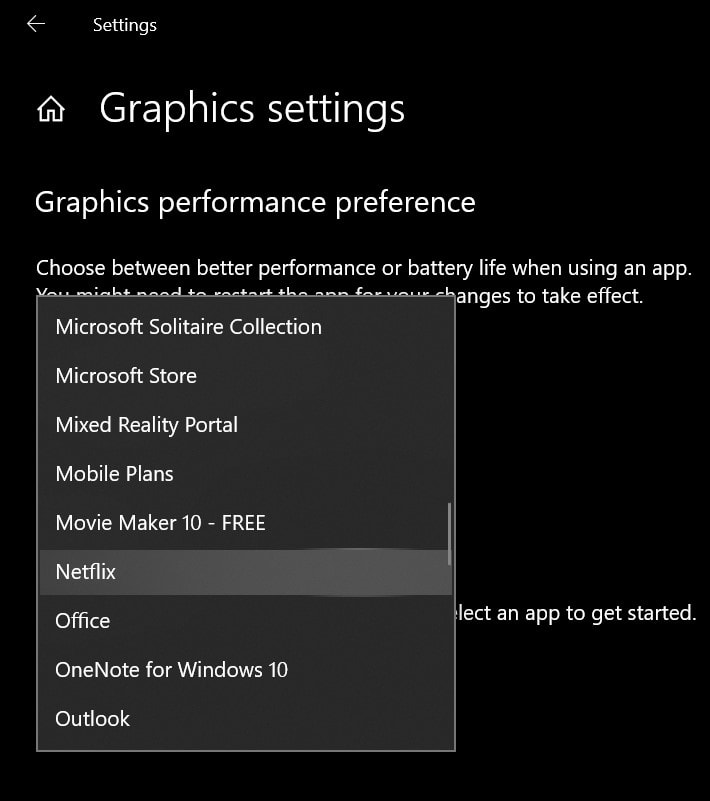
- From that select the choice of app to which you want to assign the default GPU
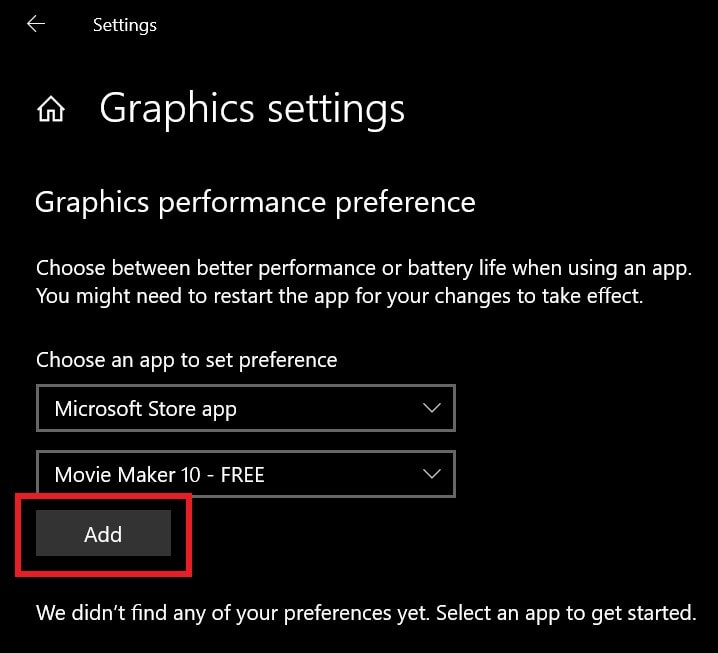
- Click on Add after selecting the app
- Once you select the app there will be a button Options. Click on it
- There will be three options Let Windows Decide, Power Saving, and High Performance
- Select any option as per your choice and click on Save
The steps that I have explained will work fine for almost all the modern-day GPUs available in the market. So, if you have multiple GPUs and you are into heavy multitasking then try to set the default GPU for various apps on your Windows PC.
