At times, Windows 10 hides certain files and folders that are by default related to the Operating System in order to save them from accidental deletion or altering done by the users. It protects against accidental deletion as it might end up causing the malfunction of the system.
However, if users want, they can unhide or make these hidden files visible in their system. There are several methods to do the same, and today we have compiled a few amongst them. Have a look down below:
Also Read
Page Contents
- Solutions for “Showing Hidden Files in Windows 10”
- Solution 1: Show Hidden Files in Windows 10 with CMD:
- Solution 2: Show Hidden Files in Windows 10 with File Explorer:
- Solution 3: Show Hidden Files in Windows 10 with Folder Options:
- Solution 4: Show Hidden Files in Windows 10 with Control Panel:
- Solution 5: Show Hidden Files in Windows 10 with Registry:
Solutions for “Showing Hidden Files in Windows 10”

Solution 1: Show Hidden Files in Windows 10 with CMD:
The first solution that you try to show hidden files in Windows 10 is via the Command Prompt. Here learn how:
- Firstly, go to the desktop search bar, type cmd, and launch Command Prompt from the search options. Make sure you launch it with administrator access.
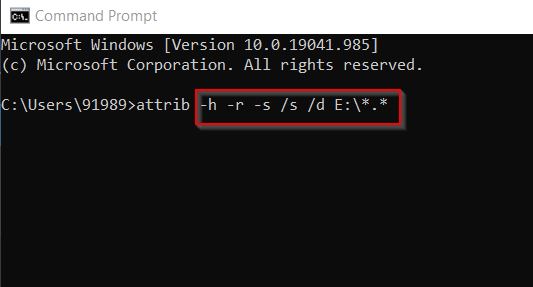
- Now inside the Command Prompt window, type or Copy + Paste attrib -h -r -s /s /d E:\*.*
and then press Enter to unhide the files in Drive E. (Here, you can replace the drive letter with the exact drive letter of your computer).
- Let the command run on its own. Once it is done, it will unhide the files and folders hidden in that particular drive.
Helpful Tip:
Users who want to understand this attrib command can read the section below:
- –h: It clears the hidden file attribute for showing the hidden files.
- –r: It clears the Read-only file attribute for allowing the user to modify the file once it shows.
- –s: It clears the System file attribute.
- /s: It applies attrib and any sort of command-line options to match files in the existing directory and all its sub-directories.
- /d: It applies attrib and any sort of command-line options only to the directories.
Solution 2: Show Hidden Files in Windows 10 with File Explorer:
If not via Command Prompt, you can also show the hidden files in Windows 10 through File Explorer. Here learn how:
- Firstly, press Windows + E altogether, and it will launch the File Explorer window.
- Now inside the File Explorer window, expand the vertical menu bar. For doing so, click on the ^ icon located at the top-right corner.
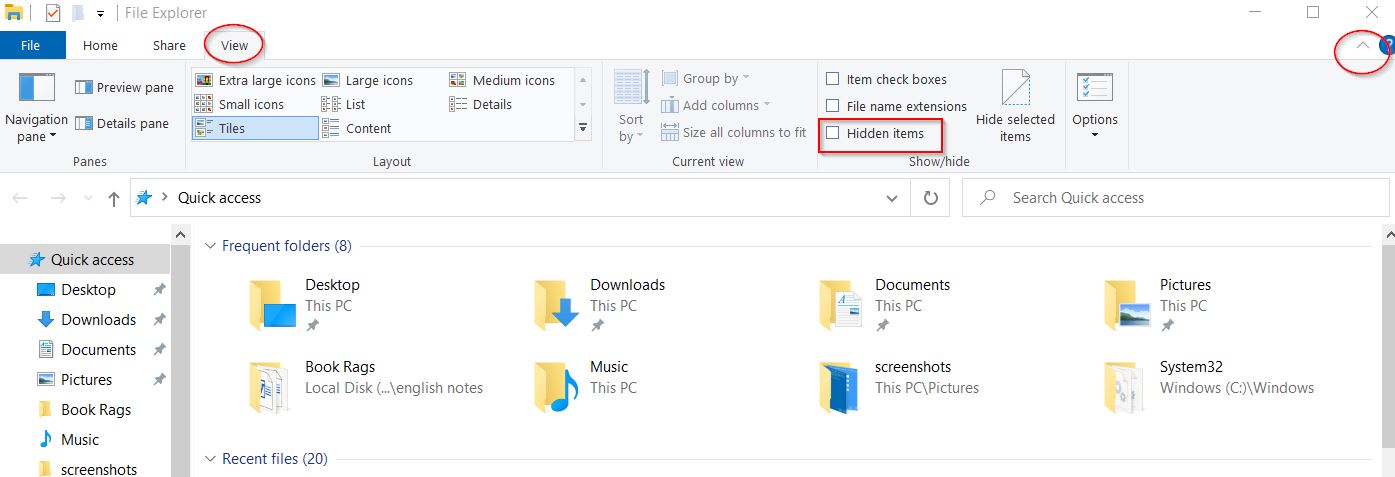
- Navigate to the View tab, and tick the checkbox for the option Hidden items (in the show & Hide section).
- Once done, it will make the hidden files and folders visible.
Solution 3: Show Hidden Files in Windows 10 with Folder Options:
For showing Hidden Files in Windows 10 with Folder Options, follow the steps given below:
- Firstly, press Windows + E altogether, and it will launch the File Explorer window.
- Now inside the File Explorer window, expand the vertical menu bar. For doing so, click on the ^ icon located at the top-right corner.
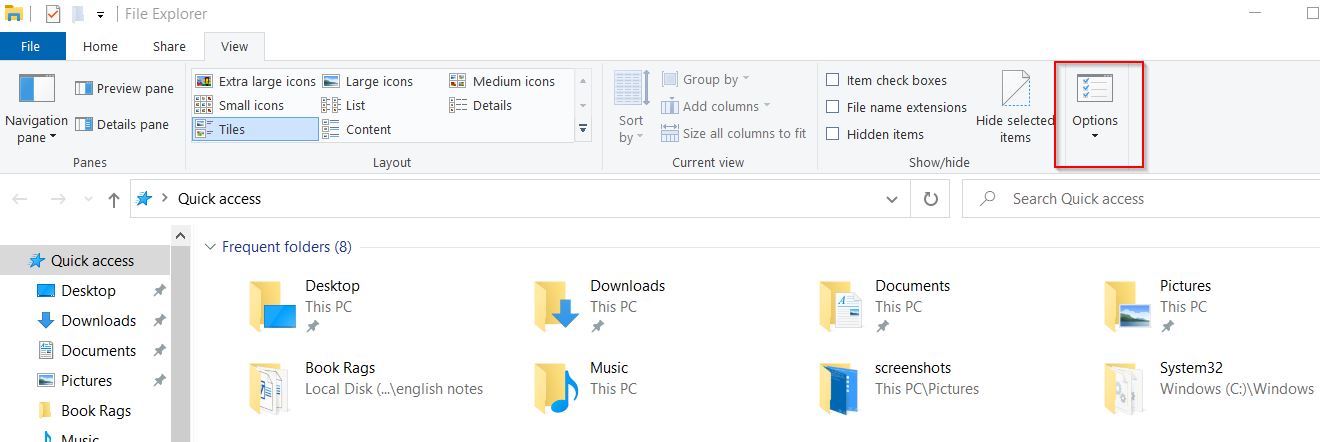
- Navigate to the View tab (from the vertical menu) and then click on Options (at the top-right corner).
- Now inside the newly opened Folder options window, click on the View tab.
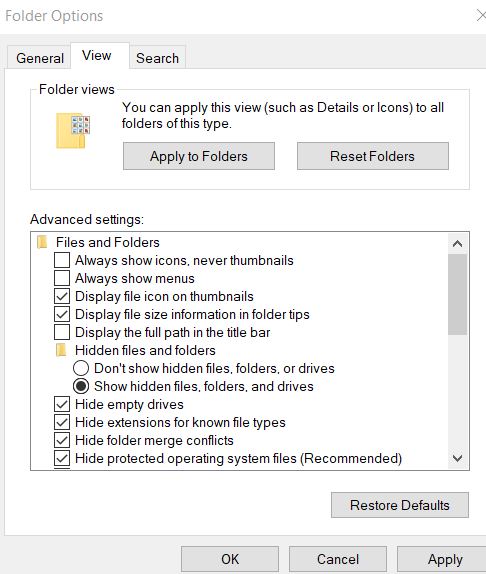
- Under the Advanced settings section, tick the circular button for the option Show hidden files, folders, and drives.
- Click on Apply and then OK.
Solution 4: Show Hidden Files in Windows 10 with Control Panel:
Here’s how you can show hidden files in Windows 10 via Control Panel. Follow the steps given below:
- Firstly, go to the desktop search bar, type Control, and launch Control Panel from the search results.
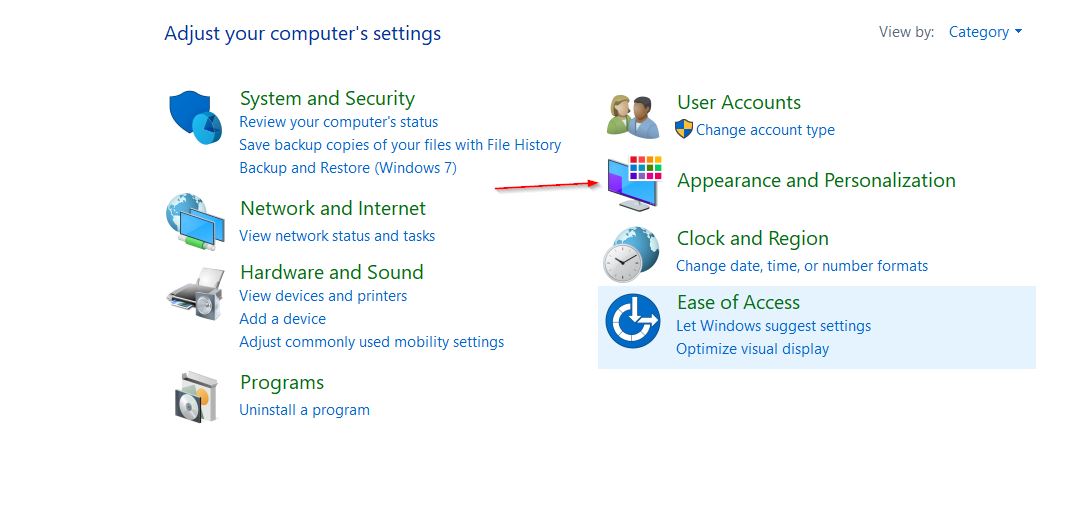
- Now inside the Control Panel window, navigate to Appearance and Personalization and then click on File Explorer Options on the right-pane menu.
- On the next prompt, click on the View tab.
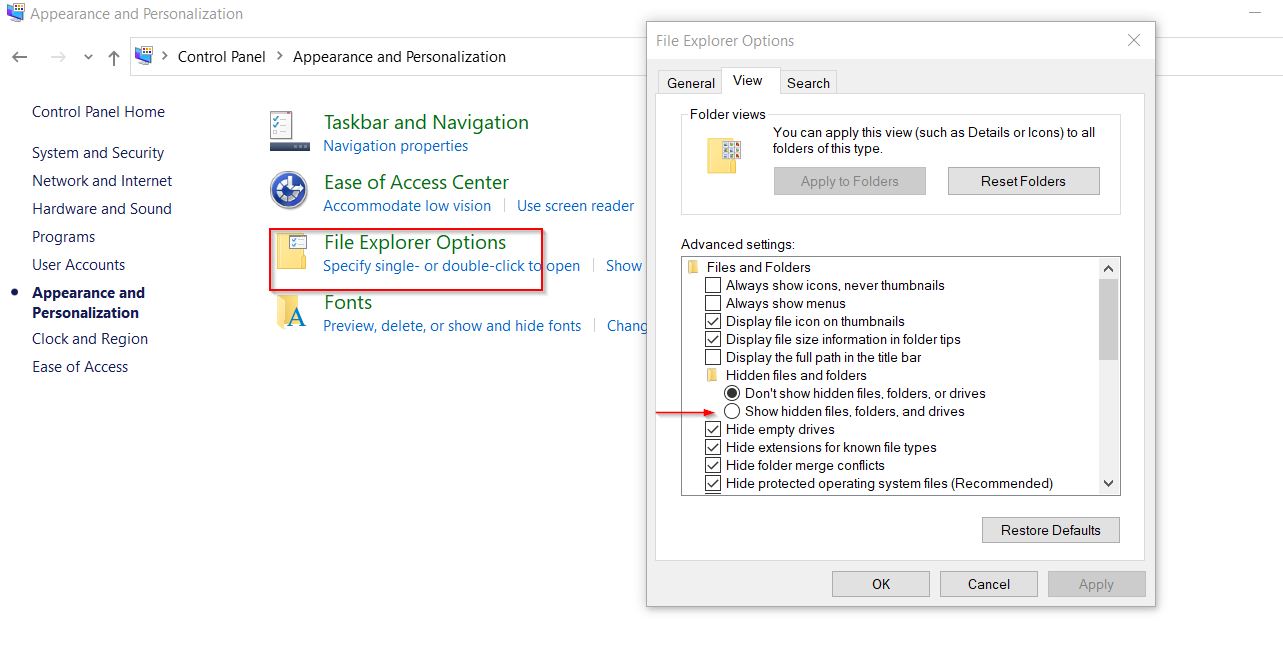
- Now under the Advanced settings section, click on the circular button before the option Show hidden files, folders, and drives.
- Select Apply and then OK. Now you could see the hidden files and folders.
Solution 5: Show Hidden Files in Windows 10 with Registry:
In order to show the hidden files in Windows 10 you can also use the Registry window as well. For doing so, follow the steps given below:
- Firstly, press Windows + R altogether and launch the RUN dialogue box.
- Now inside the empty text box, type regedit and then click on OK. It will launch the Registry Editor window.
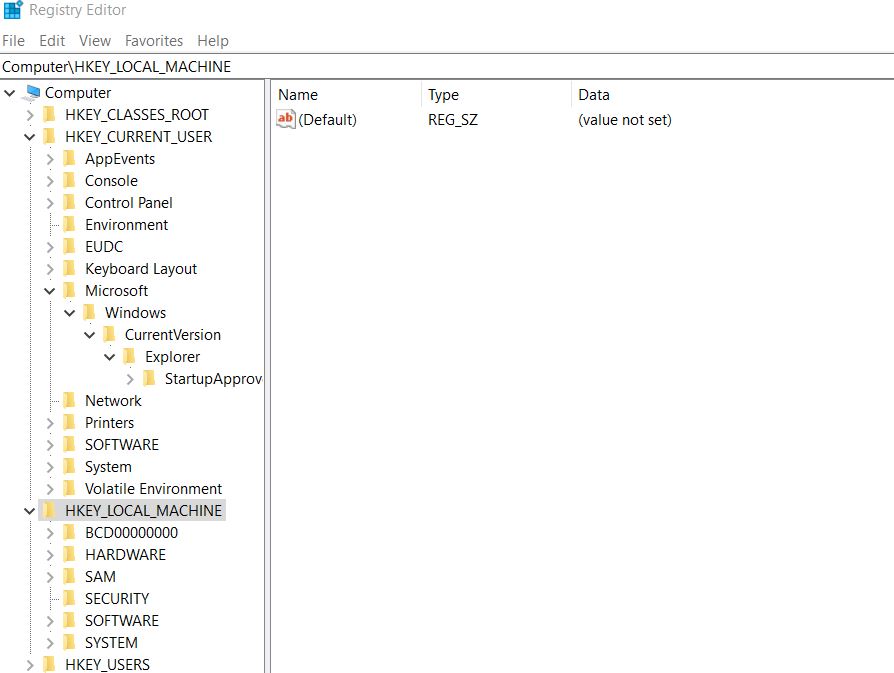
- Further, navigate to the HKEY_CURRENT_USER\Software\Microsoft\Windows\CurrentVersion\Explorer\Advanced path and then click on Advanced from the left-pane menu.
- Now on the right-pane menu, locate Hidden REG_DWORD and then double-click on it. Here set the data value as 1. It will make all the hidden files, folders, and drives in Windows 10 visible. To hide the files again in the future, you can change the data value to 2.
Anyway, to show the protected operating system files in Windows 10,
- Locate ShowSuperHidden REG_DWORD on a similar list, double-click on it, and set the data value as 1. Similarly, change the data value to 2 in case you want to hide protected operating system files in the future.
Above was the array of solutions that will help the users in making the hidden files in Windows 10 visible. All of the solutions are quite basic and can be performed using folders and components we use in our day-to-day life.
Although all the solutions are simple and would not make any further changes to your system, we recommend you to follow all the steps keenly in order to avoid any mistakes. If you have any queries or feedback, please write down the comment in the below comment box.
