In this tutorial, we will show you how to flash Sony Xperia 1 II firmware file. While the OEM is a shadow of itself than what it used to be in its peak some years back, yet it still has some handy devices lined up in its arsenal nevertheless. The Sony Xperia 1 II is a perfect example of this. Although its naming convention might confuse a few, there is no doubt about its feature set. To begin with, the 6.5-inch screen has a 1644 x 3840-pixel resolution and a tall 21:9 aspect ratio.
Under the hood, you get a powerful octa-core Qualcomm SM8250 Snapdragon 865 chipset and Adreno 650 as the GPU. Coming in a single 256GB 8GB RAM variant, the device is based on Android 10. Coming to the camera department, you get a quad rear setup with 12+12+12+0.3MP. On the front, you get a single 8MP with 1080p@30fps video recording capabilities. The side-mounted fingerprint device comes with a 4000mAH battery.
Add to it, there is a 21W fast charging and 11W wireless charging as well. All in all, it is a pretty decent offering from Sony. But the tech enthusiasts have managed to take this a step further. In this tutorial, we will list out all the detailed instructions set as to how to flash the firmware file on your Sony Xperia 1 II model number supported XQ-AT51, XQ-AT52, XQ-AT42. So without further ado, let’s get on with the guide.

Page Contents
Flash Sony Xperia 1 II Firmware File Guide
Before we list out the steps, there are some important files that you need to download and install. Likewise, one or two features on your device need to be enabled as well. All these are mentioned in the below section, please go through them once.
Warning
Pre-Requisites
- Before following this guide, make sure that you have enough battery backup on your device (at least 50% or higher)
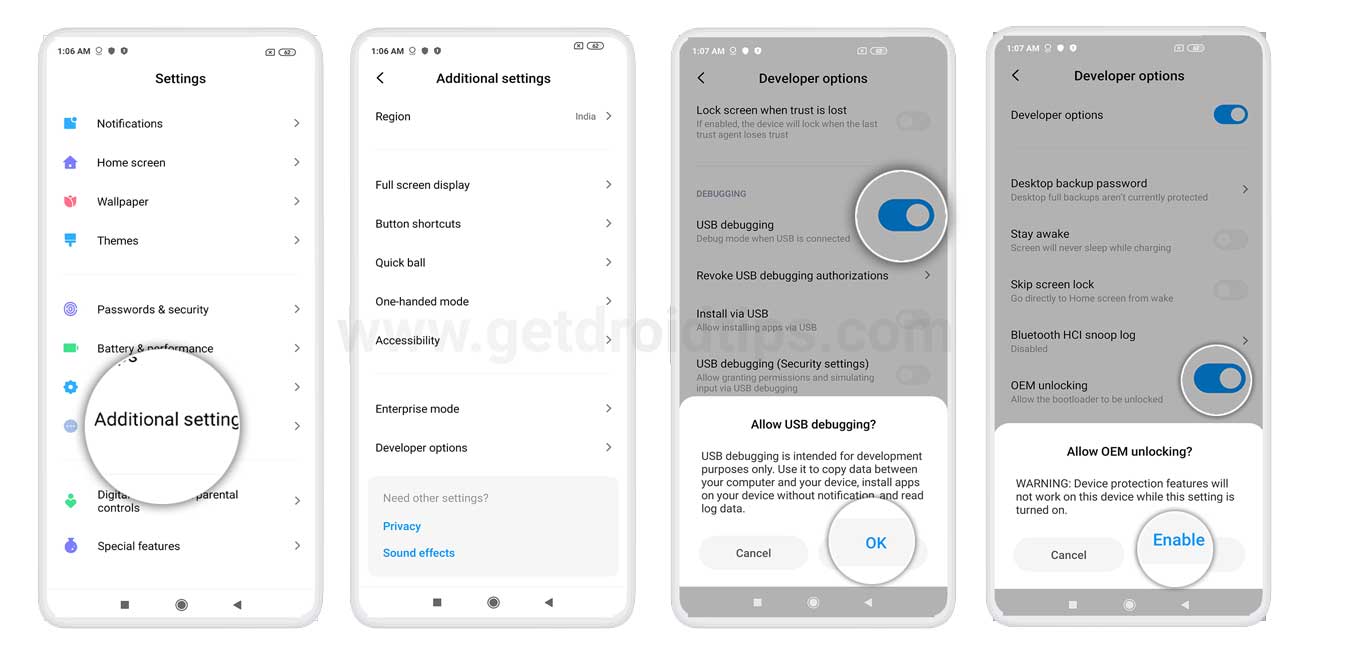
- To begin with, you will have to enable OEM Unlocking. For that, head over to Settings > About Phone > Tap on Build Number 7 times > Go back to Settings > System > Advanced > Developer Options and Enable OEM Unlocking.

- Next up, download and install the XperiFirm Tool on your PC.
- Also, download and install the NewFlasher Tool on your PC.
- We would recommend you take a complete device backup and make sure that it is sufficiently charged as well.
- Finally, download and install the Sony USB Drivers on your PC.
That’s it. These were all the required files. You may now proceed with the steps to flash Sony Xperia 1 II firmware file on XQ-AT51, XQ-AT52, XQ-AT42.
STEP 1: Download Firmware
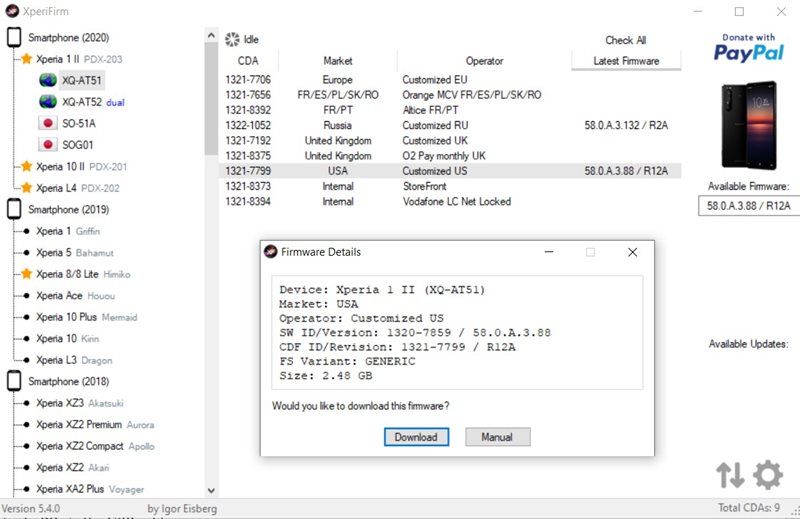
- To begin with, you will have to download the firmware of the desired region. For that, launch the XperiFirm software on your PC
- Next, select your device from the left-hand menu bar.
- Go through the firmware information section and select the region.

- Then on the right side, click on the latest available firmware that it displays. It should be present just beneath the Available Firmware section.
- A popup dialog box will then appear, click on the Download button.
The downloading process will now begin and once that is done, you will get an Unpacked Successful message. Click on OK. You could also go through our guide on how to install stock firmware on Sony Xperia using Xperifirm and Flashtool to gain more knowledge about this tool.
STEP 2: Boot your Sony Device to Flash Mode
- You will now have to boot the device to Flash mode. To do so, power off your device. Then press and hold the Volume Down key and connect your device to the PC via the USB cable.
- As soon as the Notification LED light turns green (while the device is in a switched-off state), it indicates that the device has been successfully booted to Flash Mode.
STEP 3: Flash Sony Xperia 1 II Firmware Files
- First of all, extract the Newflasher inside the same folder where the firmware files are present (that you got from the XpeirFirm tool in STEP 1).
- Now launch the NewFlasher application on your PC.
- Type in n and hit Enter. Then again type n and hit Enter. You should now be taken to the flashing stage.
- Now press Y and again Y to reply in the affirmative. The conversion process will then begin and once that is done, the tool will notify you that is now safe to disconnect your device.
- Hence, disconnect it from the PC and then press and hold the Power key to boot it to the converted firmware.
With this, we conclude the guide on how to flash Sony Xperia 1 II Firmware File. Do let us know your views on the same in the comments section below. Rounding off, here are some iPhone Tips and Tricks, PC tips and tricks, and Android Tips and Trick that you should check out as well.
