The Steam Deck comes with various storage options, ranging from 64GB eMMC to 1TB NVMe SSD. While these options provide ample storage for most users, some may find the need for additional space, especially with the growing size of modern games. If you are planning to add more games to your library and you are short of storage, you should buy a new SSD with more storage and follow our Steam Deck SSD upgrade guide.
The Steam Deck has revolutionized the portable gaming landscape, offering a powerful handheld device capable of running AAA games and providing a truly immersive gaming experience on the go. However, the amount of storage it comes with is not enough if you are a gamer or you love trying every new game. It doesn’t matter how big your storage is in your Steam deck, but you can not install new games due to the small storage. The only solution is to upgrade your Steam Deck storage by inserting a new SSD.
Upgrading the SSD can not only increase the storage capacity but also enhance the device’s overall performance, loading times, and responsiveness. In this comprehensive guide, we will walk you through the process of upgrading the SSD on your Steam Deck. It doesn’t matter if you’re really good with technology or just starting out; this guide will give you the information and the assurance you need to do the upgrade on your own.
Also Read

Page Contents
Steam Deck SSD Upgrade Guide
As we have already mentioned, all the reasons you can counter to upgrade your storage. Adding to those reasons, you would not want to buy a new Steam Deck for your new games when you can install a new upgraded SSD in your Steam Deck.
Pre-requisites
The entire process is very simple and does not take more than ten minutes. You should have an organized or clean desk before you go into the upgrade, as you can make this process longer when you lose some screws or keys. Before we move on to the upgrade guide, here are a few things you should keep in mind.
- 8 GB Storage USB stick
- 2230 NVMe drive
- Steam OS image file
- Rufus/balena Etcher
- Spudger
- Steam Deck Charger
- USB-C hub
- And a Screwdriver
The 230 NVME drives are the only drives that can be used in the Steam Deck. These drives are tiny and usually look like ice cube-sized drives. These drives can be found on old laptops or other devices. However, you can easily find the 2230 SSD for the Steam Deck on Amazon or other electronic computer shopping websites.
You should also power down the Steam Deck completely, as this process requires internal touching of the device. Remove any SD card too. Now you have all the required information before proceeding to the complete guide.
Remove the Back of the Steam Deck
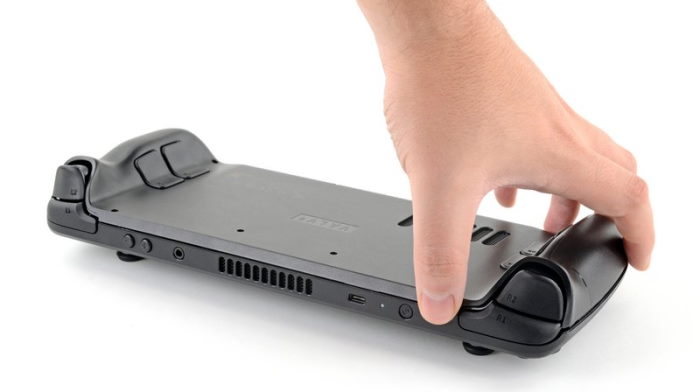
Flip your Steam Deck, and you will see eight screws behind, unscrew them one by one. You have to keep these screws somewhere safe. Avoid making your screw slip, as this will make things worse for your device.
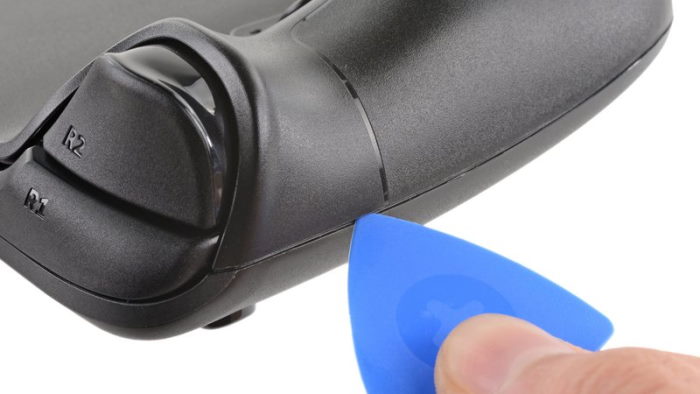
You have to unclip the back of the Steam Deck to access your device’s SSD. Use a metal card or a slicer to unclip the back of the device. Try to move the slicer from the right side of the device from top to bottom, and once the gap is made, tug out the back of the Steam Deck.
Remove Steam Deck Storage Drive
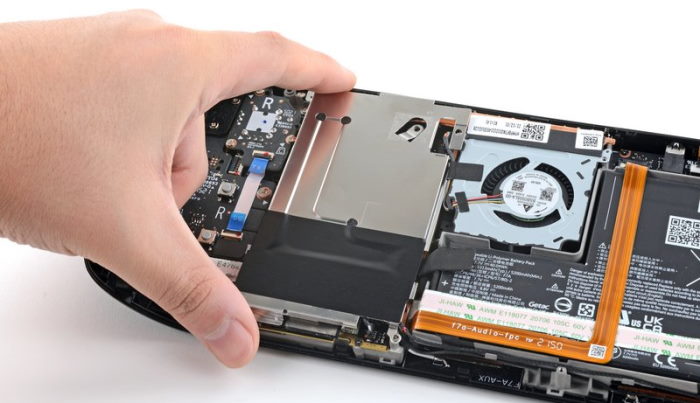
Disconnect your device battery instead of tugging it out. Disconnect the plastic connector from the sheath first and put it aside.
You have reached the Internal of the device. A metal plate covers the SSD drive, remove this metal plate, and you will see hidden screws. Remove these screws with a suitable bit and set them aside for reassembly later.
Replace NVME drive
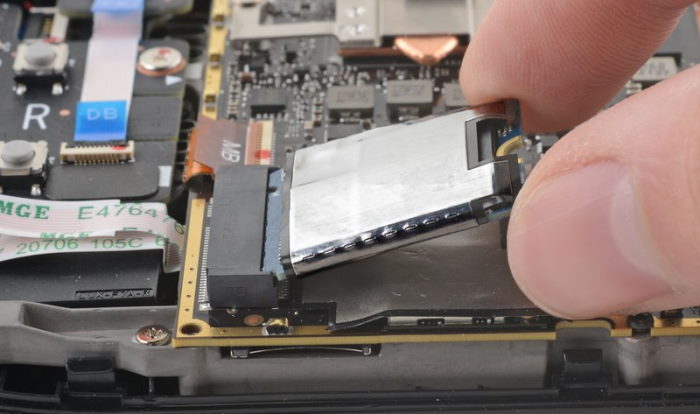
The 2230 NVME drive is in the wrapper, just remove the screw and set it aside and gently pull out the drive from its socket and remove the wrapper around it.
Now place this Wrapper in the New 2230 SSD and place it onto the same socket from where you removed the old SSD, and screw it down.
Reassemble Steam Deck
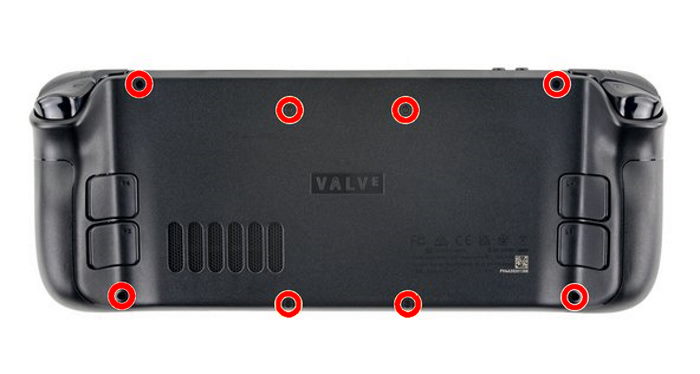
It’s time for the final step, reassembling the steam deck. But before going onto that, reconnect the battery, put your Steam Deck back in place, put all eight screws in place, and start tightening them up. Once the Steam Deck starts, verify the storage and set up the Steam Deck as you like.
Conclusion
This brings us to the end of this Steam Deck SSD Upgrade Guide. It’s important to note that Upgrading the SSD can not only increase the storage capacity but also enhance the device’s overall performance, loading times, and responsiveness. We have tried to make this guide as easy as possible, but it’s still important to keep all the precautions before proceeding with these steps.
Please keep in mind that you should not use any sharp objects to open the back of the Steam deck as it can damage the inner parts of the device. Try to keep your screws carefully, as losing these screws can make your console useless.
