Video editing is one of the toughest jobs out there, yet along very creative and time-consuming. If you have ever edited a video with detached audio files, it becomes very problematic to sync audio and video in Adobe Premiere Pro. I always spend countless hours doing its until I came across some tricks to do it instantly in no time. Here how you can do it too:
It becomes a headache for content creators or editors when they cannot sync audio and video. However, when it comes to recording audio, video production, etc., Adobe Premiere Pro is the best option out there in the market. Adobe Premiere Pro is a timeline-based video editing application developed and published by Adobe Systems.
It’s been a long time since the Adobe Premiere Pro was released, but many users aren’t quite familiar with features like Syncing Audio and Video. This leads us to the closure of bringing up an article that will help users to Sync Audio and Video in Adobe Premiere Pro.
In Adobe Premiere Pro, while recording video, the essential thing that comes to mind is syncing audio. However, this process isn’t so complicated, and with a few special tips, you can do it instantly using inbuilt features. You just need to follow the simple steps that I am going to tell you.
Page Contents
How To Sync Audio And Video In Adobe Premiere Pro?
Fortunately, we have three methods by which you can simply sync Audio and video in Adobe Premiere Pro. Each method has its own purpose, but the manual process might be the most important to learn.
Have you ever watched a video where the audio is not precisely matched with the video? This problem generally occurs due to poorly synced audio, which seems very frustrating and ruins your viewing experience. Luckily, we have solutions for you to fix this issue.
Method 1: Manually Syncing Audio And Video
The first and foremost thing is to locate your Audio and Video in your media bins.
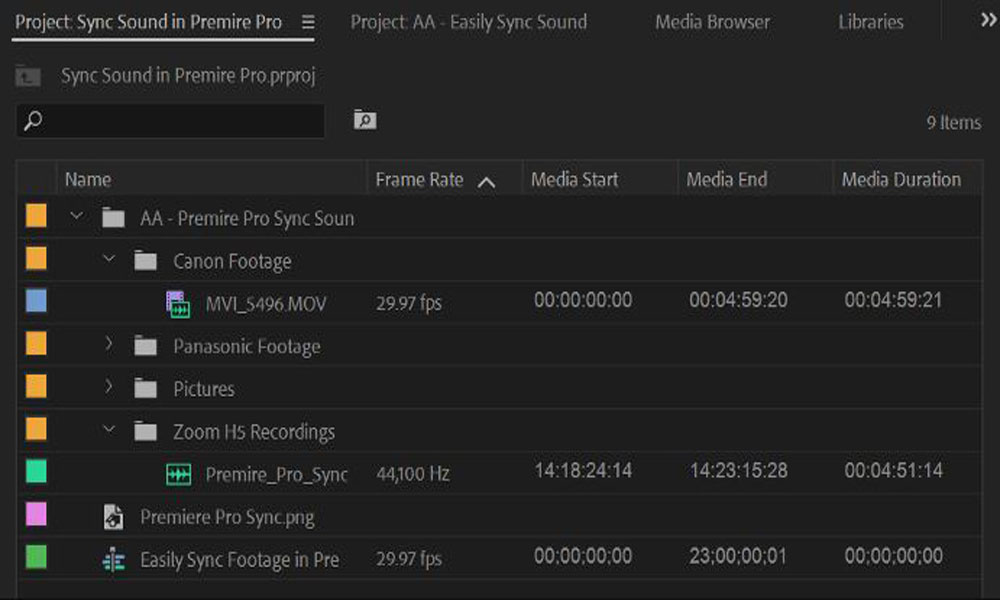
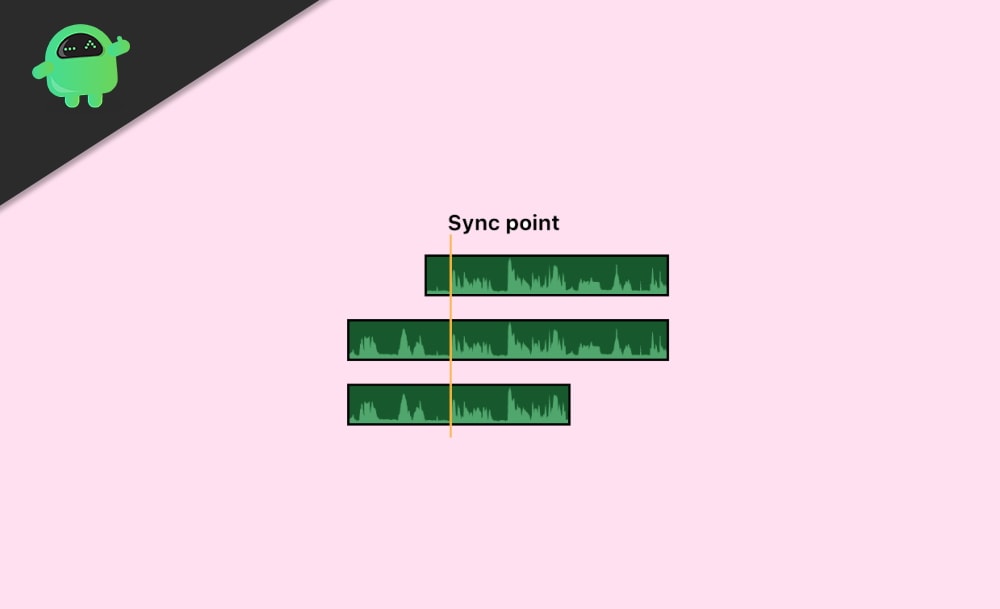
To do this, you need to sync the footage from your camera or smart device along with your external audio device. Simply drag them on the timeline of Adobe Premiere Pro to see the peaks from Slate. It will be more difficult if you don’t have any reference point for your audio, such as clapboard or hand clap.
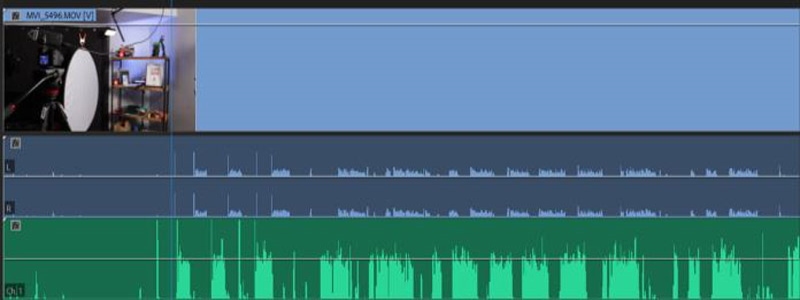
Your internal camera audio and external audio are displayed as blue and green audio, respectively. If you want to use your internal camera audio as a point of reference for your external audio, what you need to do is simply manually drag the bottom audio to match up with the top audio perfectly.
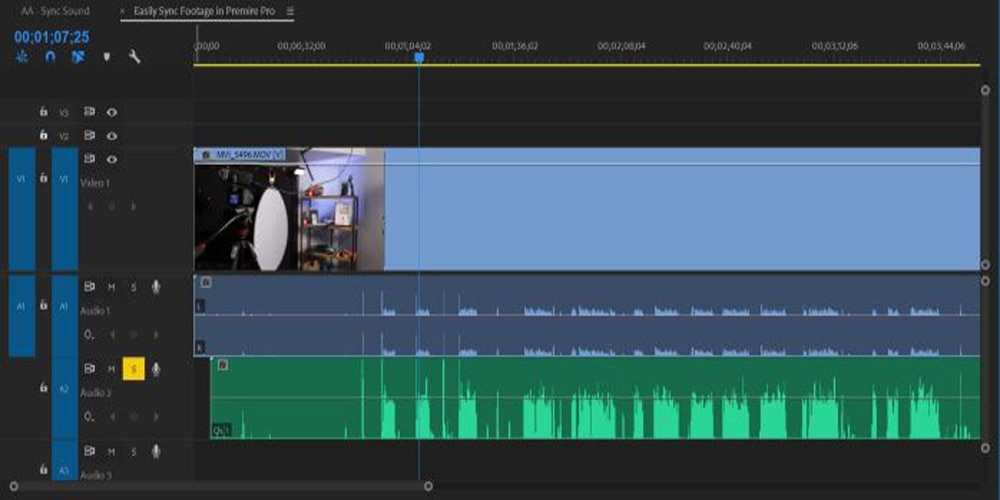
After that, playback the video clip to make sure that they correctly synced. Now, when you are happy with your video clips, delete the scratch camera audio.
Now, you have to group or link the video and audio to ensure that you do not de-sync the audio.
Method 2: Merging Clips To Sync Audio And Video
The merging process allows you to choose media in the bins that you want to link. This helps to sync up to 16 audio clips in a single video. So, let’s see the steps to merge clips to sync audio and video.
Merging clips to sync audio and video isn’t very tough. You just need to hold the Control key on your PC and choose any two video clips you want to merge.
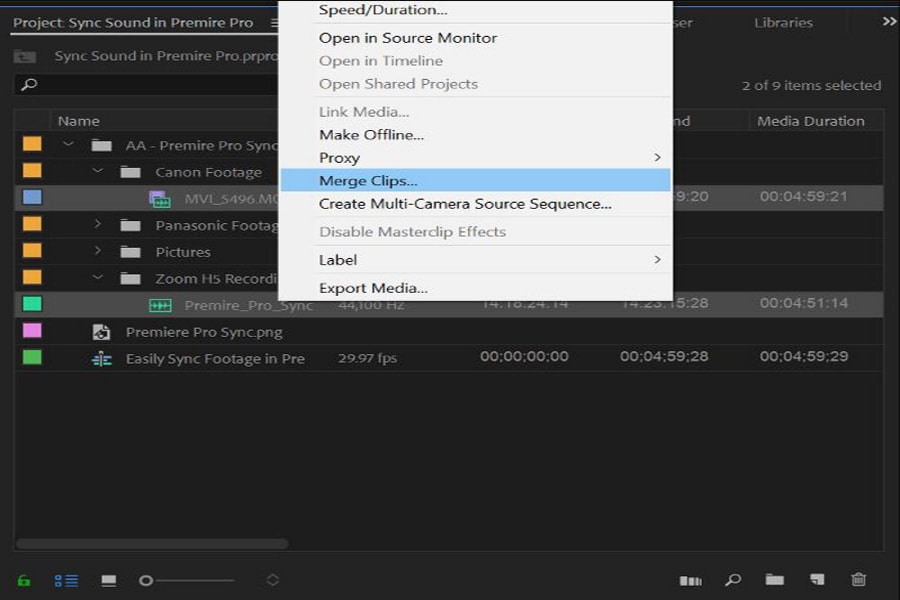
Now, a drop-down menu will open with a couple of options along with the Merge Clips option. Click on it.
After that, a new window will open containing settings related to Merge Clips. From there, select the Audio option and tap on the OK button.
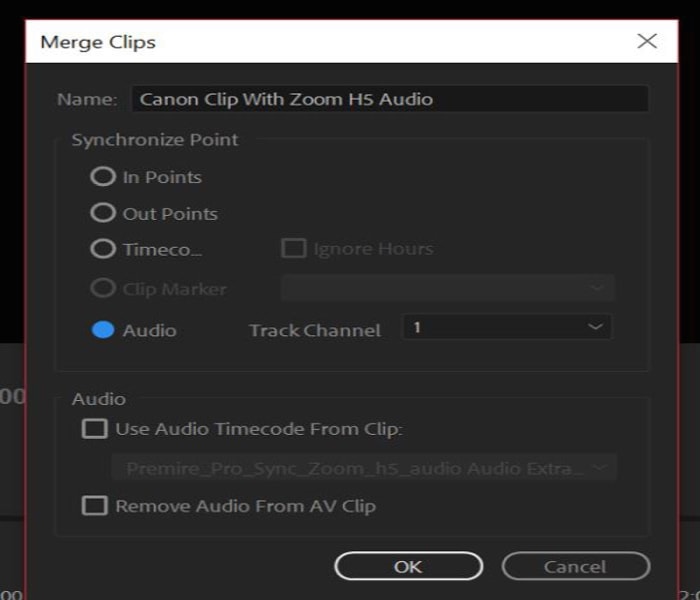
Now, Adobe Premiere Pro will automatically analyze the video clips’ audio with externals audio and look for similarities.
In my case, it was the clapboard hit, and after that, it automatically syncs the video clips. However, you’ll see a new file where you will able to import your media in the Merge Clips Menu.

At the same time, you need to drag the new Merged Clip on your timeline. We recommend you select the Remove Audio AV Clip option. This will remove the internal audio and use the external audio so that we don’t have to remove it manually.
Method 3: Synchronizing Clips On The Timeline
Synchronizing clips from your timeline is similar to the Merging clips, which automatically inspect your external recording device’s audio. However, the synchronizing method will allow you to use multiple cameras recording videos in a single scene. So, let’s see how you will synchronizing clips on the timeline.
First of all, you need to drag the external audio to your timeline. We recommend you to put the audio on track one and instantly lock it so that you can attach multiple camera angles above it. Now, place their audio below the audio you wish to add.
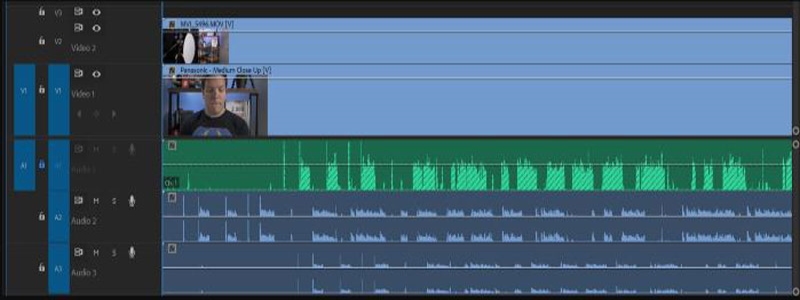
Now, you need to unlock the external audio. Then, press Control + A to choose all the video clips and right-click on it to open the drop-down menu, and select the Synchronize option.
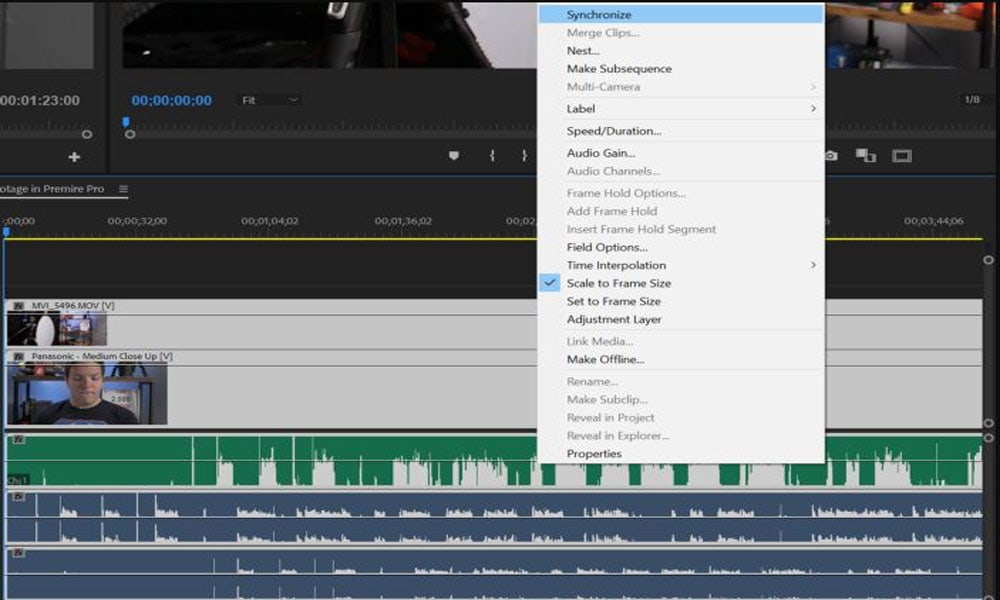
After that, similar to Merging Clip, you need to choose the audio, and then Adobe Premiere Pro will automatically sync the audio to the external sound.
Now, wait until the syncing process is completed. That’s it! Now you will able to remove the internal camera audio and also has an option to sync multiple video clips to one sound source.
Conclusion
For syncing audio and videos in Adobe Premiere Pro, you just need to follow the simple and easy tricks that we have already mentioned above. If you cannot sync audio and video with the Adobe Premiere Pro’s help, you may try some other alternative such as Plural-eyes. There many third-party extensions or plugins also available. But I’m sure you will be able to pull this off with the built-in tools if you follow this procedure step by step.
