Let’s check out the steps to unlock the bootloader on Sprint LG G8 Thinq. Most of the OEMs usually ship their devices with a locked bootloader. They do so because they want you, the user, to only use the OS that they have provided. While this makes sense from the security point of view, yet not everyone like the stock OS of their devices. This is why they take the help of custom ROMs. For that, the first requirement is that your device’s bootloader should be unlocked. And many OEMs allows you to easily do the same.
However, there are still a few exceptions. Smartphone manufacturers like Nokia, Huawei, and even LG up to an extent has stopped the support of bootloader unlocking. In LG’s case, they wouldn’t even give out the required bootloader unlocking code to you. But thanks to the rich development community of Android, there’s now an exploit through which you could easily unlock the bootloader on Sprint LG G8 ThinQ. This privilege escalation exploit was first done on the LG V50 ThinQ. Since G8 ThinQ has similar specifications, developers tried the exploit in this device and were able to achieve success on this device too. So without further ado, let’s check out the detailed instructions set in this regard.

Page Contents
Unlock The Bootloader on Sprint LG G8 ThinQ
Before beginning with the steps, we would like to highlight the fact the below steps might be a little complicated to some of our readers. So please follow all the steps in the same manner as mentioned. Furthermore, the exploit was founded by the XDA Recognized Developer j4nn, so a huge thanks to him. With that said, here are the required instructions, in detailed separate sections for your easy understanding.
WARNING
Prerequisites
- A Sprint LG G8 with one of the following configurations:
- Android 10 20e or lower and Pie on slots A/B or B/A.
- Android 10 20e or lower and Android 10 any firmware on slots A/B or B/A.
- Download and install the LG USB Drivers on your PC.
- Similarly, install the latest ADB Platform Tools on your PC.
- Python 3.8.3 With PATH Set
- OEM Unlocking Enabled in Developer Settings
- USB Debugging Enabled in Developer Settings
Downloads
All the required files have been uploaded by the developers to Google Drive. You could download them from here.
That’s it. Let’s now check out the steps to unlock bootloader on Sprint LG G8 ThinQ.
STEP 1: Checking the Firmware Version on your Device
First of all, you need to check the firmware version on your device. The exploit will only work if the version 20e or lower. To perform this check, head over to Settings > System > About Phone > Software Version. Version 20f and later versions aren’t supported as of now. In that case, consider switching slots and checking the version in the second slot. make sure to perform a factory reset before switching slots. Now once you have switched slots and the firmware version is lower than 20f, that is if it is 20a, 20b, 20c, 20d, or 20e, then your device bootloader could be unlocked.
STEP 2: Temporary Rooting
So now that we have identified the vulnerable slot, it is time to achieve root in that slot. Follow the below steps for that:
Download the v50g8-mroot.zip with the exploit attached and unzip it.
Use ‘adb push v50g8-mroot /data/local/tmp’ and get temp root with following commands in ‘adb shell’:
cd /data/local/tmp
chmod 755 ./v50g8-mroot
./v50g8-mroot
If you were able to achieve the temporary root, you should see the following message:
[+] Mapped 200000
[+] selinux_enforcing before exploit: 1
...
[+] Launching privileged shell
root_by_cve-2020-0041:/data/local/tmp # getenforce
Permissive
root_by_cve-2020-0041:/data/local/tmp # id
uid=0(root) gid=0(root) groups=0(root) context=kernel
root_by_cve-2020-0041:/data/local/tmp #
That’s it. You have achieved a temporary root on the exploitable slot. Let us proceed ahead with the backing up of all important partitions.
STEP 3: Backup Partitions
Copy-paste the below lines in the adb root shell, and once you get the images from the firmware, move it to a safe place, preferably on your PC. Furthermore, we have provided two scripts file below, one will automate the steps, others will perform a full backup if every partition. It’s better if you go for the latter. These are the least images that you should backup, if not the complete firmware:
dd if=/dev/block/sda28 of=/storage/emulated/0/Download/OP_a.img
dd if=/dev/block/sda29 of=/storage/emulated/0/Download/OP_b.img
dd if=/dev/block/sda19 of=/storage/emulated/0/Download/carrier.img
dd if=/dev/block/sde64 of=/storage/emulated/0/Download/catecontentfv.img
dd if=/dev/block/sde63 of=/storage/emulated/0/Download/catefv.img
dd if=/dev/block/sde57 of=/storage/emulated/0/Download/cateloader.img
dd if=/dev/block/sdg1 of=/storage/emulated/0/Download/frp.img
dd if=/dev/block/sdf5 of=/storage/emulated/0/Download/fsc.img
dd if=/dev/block/sdf4 of=/storage/emulated/0/Download/fsg.img
dd if=/dev/block/sda8 of=/storage/emulated/0/Download/ftm.img
dd if=/dev/block/sda31 of=/storage/emulated/0/Download/grow.img
dd if=/dev/block/sdf4 of=/storage/emulated/0/Download/fsg.img
Run the below backup script
adb push backupall-part.sh /data/local/tmp
Execute the following in a root shell:
cd /data/local/tmp
sh backupall-part.sh
That is it. These scripts should be able to create the desired backups. It’s now time to deal with the slots on your device.
STEP 3A: Finding the Right Partition
To find your current partition, type in the below command:
getprop | grep slot
If it is Slot A, head over to the STEP 3B. On the other hand, Slot B users should refer to the STEP 3C section.
STEP 3B: Slot A -dd Command
The following dd commands will flash xbl, xbl_config, abl, and laf from Pie, as well as the V50 engineering bootloader to slot B. Copy these images to your Internal Storage’s Download folder. Furthermore, it is also required that each of these commands is run at least 5 times, i.e you have to flash each of the below commands five times each. Again, we would like to reiterate the fact that these commands are for devices who have Slot A, checked after executing the STEP 3A commands.
dd if=/storage/emulated/0/Download/V500ES_abl_a.img of=/dev/block/bootdevice/by-name/abl_b
dd if=/storage/emulated/0/Download/xbl_b.img of=/dev/block/bootdevice/by-name/xbl_b
dd if=/storage/emulated/0/Download/xbl_config_b.img of=/dev/block/bootdevice/by-name/xbl_config_b
dd if=/storage/emulated/0/Download/laf_b.img of=/dev/block/bootdevice/by-name/laf_b
Now exit the root shell by typing in “exit” (without quotes) twice. Once done, switch your device to Slot B and reboot your device to Fastboot Mode. For the latter, use the key combination of Volume Down and Power. Then select the Restart Bootloader option using the Volume Keys and hit the Power key to confirm the selection.
- Enter the below command to make sure that that your device is booted in Fastboot Mode:
fastboot devices
- Finally, enter the below code to unlock the bootloader of your Sprint LG G8 ThinQ:
fastboot oem unlock
- You will get a confirmation message on your screen, use the Power key to reply in affirmative.
Now if slot A does contain firmware version 20d, then proceed to “Step 4A, Magisk Flashing”. If slot A does not contain firmware version 20d, proceed to “Step 4B, Flashing 20d”.
STEP 3C: Slot B dd Commands
The following dd commands will flash xbl, xbl_config, abl, and laf from Pie, as well as the V50 engineering bootloader to slot A. Copy these images to your internal storage Download folder. These steps are for those who got Slot B as the active one from the command given in STEP 3A. Furthermore, as was the case earlier, you will have to execute each of the below four commands five times each.
dd if=/storage/emulated/0/Download/V500ES_abl_a.img of=/dev/block/bootdevice/by-name/abl_a
dd if=/storage/emulated/0/Download/xbl_b.img of=/dev/block/bootdevice/by-name/xbl_a
dd if=/storage/emulated/0/Download/xbl_config_b.img of=/dev/block/bootdevice/by-name/xbl_config_a
dd if=/storage/emulated/0/Download/laf_b.img of=/dev/block/bootdevice/by-name/laf_a
Now exit the root shell by typing in “exit” (without quotes) twice. Once done, switch your device to Slot A and reboot your device to Fastboot Mode. For the latter, use the key combination of Volume Down and Power. Then select the Restart Bootloader option using the Volume Keys and hit the Power key to confirm the selection.
- Type the below command to make sure that the device has been successfully connected to Fastboot Mode.
fastboot devices
- Now enter the below command to unlock the bootloader of your Sprint LG G8 ThinQ:
fastboot oem unlock
- You will get a confirmation message on your screen, use the Power key to reply in affirmative.
Now if Slot B does contain firmware version 20d, proceed to “Step 4A, Magisk Flashing”. On the other hand, if Slot B does not contain firmware version 20d, proceed to “Step 4B, Flashing 20d”.
STEP 4: Flashing the Required Files
If Slot A (Step 3B) or Slot B (STEP 3C) does contain the firmware version 20d, then you have to refer to the steps mentioned in STEP 4A: Magisk Flashing. If Slot A (Step 3B) or Slot B (STEP 3C) does contain the firmware version 20d, then you have to refer to the steps mentioned in STEP 4B: Flashing 20d.
Step 4A: Magisk Flashing
We will now flash the appropriate Magisk patched boot image for your firmware version. The following commands need to be changed based on which slot your 20[a,b,c,d,e] firmware is located. For example, if 20d is in slot A, then use the below commands:
fastboot flash boot_a sprint20d_magisk_patched.img
fastboot --set-active=a
On the other hand, if 20d firmware is in Slot B, then execute the following commands:
fastboot flash boot_b sprint20d_magisk_patched.img
fastboot --set-active=b
Now select the Power Off option and use the Power button to confirm the selection. It might take around 20 seconds for the device to boot up, this is completely normal.
STEP 4B: Flashing 20d
According to the developers: “After some testing, we have determined that no stability problems occur as long as you flash a patched boot image that matches your current firmware version. Currently, we have patched 20d and 20e boot images available.”
So in that case, you could use the sprint20d_magisk_patched.img or the sprint20e_magisk_patched.img file present in the Magisk Patched Boot Images section of the Downloads section. If you still wish to know more on this topic, this documentation’s Step 4B, Flashing 20d section will come in handy.
STEP 5: Final Steps
In this section, we will now flash the TWRP Recovery, Magisk, and dm-verity disabler. Download all the three files from the download section and copy them to your SD card.
- Download and install the latest Magisk Manager APK file and install it onto your device.
- Once installed, launch it. It will ask you to perform an additional setup. Allow it. The phone will reboot automatically.
- After the reboot, open Magisk Manager once more, tap on the 3 horizontal bars on the top left, and select Modules. Tap the plus sign and select the twrp-installer zip file. This will flash the TWRP onto your device.
- Now shut down the phone and boot to recovery via the key combination. For that, hold volume down and power until you see Recovery mode, and then release the keys.
- Once it boots to the TWRP recovery, it will ask for a password, hit the Cancel option, and go to Wipe > Advanced > Select data partition and perform a right swipe to wipe to the data partition.
- Now go to Reboot > Recovery. When your device reboots to recovery for the second time, it wouldn’t ask for a password now. This means we have successfully decrypted the device.
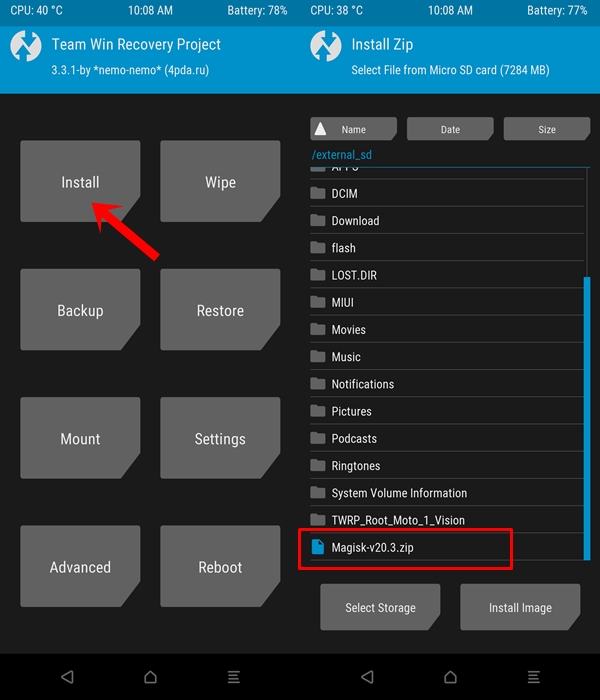
- Head over to the Install option and install the Magisk-v20.4 ZIP file. Go back and head over to Reboot > Recovery. When your device again boots to TWRP, go to Install and flash the Disable_Dm-Verity file.

- Finally, head over to Reboot > System. Your device will now reboot to the system with an unlocked bootloader and rooted as well. Congratulations are in order!
So with this, you have successfully unlocked the bootloader on the Sprint LG G8 ThinQ. Although the steps might seem a little daunting at first, if you follow them exactly as mentioned, it shouldn’t be much of an issue. On that note, if you still have any issues, drop in your queries in the comments section below. Likewise, here are some iPhone Tips and Tricks, PC tips and tricks, and Android Tips and Trick that you should check out as well.
