If you are multitasking and using two or more windows at the same time, then you could manually place these windows side by side and carry out the desired task. Or even better, you could eliminate this manual method and take the automatic approach. Windows 10 comes baked in with a Split Screen functionality that allows you to simultaneously use up to four screens at one go.
Playing YouTube videos at one end, working on your docs at the other end, and browsing the net using the third window, how cool will it be, isn’t it? Likewise, it scores pretty high on the usability front as well. So in this guide, we will show you how to use the Windows 10 Split Screen using two different methods. Furthermore, we will also share some handy tips that will streamline your entire multitasking process. Follow along for the instructions.
Also Read
Page Contents
Windows 10 Split Screen Feature Preview
So here how this feature looks, upon opening two, three, and four windows simultaneously.
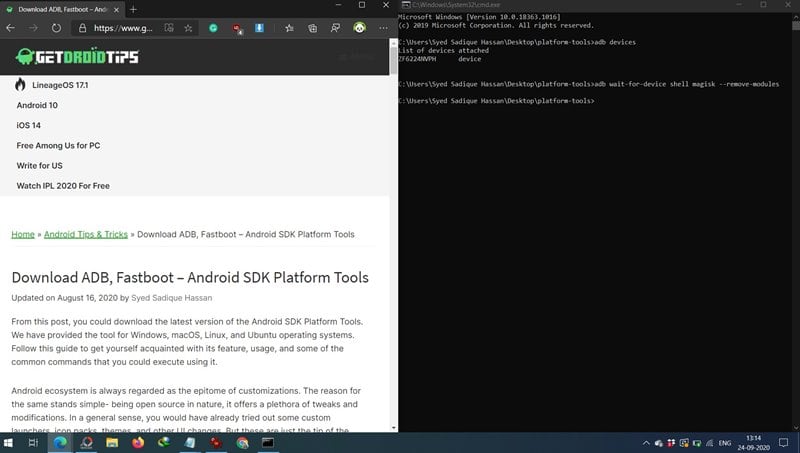
- When you are using two windows, each of them ends up occupying 50% of the screen.
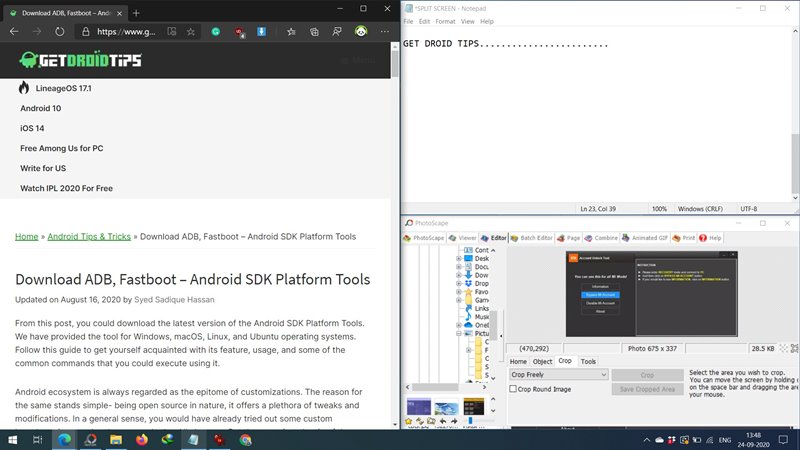
- Then when you have three windows, two of them will occupy 25% of the screen each on the right, and the third one will occupy the entire left-hand side (or vice versa- positioning depends on your preference).
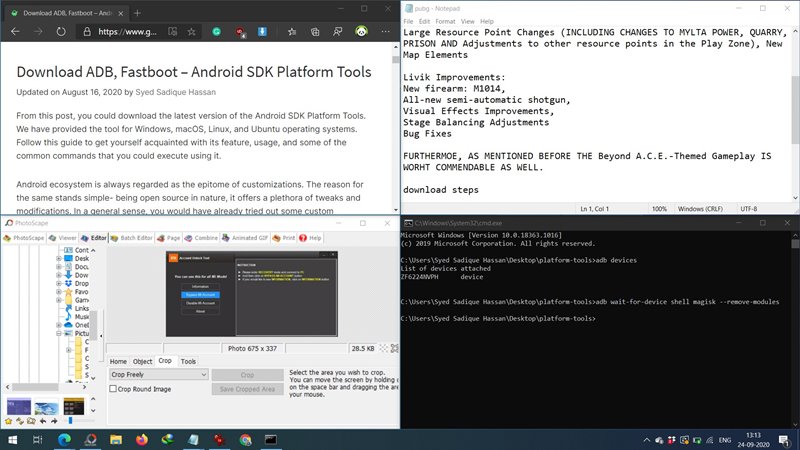
- Likewise, upon opening four windows, each of them gets one quadrant each.
The position of these windows aren’t fixed, you could drag and change its position as per the liking. Likewise, you could also change the size of each of these windows. We will discuss all this later on this guide. First, let’s turn our attention on how to enable this feature.
How to Enable Windows 10 Split Screen
If you are looking to enable the Windows 10 Split Screen functionality on your PC, then you are not alone. Even on the Microsoft Forum, over a thousand users are already looking for the concerned steps. In this regard, the below instructions steps will come in handy.
- Head over to the Settings menu on your PC. For that, use the Windows+I shortcut keys.
- Then select System from the Settings page.
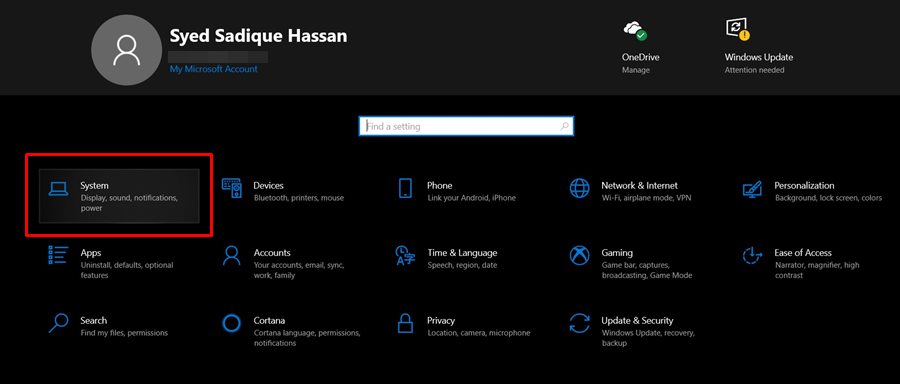
- Click on Multitasking from the left menu bar and make sure the Multitasking toggle (Snap Windows) is enabled.
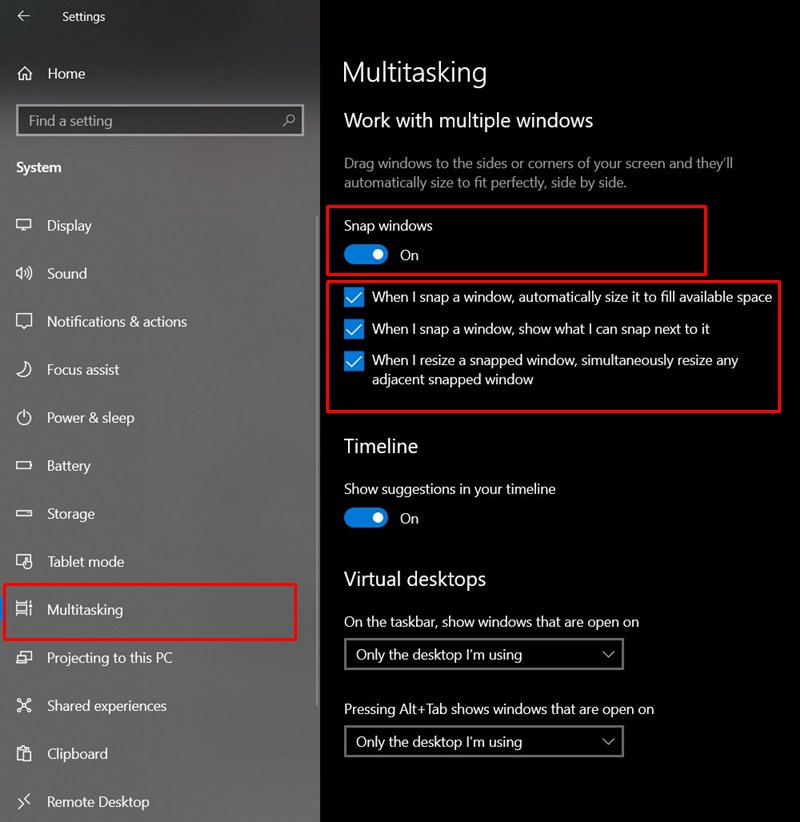
- Just below that, there will be three other options, it is recommended to keep them check-marked as well.
How to Use the Split Screen Feature
There are two different approaches that you could take. The first one involves using the mouse while the second method deals with the keyboard shortcut keys. Instructions for both these methods are given below. Try out the one that suits your requirements.
Method 1: Using the Mouse
If you wish to use two windows simultaneously, then click on the top bar of the first window to highlight it. Then drag it to the left or right of your screen using the left mouse click. As soon as you see a transparent region, leave the mouse button and that window will automatically be adjusted there.

Now you will see a menu on the other blank side of the screen with all the opened apps. Select the one that you wish to display on that side of the split-screen.
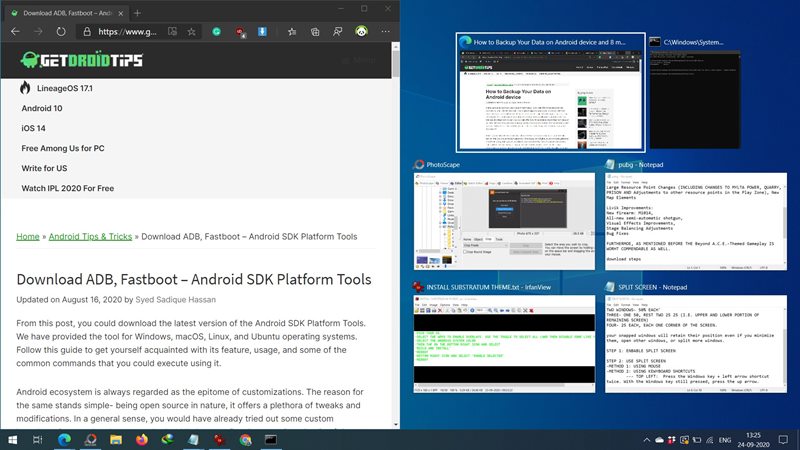
Along the same lines, you could repeat the steps for three and four windows as well. For example, in the case of three windows, drag one of the windows to the left of your screen. This will occupy the left side of the display or 50% of the entire screen. Then drag another app to the bottom right of your screen.
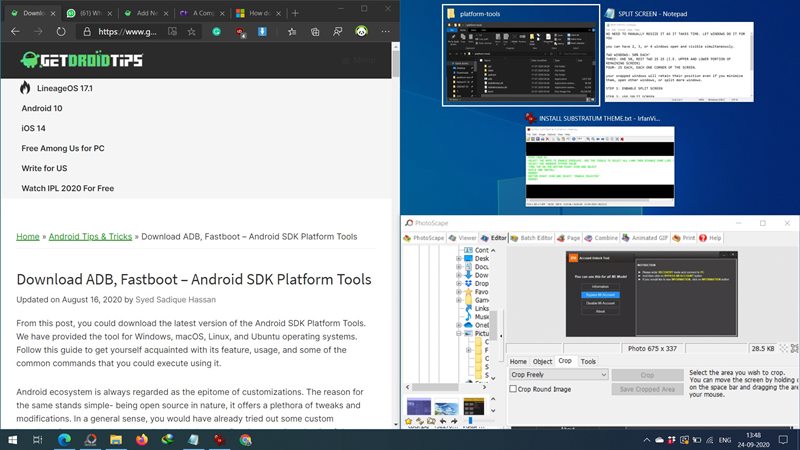
In the remaining portion (top-right), you will see the app selection window. Use the desired app that you wish to use as the third window in the split-screen. As mentioned before, both these windows will occupy 25% of the right-hand side of your screen.
Method 2: Using Keyboard
You could also use the keyboard shortcut keys to for Windows 10 Split Screen feature. To send a window to the left of your screen, use the Windows + Left arrow key. Similarly, Windows + Right arrow keys send it to the right. This is usually the case when you wish to multitask with two windows.
What if you wish to send a window to any corner of your screen (say when multitasking with three-four windows)? Well, the process is a tad bit different. For example, if you wish to send a window to the top left, then first off, click on the top menu bar of that app window to highlight it. Then press the Windows key + left arrow key twice, leave the left arrow key and now press the top arrow key once.
Likewise, for the bottom left corner, use the Windows key + left arrow key twice and then the bottom key once. Similarly to send a window to the bottom right, first press the Windows key + right arrow key twice, then leave the right arrow and hit the Down key once. The top right follows the Windows key + right arrow key twice and then the top arrow key once.
Tweaking the Windows 10 Split Screen Feature
You could further make some changes to the Windows 10 Split Screen feature. To begin with, you could resize these multi-windows simply by dragging the vertical bar and allocating the desired screen space to each of them.
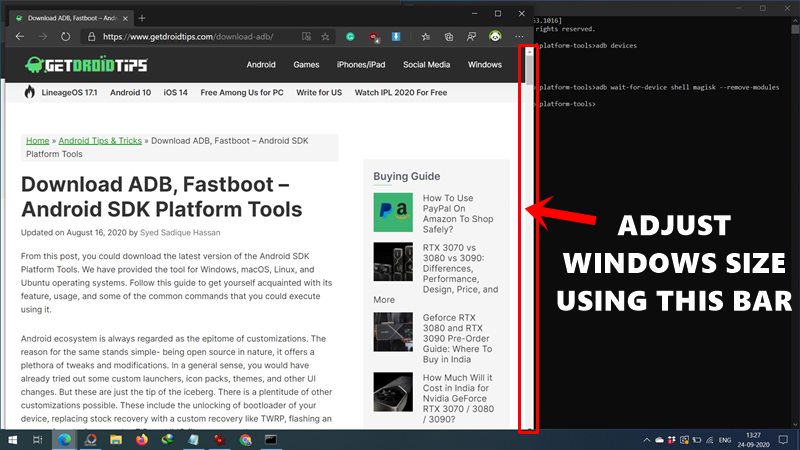
Then at any point in time, you wish to go back to the default state, then just maximize the required window. Or you could also click on the Show desktop icon situated at the bottom right of your screen (in the taskbar). Along the same lines, you could make use of the Windows+D shortcut to minimize all the multi-screen windows at one-go.
On that note, we conclude the guide on how to use the Windows 10 Split Screen feature. We have shared two different methods for the same, settle with the one that you find more comfortable to deal with. Furthermore, we would like to know your views in the comments about this useful multitasking feature baked into the OS. Rounding off, here are some other equally useful iPhone Tips and Tricks, PC tips and tricks, and Android Tips and Trick that you should check out as well.
