It’s annoying when important emails from your boss get lost in a pile of new emails. You might search each time on the inbox, trying to find that particular mail. But there is another method of doing this without all the manual work. Since this is an automated process, it saves some time. Hence this helps you use that time for doing other productive works.
Although this article is about creating Rules that move your mails to the desired place based on the specified criteria, so in this article, let’s see how to create rules and automatically move certain emails to a folder in Outlook.

How to automatically Move Emails to a Folder in Outlook?
In order to use features like automatically move emails to a folder in Outlook, you need to create some rules. So, let’s see how to create Rules for the most recently used versions of Microsoft Outlook.
- First, open the mail from the sender you wish to move automatically.
- Open the Messages tab and click on Rules and then click on Create Rule.
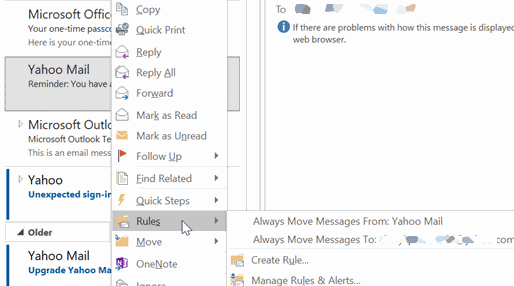
- Select the criteria that should meet. For example, you can specify “Subject contains” and specify words that should match.
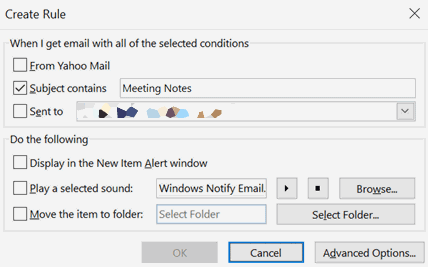
- Under “Do the following,” select “Move the item to folder” and select the folder to which you wish to move those emails to.
From now onwards, if you get emails from the sender meeting the criteria, this rule will automatically move the mail to the folder. Also, you can select apply his rules to existing mails in the inbox at the next prompt.
Custom Rules
Apart from sender specific rules, you can also set some custom rules. For example, if you receive emails from people in the sales department, you can set it to automatically move to the “Sales” folder. To accomplish it,
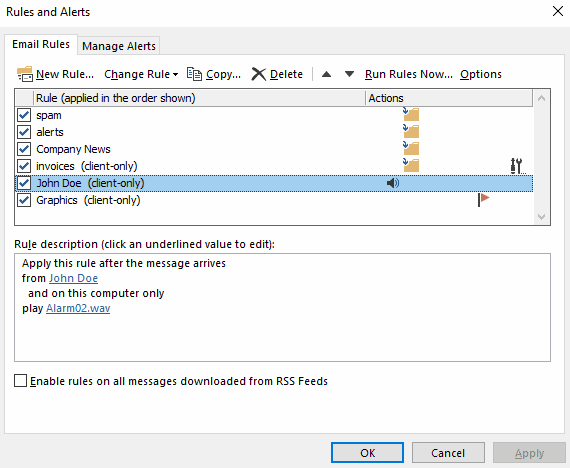
- Open Home > Rules and select Manage Rules & Alerts.
- Now from the List of Rules, click on New Rule.
- Now from the Rules wizard, you can choose the existing templates, which are also very useful. However, you can set a new rule from scratch if you need a very complex rule.
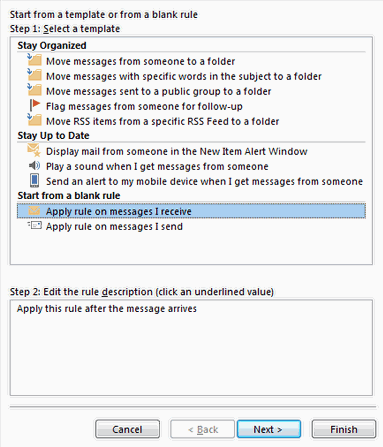
- For this case, let’s choose the one in Stay Organised category. Then specify your criteria and target folder.
(Note: to edit values, click on the highlighted text, and provide the value in step 2. The pic above only represents the concept.) - Save the rule and, if required, apply now to organize existing mails.
That’s it. You can move emails to the specified folder using these rules.
For Outlook Web
So what if you use Outlook web? The settings are also similar, but the way you access the settings changes in the web versions.
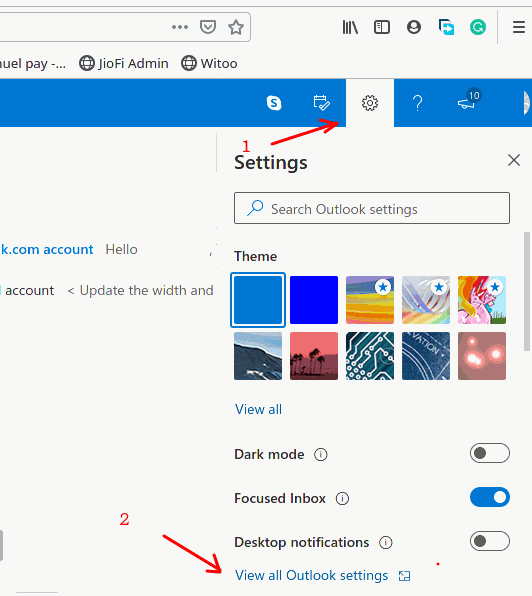
- Open the Settings icon on your screen and click on View all outlook settings.
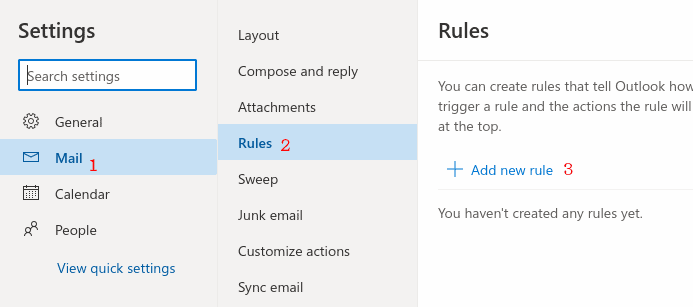
- Now, click on Rules under Mail options and click on New Rule to add a new rule.
- Set your rule from this window using the settings.> First, set a name for this new rule to identify it later.
> Then Click on the condition and select a condition you’re going to set for this new rule. Here I want to move mains from certain senders. So I select “From” and specify those names or mail addresses.
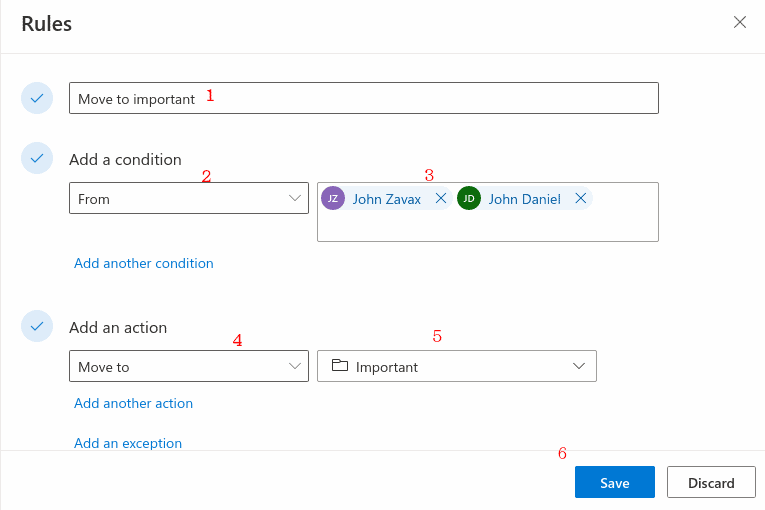 > Finally, specify the action to do, here. In this example I’m moving those emails to a folder (with the name Important).
Conclusion
So this is how you can automatically move emails to a specific folder. These steps are easy and very useful for productivity. So if your organization uses outlook, this particular setting will help you to manage or organize your email very efficiently.
- How to Fix Server Responded: 421 Cannot Connect to SMT / SMTP server?
- Best Outlook Keyboard Shortcuts for Windows and Mac
- Apple Mail vs Outlook: Which Email App Is Better for macOS?
- How to fix Error Code: 0x800CCC6F While Sending E-mails from Outlook?
- Fix Outlook Error 0x800CCCDD Your IMAP server closed the connection?