iPhone’s slow-motion clip recording is one of most the most preeminent feature that makes your party clip to look vivid. But what if you ever require to convert slo-mo video to normal video on your iPad and iPhone? Hold on, and we are here to solve this problem since we have some quick and easier way to convert your slow-motion video to normal video on iPhone and iPad.
It’s not an easy job to create the best slo-mo video. In case you are craving to make your party shot more jazzy than slo-mo is for you. In this article, we will show you how you can edit slow-motion videos on your iPhone and iPad for free.
Read this article till the end and learn how to edit slow-motion videos on your iPhone for free without downloading any application. There might be a couple of other questions that you have in your mind, so without wasting ado, let’s get started with our complete guide.

Page Contents
Convert Slow Motion Videos To Normal Video On iPhone and iPad?
Switching anything captured in slow motion back to a normal speed video on the iPhone is pretty easy. The Photos app has acquired a symbolical slow-motion video converter that you can use to modify slo-mo selfies into traditional clips with dexterity.
Steps to Change Slow Motion Videos To Normal Video
Nevertheless, the stock photos app transforms videos without any deterioration of quality. Follow the procedure given below:
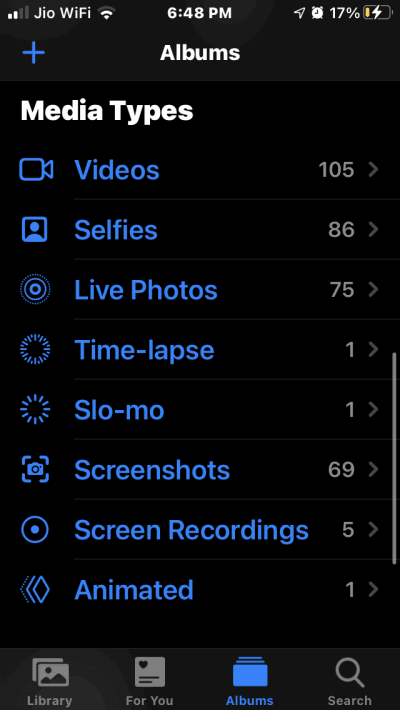
Start the Photos app on your iPad or iPhone. Now, click on the Albums tab found at the bottom of the window.
Then, navigate through the Media Types section and tap on the Slo-mo option.

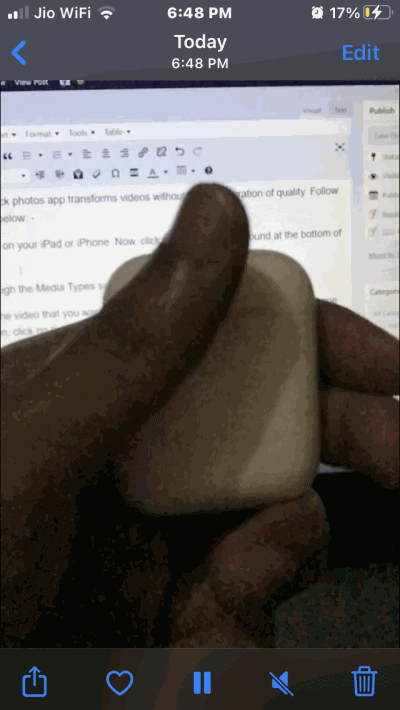
Next step, choose the video that you want to transform into a conventional video on your iPhone or iPad device. Then, click on the Edit button found in the top right corner of the window.

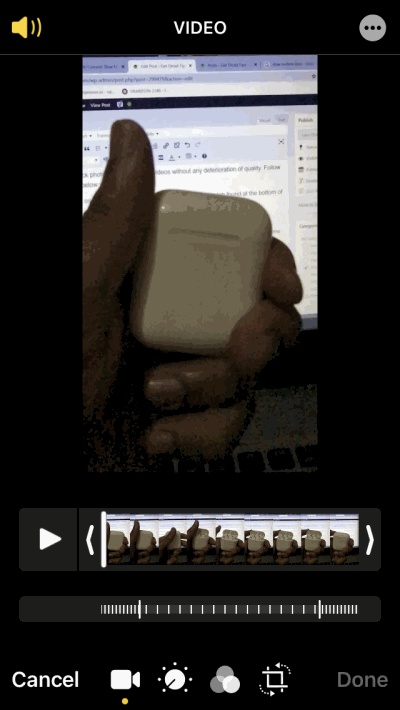
Now, you’ll notice a slider with vertical lines at the bottom of the video. The tightly packed vertical lines placed at the right and left ends represent the normal speed, and the middle one that has plenty of space between vertical lines represents slow speed.

To transform the slow-motion video, what you have to do is simply drag the slider to ensure that vertical lines are tightly placed or positioned closely.
When you have done with the editing, simply tap on the play button to preview it and make sure to hit the Done button found at the right corner of the screen after previewing it. That’s it! Now your slow-motion video is successfully converted into a Regular video.
Reverse Changes made to Slo-mo video
If you ever want to reverse this process to bring back the slo-mo video, simply open that video again and tap on the Edit button.
Then, you’ll notice a Revert button appears at the bottom. So click on it.
Click on the Revert to the original button from the pop-up menu to confirm.
Conclusion
Currently, everyone is crazy about this exciting feature, and why not because iPhone slow-motion clips recorded at 120 fps or 240 fps that is incredible to watch. Even after you convert your video into a normal video is still presents itself in the slo-mo category.
In case you think that this process reduces the overall quality of the video, then don’t worry about that because, after conversion, it does not reduce the quality of your video.
Unfortunately, with the help of the Photos app, you cannot convert the standard iPhone videos shot at 24 or 30 fps to slow-mo, but for this type of video, you can use iMovie or any other suitable iPhone or iPad apps for this work. That’s all we have for you on How To Convert Slow Motion Video To Normal Video On iPhone And iPad. We hope this guide helped you.
