There is no doubt that NVIDIA offers a powerful and stunning dedicated graphics cards segment for PC games or high graphics-intensive works. If you want an ultimate PC gaming experience on your Windows OS then NVIDIA GPU (Graphics Processing Unit) is the best one in the market for ages. However, some of the unfortunate users may find NVIDIA Driver not compatible with this Windows version error in some cases. So, let’s follow the troubleshooting guide below.
Whether it comes to video editing, photo editing, graphic designs, animations, PC games, and some other graphics-hungry applications, NVIDIA is known to all. Now, the mentioned problem mostly appears to the NVIDIA graphics card users whenever they want to install the latest graphics driver update.
Also Read
Therefore, users can’t install the latest patch updates on their computer for the NVIDIA GPU which isn’t expected at all. Now, most of the users may get panic and starts thinking about whether the GPU isn’t supporting the Windows version or they need another GPU card. Well, that’s not the case and if you’re also experiencing the same issue then you’re in the right place. Here we’ve shared all the possible workarounds below to resolve this issue completely.
Page Contents
Fix NVIDIA Driver not compatible with this Windows version
One thing you need to understand is that there is no issue with your PC configuration or your GPU card. The problem may occur due to either the Windows OS version or the GPU driver version. Another possible reason behind this issue can be the system architecture variant. That means if your Windows OS is 32-bit or 64-bit then you’ll also need to install the GPU driver accordingly.
Additionally, you’ll also need to check whether your Windows OS version and build is running on the latest one or not. In another way, you can also uninstall and reinstall the NVIDIA graphics driver on your PC using the DDU (Display Driver Uninstaller). Whereas updating your Windows OS, downloading NVIDIA driver using the GeForce Experience app can also become useful in most cases. so, let’s follow each and every method below.
1. Check Windows Version and Build
- Press Windows + R keys on the keyboard to open up the Run dialog box.
- Now, type dxdiag and press Enter to open up the DirectX Diagnostic Tool.
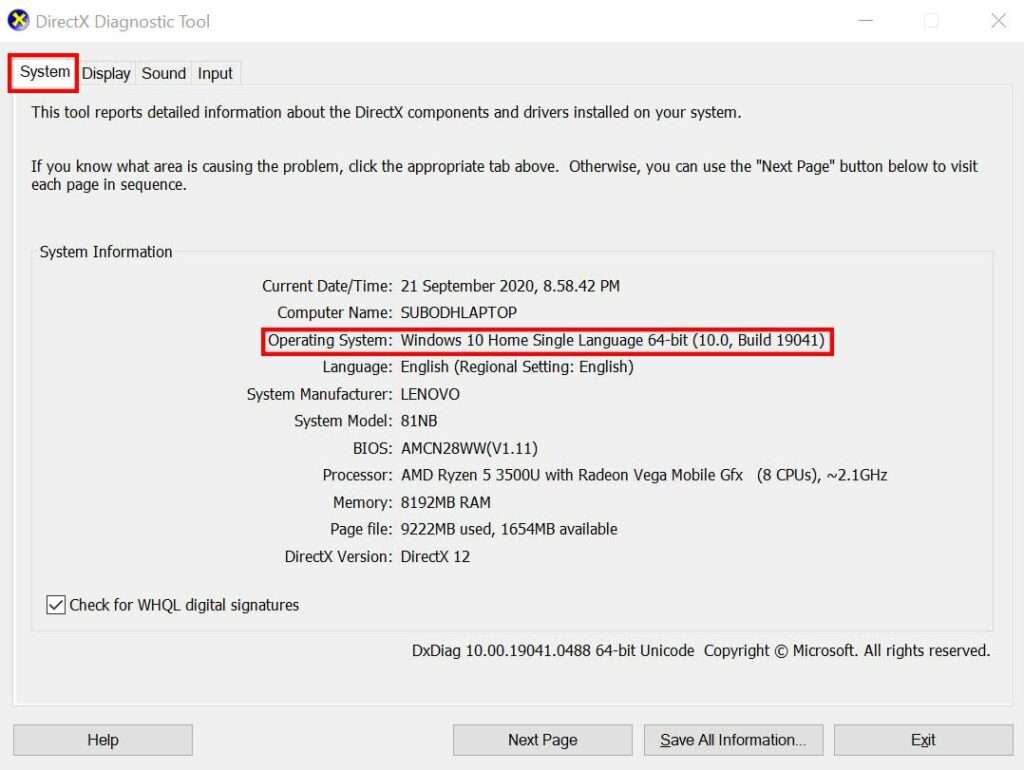
- Here you’ll be able to find both the Windows Operating System version and build number under the System tab.
- Make sure your Windows is running the latest 1703 version or higher to become compatible with using NVIDIA GPU. (At the time of writing this article, the latest Win version is 2004)
Also Read: Fix: NVIDIA High Definition Audio Not Plugged In Error
Now, if the version and build number aren’t updated then you’ll need to follow the next method to check for Windows update.
However, if you can’t find the actual Windows OS version on the DirectX Diagnostic Tool then you can type winver in the Run dialog box and press Enter to open up the About Windows page.
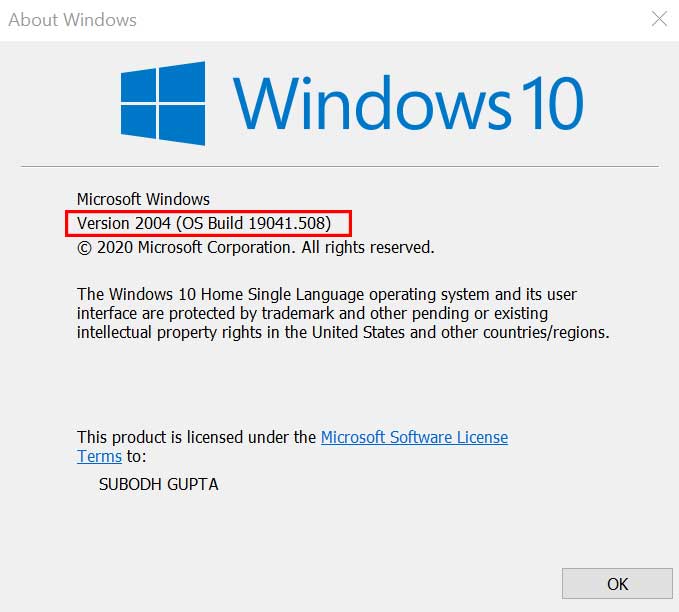
Here you can find out the actual Windows OS version along with the build number. Hope this will help you a lot to understand things.
2. Update Windows
It’s always recommended to check for Windows update and keep it up-to-date to get all the patch fixes, improvements, security features, other bugs fixes, etc. Meanwhile, updating your Windows OS version will also help other apps or tools to run properly on the machine. So, to do that, follow the steps below:
- Click on Start > Settings > Update & Security.
- If in case, Windows system won’t notify you for any update automatically then you should click on Check for updates.
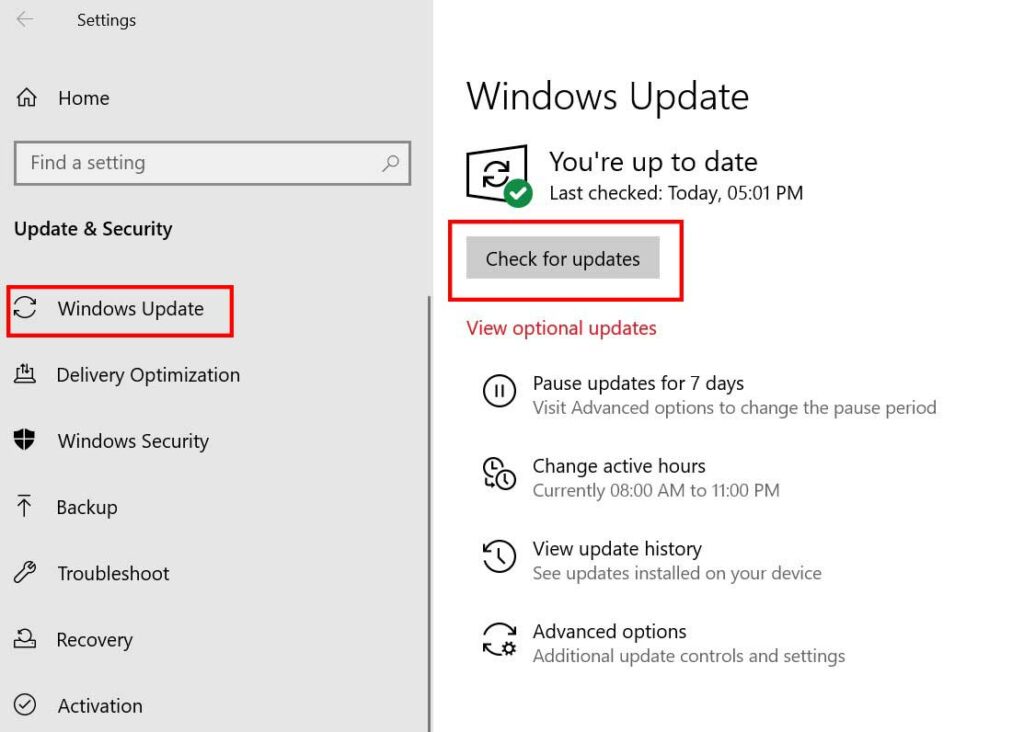
- If there is any latest Windows update available, make sure to Download and Install it.
- Once downloaded, the system will ask you to reboot your device to apply the changes.
3. Update GPU Driver
- Click on Start > Type Device Manager and click on it from the search result.
- Click on the arrow of Display adapters > Right-click on the graphics card.
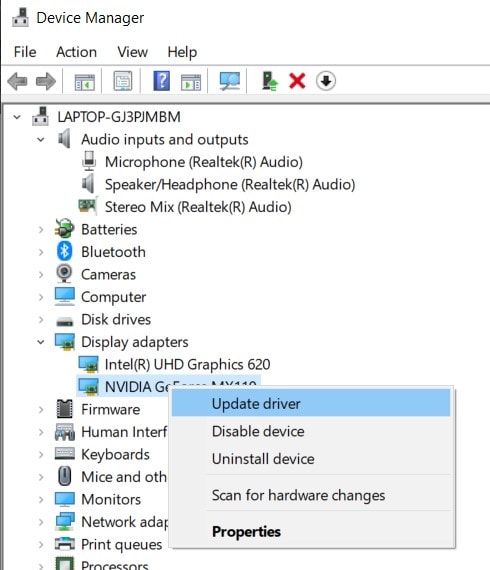
- Next, select Update driver > Choose Search automatically for drivers.
- If there is any update available, it will automatically download and install the update.
- Once done, restart your computer to change the effects.
However, if the native updating driver method doesn’t work for you, then try the following method to manually uninstall and reinstall the NVIDIA driver.
4. Uninstall NVIDIA Driver via DDU
So, the DDU (Display Drivers Uninstaller) tool will help you to easily uninstall the NVIDIA GPU driver from your computer in a clean format.
- First, download the latest Display Drivers Uninstaller software on your PC.
- Next, simply install the tool > Then turn off the internet connection on your PC to just uninstall the driver.
- Launch the DDU tool > Select your graphics driver (NVIDIA) from the drop-down list.
- Click on Clean and restart (Highly Recommended).
- Once the driver is uninstalled from the PC, it will ask you to restart your computer.
- Make sure to reboot your PC. Now, follow the next method to reinstall the driver.
5. Reinstall NVIDIA Driver via GeForce Experience
- Head over to the official NVIDIA GeForce website to download the driver.
- Now, download the GeForce Experience app on your PC and install it.
- Keep in mind that you’ve connected your desktop monitor via the NVIDIA GPU.
- Launch the NVIDIA GeForce Experience app > If it asks you to update the version, then simply update the app first. Otherwise, proceed to the Drivers tab.
- Click on Check for Updates > If there is the latest driver update available, click on Custom Install. (You can also go for Express Installation)
- Enable the checkbox to Perform a clean installation and then proceed to Next.
- Follow the on-screen instructions to complete the installation process.
- Once done, restart your computer and you may not get NVIDIA Driver not compatible with this Windows version error anymore.
That’s it, guys. We assume you’ve found this troubleshooting guide very helpful. For further queries, you can comment below.
Also Read
