Thousands of emails are sent or received every day. In such scenarios, it is obvious that you might get important emails from time to time. And since many people use Gmail as their primary email provider, you also might be using Gmail as well. Recently, many users have complained about Gmail notifications, not working issues on their Android devices.
Most of these issues arise because of faulty notification settings or other system settings trying to block Gmail notifications on your Android smartphone. So here is a troubleshooting guide to fix this problem.
Page Contents
Fix Gmail Notifications Not Working issue
If you are not able to get notifications from Gmail on your Android, then these are the following things you need to keep in mind that maybe this can affect you for not getting notification
- Battery Saver
- Data Saver
- Automatic Date and Time
These are the major settings that stop you from getting any notification from your Gmail.
Also Read
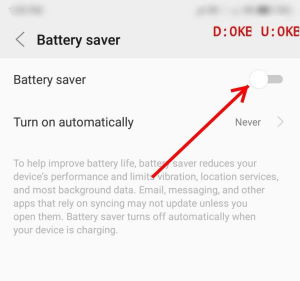
Fix 1: Battery Saver
A battery saver is quite common to use while you use your Android device. People always enable this option when they have to travel or work all day and want that battery drain a little slow.
Here are the following steps to disable the Battery saver option. It is for general android users. It can vary according to your Device and OS:
Step 1: Open Setting.
Step 2: Go to Battery.
Step 3: Open Battery Optimisation.
Step 4: Toggle off Battery Saver.
There are some other aspects you need to work on either that can lead your Gmail Notification, not working.
Fix 2: Data Saver
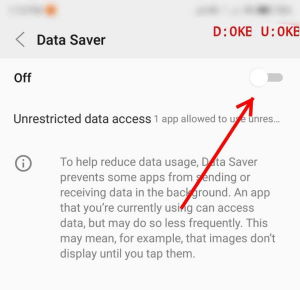
For saving your Data, your device stops asking for notification so that no extra Data usage can happen. Follow these steps to turn off the Data saver. It is for general Android options that can vary upon devices.
Step 1: Open Settings.
Step 2: Open Data Usage.
Step 3: Turn off Data Saver.
This can surely help you to get your work on Notification work.
Fix 3: Automatic Time and Date
If you were traveling, or reach a new country where the time zone is different from your previous one, then you need to go for this fix.
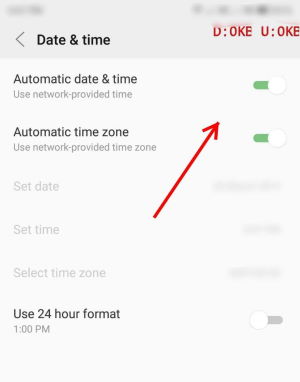
Sometimes Automatic Times and Date are disabled due to which several apps and their notification won’t work.
Step 1: Open Settings.
Step 2: Open Time and Date.
Step 3: Toggle on Auto Time and Date if it’s off in your device.
Now, if you traveled or by mistake from you, this option turned off, which can even lead to not getting Notification.
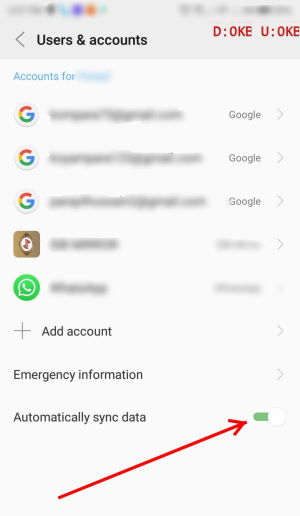
Fix 4: Sync Account in Android
This also an essential option if you are an Android user so that you can get all the notification on time with your almost every application you use. These are the following steps to Sync Account.
Step 1: Open Settings.
Step 2: Tap on Account.
Step 3: Toggle on Automatically Sync Data.
Fix 4: Clear Cache
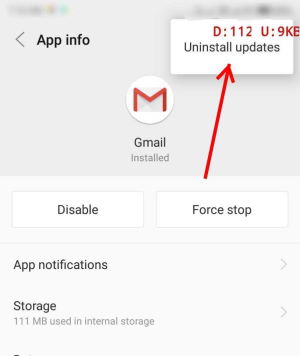
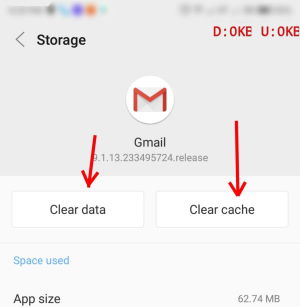
Clearing cache helps in order to get your application to work without any hurdle. You can simply clean the Cache of your Gmail app. These are the following steps to clear Cache from your Gmail App:
Step 1: Open Settings.
Step 2: Go to Storage.
Step 3: Open App.
Step 4: Open App and Notification.
Step 5: Browse Gmail.
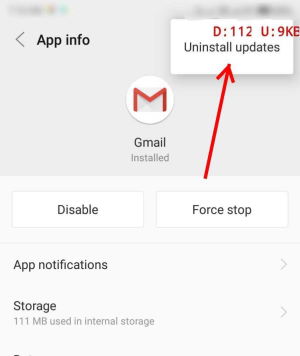
Step 6: Click on Storage.
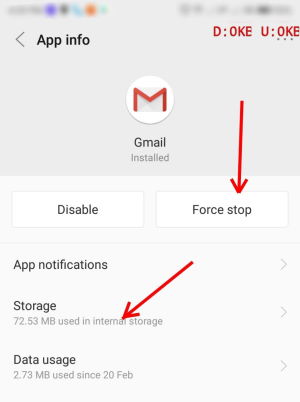
Step 7: Click on Clear Cache.
Step 8: Open Gmail.
Step 9: Log in to your Gmail account.
After this, your Cache will be deleted, and also your Notification will start working again. However, you might need to re-login to your Gmail account.
Fix 5: Allow your Notification
By anyone, mistake Notification can be turned off. So you just need to turn on your Notification only. Steps to turn on your Gmail Notification:
Step 1: Open Settings.
Step 2: Open Apps and Notification.
Step 3: Go to Notification.
Step 4: Open App Notification.
Step 5: Select Allow Notification.
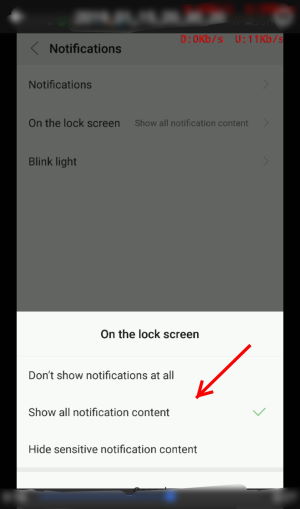
So that you can get Notification again from not just only Gmail but from all the applications by this method.
Fix 6: Re-active your Gmail Account
If the problem persists, then you can go for this last option only. Which is the last hope to resolve your notification issue? While I hope you remember your credentials to re-login to your Gmail account.
Steps to follow:
Part 1: Remove Account:
Step 1: Open Settings
Step 2: Open Account
Step 3: Select Account Name/Names
Step 4: Remove Account
Part 2: Add account again:
Step 1: Open Settings
Step 2: Open Account
Step 3: Add Account
Step 4: Enter your Email and Passwords again
After attempting both parts, you have re-added your Gmail account to your Android device again.
Conclusion
These are some troubleshooting steps to fix Gmail notifications, not working issues for your smartphone. If none of these methods work for you, then we suggest you uninstall the Gmail app and install it again. The issue might arise because of some technical difficulty also. So make sure to update your Gmail app from time to time to avoid such errors.
