If you have ever lost your phone, you will know just how much of a hassle it can be just trying to get it back. But thanks to advances in technology, you can now find your missing phone using Alexa. Different operating systems and smartphone manufacturers have their methods for tracking down and recovering lost devices. Apple has its built-in “Find My iPhone” feature on iCloud – which you can learn how to use here – while Android devices can be tracked using Google maps, while Samsung has its own Find My Mobile feature, which helps it’s users track and locate their kissing Samsung devices.
Not to be left behind, Amazon has also come up with its own device tracking feature, which uses its artificial intelligence-powered smart assistant, Alexa. Alexa can help you find your device using a wide range of features, including tracking your phone and even giving you the location where your device was last seen or where it was last detected. Let us now get into the business of the day and show you just how you, too, can leverage on Alexa’s powers to help you track and/or locate your missing device.
Also Read
How to Use Alexa as an Intercom
Fix: Firestick Connected to WiFi, But No Internet
Amazon Photos Not Working, How to Fix?
Alexa Won’t Play My Radio Station, How to Fix?
Does Alexa Fart on Command, How to?
Why Is My Amazon in Spanish and How to Fix It?
Why is Alexa spinning blue light? Reason and Solution
FREE Amazon Gift Card Code (August 2023)

Page Contents
Putting Alexa to Work by Enabling the “Find My Phone” Skill
Just like any intelligent being, Alexa needs to be trained to find your missing device. It is a skill that Alexa must learn, but unlike with humans and other living things that have to go through months and even weeks of training before they can master any skill, all Alexa requires is a few clicks and taps, and the skill will be learned quickly and easily.
To teach Alexa to learn and master the skill to find your missing phone, here are the steps you must take:
- Launch the Alexa application on your mobile device.
- Tap on the menu icon (three horizontal bars) on the top left-hand corner of your device’s screen.
- Tap on the Skills & Games options from the list in the drop-down menu.
- Click on the search icon (image of a magnifying glass) in the top right-hand corner of your device’s screen.
- Tap on the Find My Phone option from the resulting list.
- Click on the search results that appear at the top of the list, and this will take you to a page containing an exhaustive list of options. Alternatively, you can also tap on the skill labeled Find My Phone, a skill which shows up with a logo.
- On the ensuing screen of skills, click on the Enable to Use option from the list of options.
When you have done this, you would have successfully taught Alexa how to use the Find My Phone. This is the skill that Alexa will use going forward to track and find your device should it ever go missing in the near future.
At this point, you will then need to employ the services of third-party application software that are compatible with the Alexa software to help track and locate your device. The following are some of the applications you can connect with the Alexa artificial intelligence software to help pinpoint the location of and find your missing phone.
Use the TrackR App to Create an Alexa Tracker
One of the officials Finds My Phone applications upheld by Alexa-empowered gadgets is Tracker. It’s genuinely simple to set up, however, doesn’t work for each circumstance. Here’s the manner by which to check on the off chance that it will work with your gadget:
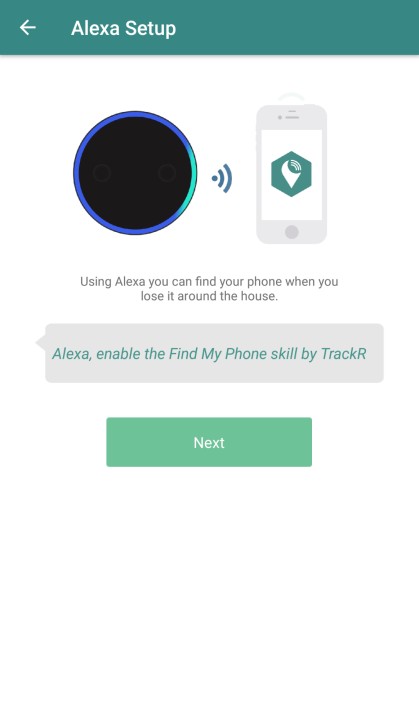
- Download and enable the Trackr app on your Alexa gadget. You can do this through your associated cell phone (the phone or tab you’ve connected to your gadget), or essentially state, “Alexa, ask Trackr to find my phone.” (Note that prior to losing your device, you have to have installed the Trackr app on the device that you are trying to find for this to work. You can download the Trackr app for Android here, and you can download it for iOS here).
- Open up the Trackr app on your smartphone, then select the Add A New Device option.
- Click on Alexa Integration, and promptly follow the instructions on the screen in order to connect your smartphone to your Amazon Echo loudspeakers.

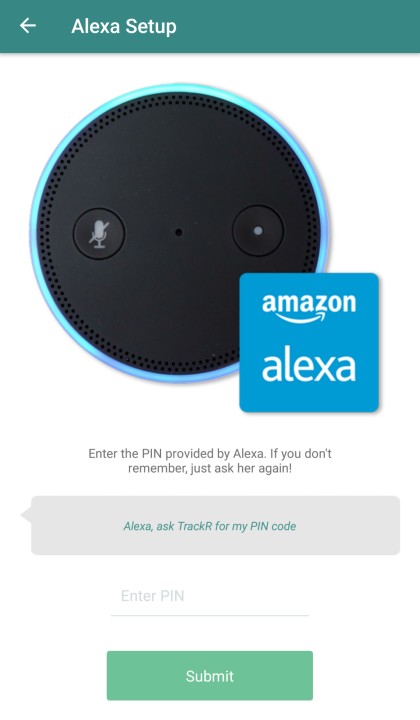
- For some added security, there is extra authentication, which requires you to follow a few more steps where you will be required to connect a PIN from your Alexa-enabled device to your smartphone.

- Follow the instructions delivered on to the screen in order to complete the process of linking all of your accounts together.
- At this point, you will have successfully enabled two new commands. One of those commands will be to ask Alexa to give you the last known location of your device, which will lead Alexa to inform you about the address of your phone’s last known location. The second command will be to ask Alexa to put a call through to your phone, of which it will do just that.
Using the Cell Phone Finder App to Get Alexa to Call Your Missing Phone
Setting up the Cell Phone Finder is a bit trickier and more complicated than using the Trackr app. However, because not every phone is compatible with the TrackR app, your options may be limited, and you may find yourself having to use the Cell Phone Finder app instead. But not to worry, we will show you just how you, too, can set up the Cell Phone Finder app on your device.
Note that prior to losing your device, you have to have installed the Cell Phone Finder app on the device that you are trying to find for this to work.

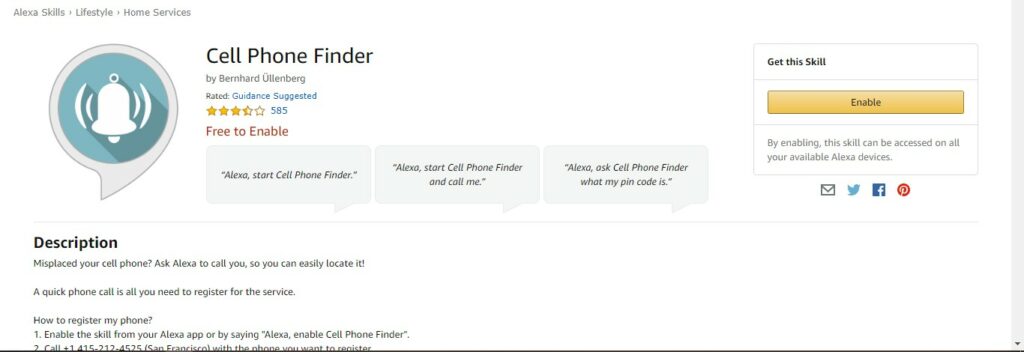
- Download the Cell Phone Finder app to your Alexa-supported device. You can download the app manually from your app store, or you can issue the command, “Alexa, enable Cell Phone Finder.”
- You can calibrate your device to connect to this skill by dialing the number (415) 212-4525 using the phone you want to register with the app.
- After you have successfully called the number, say “Alexa, ask Cell Phone Finder what my PIN code is,” and Alexa will read out your registered PIN code to you.
- Type in the PIN into your smartphone, and your two devices will immediately be connected if the PIN is found to be correct.
To use the skill, say, “Alexa, start Cell Phone Finder and call me.” Your linked device should start ringing.
It is important to note that you can use this skill to connect to only one mobile device. If you would like to have a different mobile device connected, then you will be forced to uninstall the skill and then make Alexa learn it over again by undergoing the process of registration all over again.
Setting Up Your Own Personalised Alexa Skill Using the IFTTT Platform
This method is even more complicated than the previous one. However, once you can master it, you will automatically know how to use a system that would enable you to connect all kinds of devices. This method involves the use of the service called IFTTT, which means “If This Then That”.
IFTTT is a website that enables users to create connections between different internet-connected devices. IFTTT is so efficient that it helps you set up connections that you would otherwise not be able to set up. In order to learn how to connect both of your devices so as to be able to create a connection between the two of them, follow the steps below:
- Log on to www.ifttt.com log in to your account (you may also download the IFTTT app on your Android device here. You can also download the IFTTT mobile app on your iOS device here). If you are a first time visitor to the site or don’t have an account yet, then you should first of all sign up for a free new account before proceeding to the next step.

- Create the channels that you would need. In order to be able to do this, you should click on the Channels icon, which is located at the top of the screen. Click on the Alexa channel, and then click on the Select Connect button. After this point, you will then be required to log in to your Alexa account in order to confirm the connection you have just made.
- In the next phase, you should create your own Phone channel. In order to do this, click on the Channels tab all over again, and then proceed to do a search for “Phone Call”.
- Once again, click on Connect, and then type in your phone number and click on the Send PIN button. The website service will call your phone, and then you can confirm the PIN code.
- Immediately you succeed in adding both of your devices to the website’s servers; you may go ahead and create a phone call connection between your two devices. To do this right there from the IFTTT website, you should start off by first selecting your username through the menu in the top right-hand corner of your computer screen, and then select the Create option from the available menu.
- Select This to begin the process of creating the connection and then search for Amazon Alexa right under the Choose Trigger channel.
- Choose the Say a Specific Phrase option as your preferred trigger, and then type in something that you are not likely to forget very easily. We recommend typing something such as “Locate my device” or “I can’t find my device.”
- Select Create Trigger, and then click on That to set up the subsequent part.
- Click on the Phone Call channel and then click on Call My Phone as your preferred course of action to take.
- Lastly, click on Create Action in order to finish up the connection that you have been setting up, and then you can proceed to select Create Recipe in order to lock up and secure everything in their place.
If you are an Android device user, you should be able to create a different recipe that enables you to get the IFTTT website to turn the volume on your phone to the maximum decibel. This would ensure that your chances of hearing it ring are much higher since your device’s ring would be higher than it would if you otherwise don’t utilize this feature before trying to dial up your device.
At this point, you should be able to simply call “Alexa” and follow the name up verbatim with the particular command you typed in earlier. This will put a call through to your phone, and it should begin ringing immediately. Yet again, it is important to remember that this is a method which requires that you must have downloaded and enabled the IFTTT service prior to losing your device.
If this explicit guide has been helpful to you, kindly let us know in the comments section below. We love to hear from you, and we would be elated to hear all about your thoughts and suggestions on how we can make this guide even more helpful to all of our readers. Cheers and good luck with keeping your devices safe and sound!
