From this post, you can download and install the latest Android USB Drivers onto your Windows and Mac platforms. Thanks to the open-source nature of the Android OS, it allows you to carry out a plethora of tweaks. The general users could try out launchers, icon packs, and themes among others. Likewise, they could also transfer files between their device and PC, share the device’s Internet via USB Tethering, or make use of the MIDI or PTP mode.
Also Read
The tech enthusiasts could take all this a step further and execute ADB and Fastboot Commands. They could then unlock the bootloader, flash custom ROMs, install a custom recovery like TWRP, or root their devices. But for most of these tweaks to be carried out, you will have to connect your device to a PC via a USB cable. In turn, your PC should be able to recognize the connected device. This is only possible when you have the necessary drivers installed. In that regard, you can download and install the latest Android USB Drivers for Windows and Mac from this guide.
Page Contents
Why we need USB Drivers?
One important question that might come to your mind is why you need to install these drivers. Well, there exists a plethora of reasons for the same. From the usual file transfers to making use of MIDI or PTP mode, the opportunity stands aplenty. Apart from that, you could also share your device’s internet connection via USB Tethering. But this is just the tip of the iceberg. Being open-source in nature, Android allows for a plentitude of customizations.
These include the unlocking of the bootloader, installing a custom recovery like TWRP, and gaining administrative privileges in the root form. Likewise, there exist many types of ADB and Fastboot commands that you could execute using your PC. But for all of the aforementioned tasks, there exists a major requirement. Your PC should have the necessary USB drivers installed. In this regard, you could take either the manual or automatic route. This guide will focus on the latter, i.e., how to manually install the Android USB Drivers on your PC.
How to Manually Install Android USB Drivers on your PC
It is always good to Manually install Android USB drivers on your PC. Because you never know when you or somebody else gonna need them. Even if you don’t own an Android smartphone, there are chances that someday, one of your friends or family members will ask you to transfer photos, files, etc. to the Android smartphone. And if you don’t have Android USD drivers installed on your PC, you will disappoint them a BIG TIME!
But hey, don’t worry. Today in this blog post, we will explain to you – how to install Android USB drivers. We will guide on to install Android USB drivers on both Windows PCs and Mac computers.
Download USB Drivers:
For all brands: Android USB Drivers
SDK: Download Android SDK Platform Tools
Installing Android USB drivers in Windows PC
Installing the Android USB driver is pretty hectic when it comes to Windows. But don’t worry, we will guide you in this tutorial. Simply follow the steps down below.
1. First of all, install the Android SDK on your computer. You can download it here.
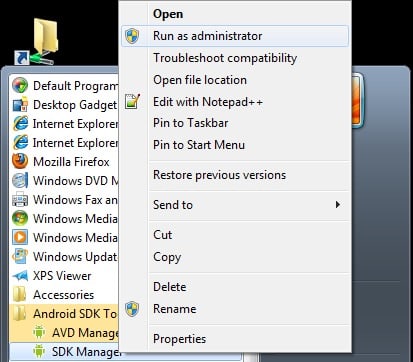
2. After installing the Android SDK, go to the start menu. Select Android SDK Tools -> SDK Manager. Right-click on it and select Run as Administrator
Note: Please make sure to run SDK Manager in administrator mode. Otherwise, you will face trouble in installing new components.
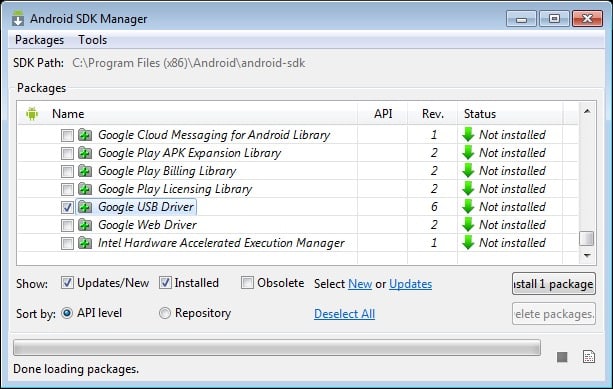
3. In the SDK Manager, select EXTRAS. There you need to select Google USB driver and then click Install 1 package.
4. When the installation is complete, plug in your Android device.
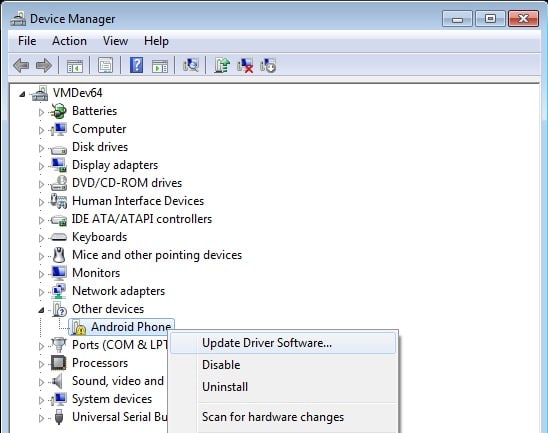
5. Open the device manager on your PC. You can do it by searching the “Device Manager” in the search bar. Here select Android phone, right-click, and select – Update driver software
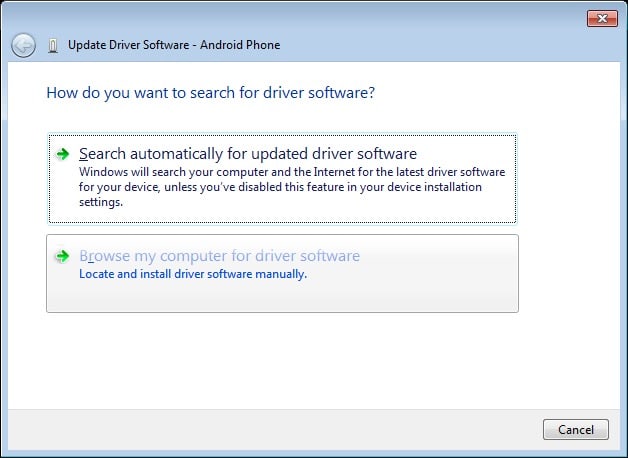
6. A new dialogue box will appear, select “Browse my computer for driver software” from the options.
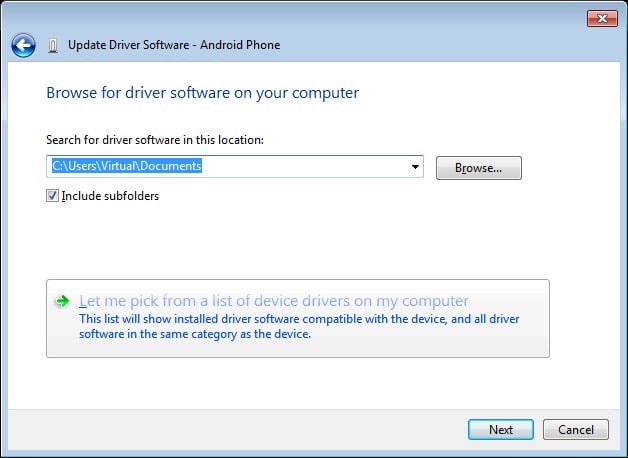
7. Now select the “Let me pick from a list of device drivers on my computer” option.
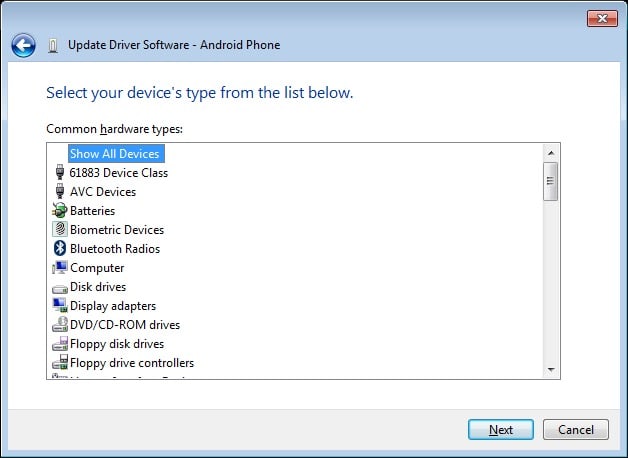
8. Select “Show All Devices” from the drop-down menu.
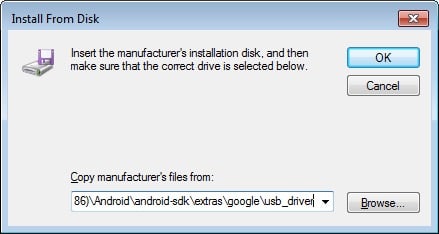
9. Click over the “have disk” button
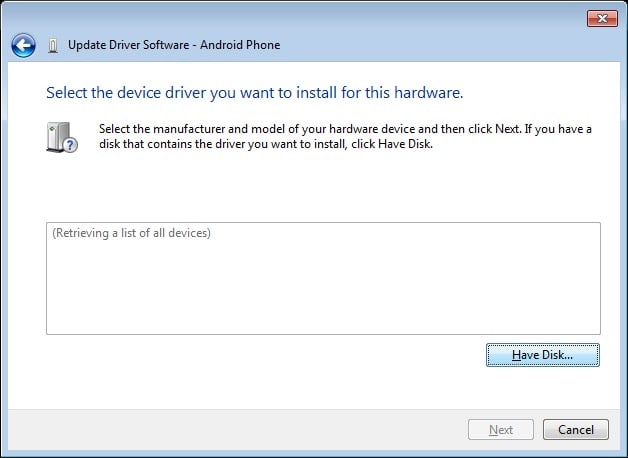
10. Enter the path for the Google USB driver.
C:\Program Files (x86)\Android\android-sdk\extras\google\usb_driver
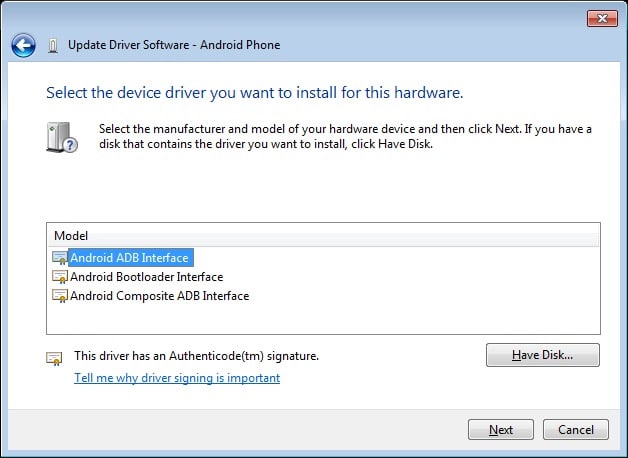
11. Select “Android ADB Interface” from the list of devices.
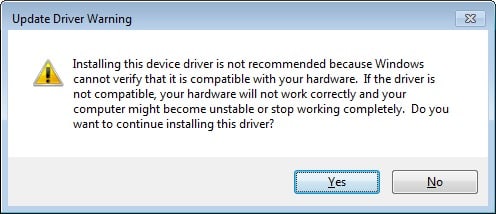
12. Confirm the Android USB driver install by pressing the “Yes” button.
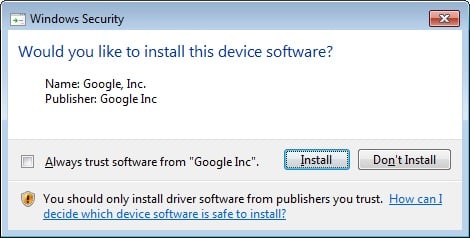
13. Press Install.
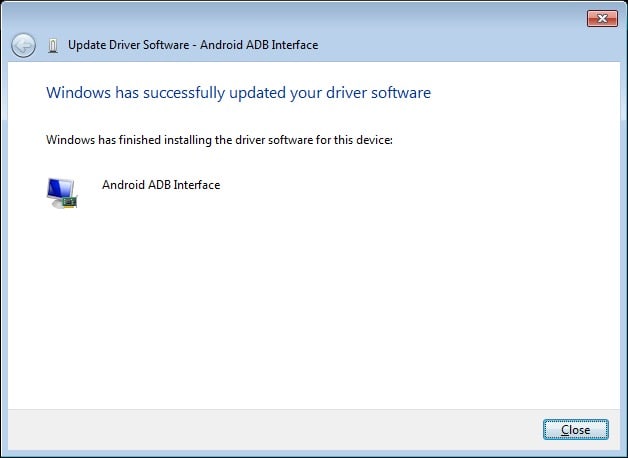
14. Now, the installation is complete. You can click on the close button to terminate the installation wizard.
This is a detailed guide on How to Install Android USB Drivers on your PC Manually. You can also install custom Android USB drivers for Windows that come from the official manufacturer’s site. These include Samsung USB drivers, HTC USB drivers, etc. You can find these on official manufacturers’ websites.
Also, Read: Download Manufacturer-Based Android USB drivers.
Installing Android USB drivers in Mac OS
Installing Android USB Drivers in Mac is rather easy as compared to Windows. All you need to do is install Android File Transfer for Mac, and you’re good to go. It will automatically connect Android devices and your Mac computer to share media and comment files.
Want to download the ADB Fastboot tool?
We have already written a complete guide on downloading and installing the ADB Fastboot tool on your PC/Laptop. We also shared the basic ADB Commands guide for you to learn.
