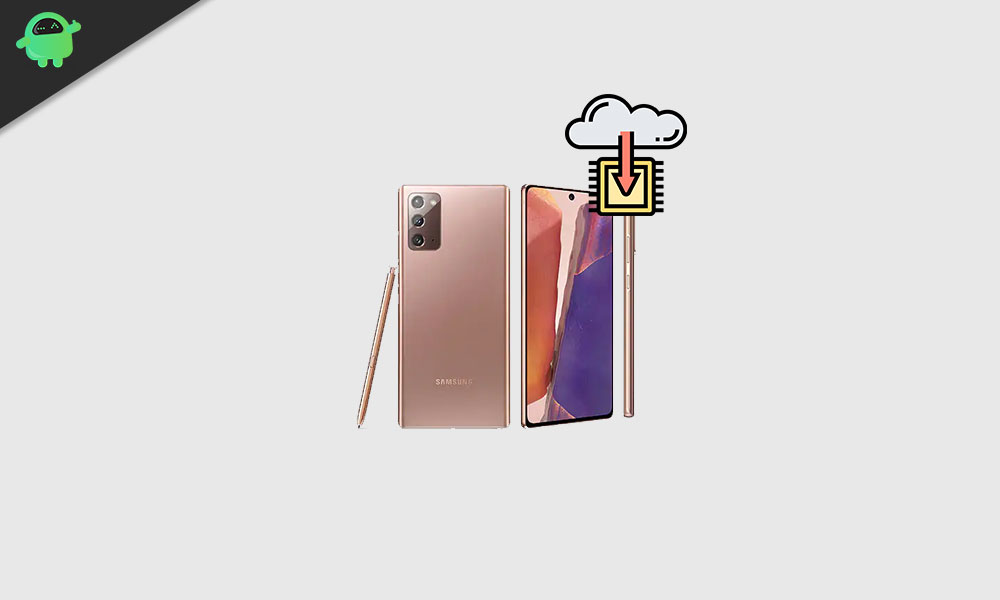
In this tutorial, we will show you how to install the modified Custom ROM on Galaxy Note 20 / Note 20 Ultra. While the Samsung Galaxy Note series has always known to be among the most power-packed flagships, Note 20 and its Ultra variants seem to have taken it to the next level. Boasting of the Snapdragon 865+ chipset and Adreno 650 GPU (USA Variant) coupled with 512GB 8GB RAM, and the specs sheet could put all the other flagships to rest. Along the same lines, its triple rear camera setup of 108+12+12MP setup is among the best in its class, with the 8K@24fps video recording capacity proving to be the icing on the cake.
Also Read
While the feature list is definitely impressive, but this is just the beginning. You could add tons of new features and customizations to this device by flashing a modified custom ROM. Although the device has just been released for the general public, it is quite commendable to see such an active custom development going on. On that note, if you are looking to try out this ROM, then this guide will come in handy. We will list out the necessary instructions needed to install this modified Custom ROM on Galaxy Note 20 / Note 20 Ultra. Follow along.
Page Contents
Modified Custom ROM’s Feature List
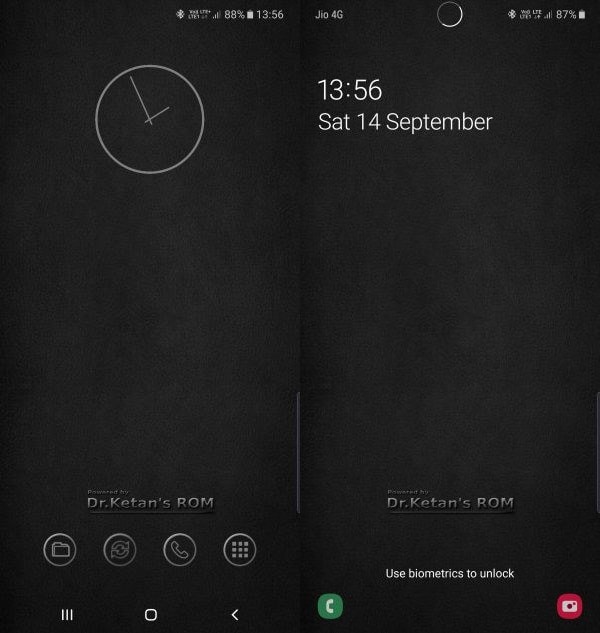
The name of this ROM is Dr.Ketan ROM. It has been developed by XDA Recognized Developer / Recognized Contributor dr.ketan, something that is pretty much evident from the ROM’s name itself. talking about the feature, well it has managed to incorporate quite a few of them. Here is the complete list of all the tweaks, customizations, and the features that the ROM beholds:
-Based on stock Android Q
-No more Combo key requires, a simple reboot will always reboot with root
– Ad-Free QS Panel Toggle
– Native call recorder (Manual) While you are on call – click 3 dot – Record
– Removed many stubs & common bloatware
– Removed carrier bloatware
– More secure OEM patch.
– High Volume warning disabled
– Dual SIM + SD card pre-patched
– Debloated unnecessary craps (tried to preserve most functions though)
– Prefixed Titanium freezing while restoring apps
– Added some important Samsung stuff:
-Calculator,
-Music,
-S Health– Probable fix for Titanium Backup schedule
– Internet browser Secret mode
– S Health patch for using with a rooted device.
– ROM Tool with the following Options:
-Long Press Home customization: Select Device assistance as LP Home from settings, then select if you want to use it to assign to any
-AdFree mode Enable/Disable
-ROM Control – See below
-Update & Fix-ROM Control:
-Battery Bar with thickness and color option
-Network meter with Toggle (Lt/Rt/Quick Panel/None) with color option
-Virtual Key with Toggle (Lt side – Menu, Rt side – Power, Centre – Home)
-Double-tap status bar to sleep
These were all the features of the Dr.Ketan ROM. Let’s now check out the instructions to install the modified Custom ROM on Galaxy Note 20 / Note 20 Ultra.
Install Modified Custom ROM on Galaxy Note 20 / Note 20 Ultra
Before we list out the steps, there are some pretty important points that need your attention. Please go through them and then only proceed with the flashing instructions.
Important Points to keep in mind
- This will void the warranty of your device.
- As of now, you will lose Samsung Pay and Samsung Pass forever if you root once, even unrooting won’t help.
- OTA won’t work once you root your device.
- According to the developer, this ROM is tested only on N986B If any N985 users want to test, can try on your own risk.
- Furthermore, TWRP is included in ROM itself.
- This is the first version and needs to be flashed using Odin. The subsequent versions may have different scenarios.
- Your device should be based on the N986BXXU1ATH3 1st Aug security patch update.
- You should have rooted your device using Full AP Magisk + Patched kernel.
These were the required points worth mentioning. You may now head over to the Requirements section and then proceed with the steps to install the modified Custom ROM on Galaxy Note 20 / Note 20 Ultra.
Prerequisites
- Create a complete backup of your Galaxy device.
- Next up, download and install the Odin Flash Tool on your PC. As for this guide, Odin 3.14.4 or above is required. You could get that build from the attached post.
- Also keep your device sufficiently charged, at least 50% is recommended.
Download Modified Custom ROM for Galaxy Note 20 / Note 20 Ultra
- ROM OS Version: Android 10
- ROM Kernel: Linux 4.x
- Status: Stable
- ROM Firmware Required: Stock Samsung
- Download: Link
That’s it. You could now proceed with the steps to install the modified Custom ROM on Galaxy Note 20 / Note 20 Ultra.
Installation Instructions
- Once you have downloaded the N986B_DrKetan_ROM_Q0*.zip file, extract it to your PC.
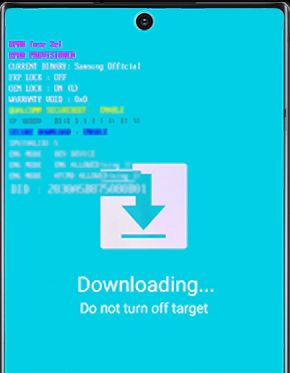
- Next up, you will have to boot your device to Download Mode. For that, power off your device. Then keep holding the Vol Up + Volume Down button together and connect it to the USB cable, which in turn should be connected to your PC.
- Launch the Odin Tool on your PC, and head over to the Options section. Under that, disable the Auto Reboot option.
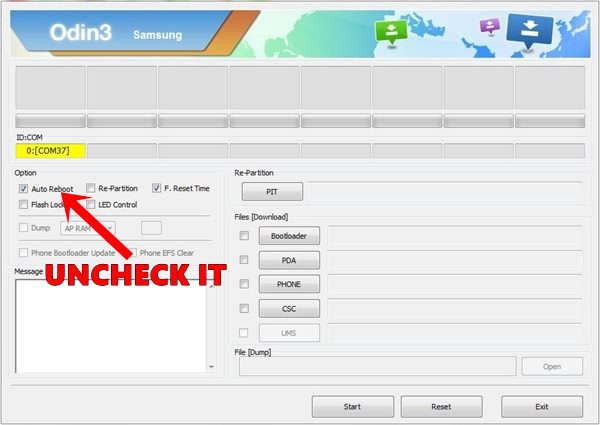
- Now head over to AP, navigate to the extracted N986B_DrKetan_ROM_Q0*.tar.md5 file and select it.
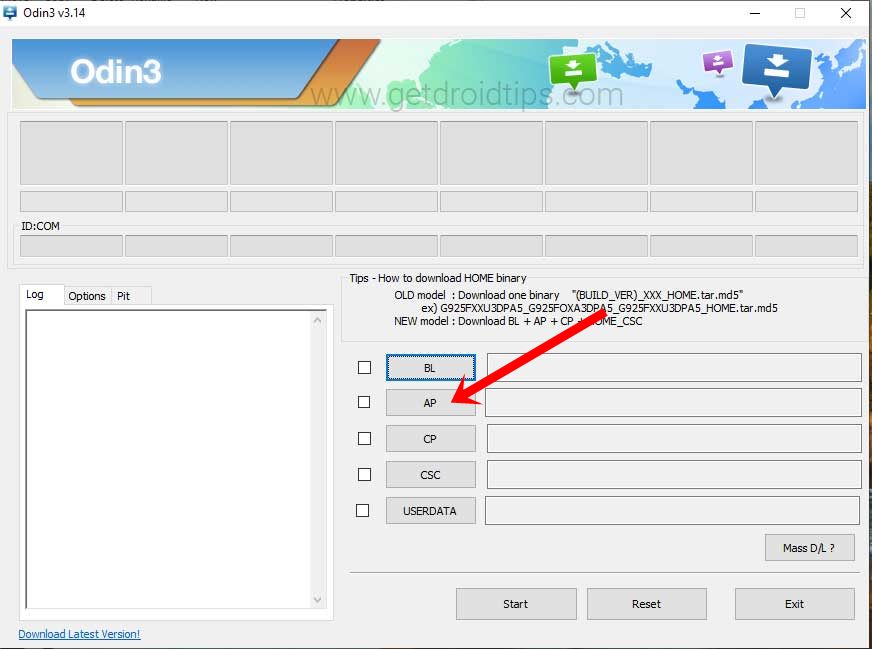
- Click on the Start button and wait for the process to complete. When that is done, disconnect your device from the PC.
- Then keep holding the Vol Down+Side Key for around 7 sec. As soon as the device screen goes off, use the hardware key combinations to reboot to your device to recovery.
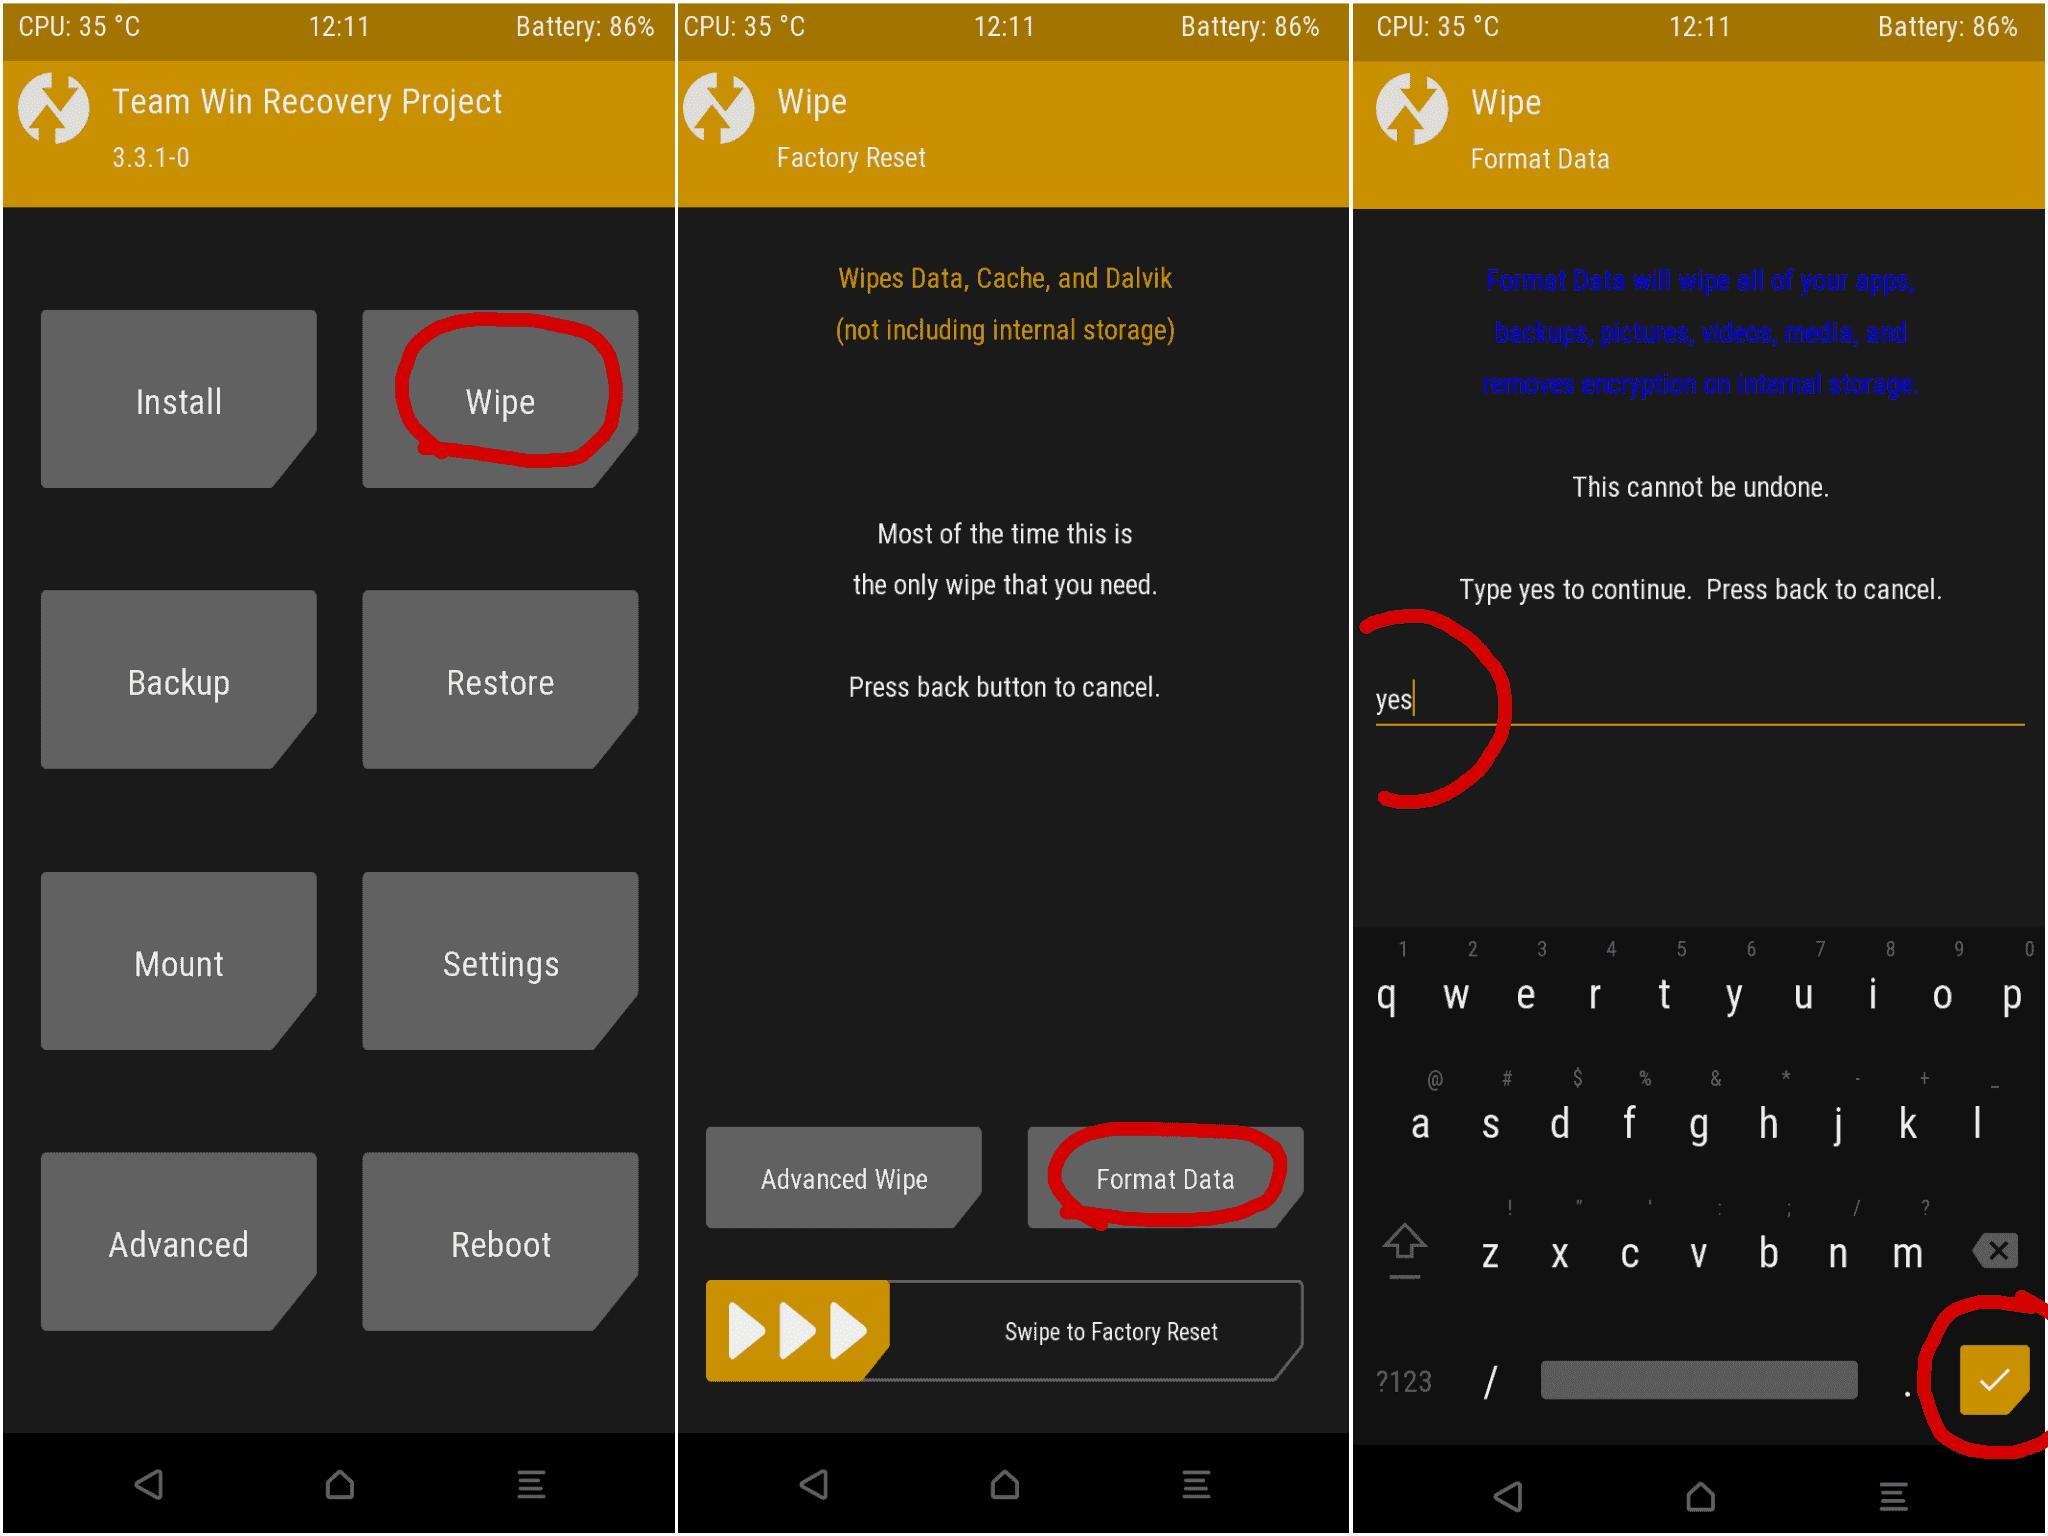
- Once your device is rebooted to TWRP Recovery, head over to the Wipe section and click on Format Data. Then type in YES in the space provided and tap on the tick mark situated at the bottom right.
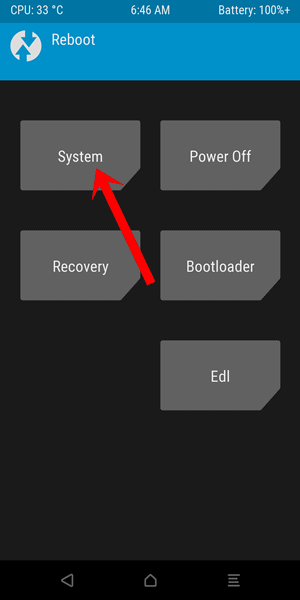
- When that is done, head over to the Reboot section and tap on System. Your device will reboot to the Android OS. Although you have installed the modified Custom ROM on Galaxy Note 20 / Note 20 Ultra, yet the process isn’t complete yet.
- Connect it to WiFi and then go to the Magisk Manager app. Complete the environment setup and then reboot your device. However, if you cannot find the app installed, then download and install it and then carry out the above task.
- Once your device reboots, launch the Magisk Manager app. Tap on the hamburger menu situated at the top left and go to Settings.
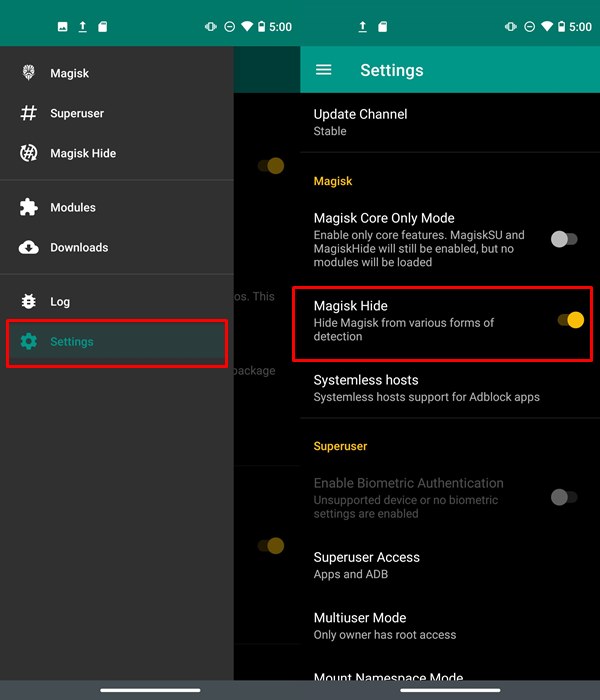
- Now enable the Magisk Hide toggle under the Magisk section. You should also consider turning off the Supersu notification while setting up the app.
- Finally, open the ROM Tool and it will ask you to Apply Essential Fix. Complete it as mentioned and once that is done, reboot your device.
That’s it. These were the steps to install the modified Custom ROM on Galaxy Note 20 / Note 20 Ultra. Once you have successfully installed it, do share your experiences in the comments section below. Rounding off, here are some iPhone Tips and Tricks, PC tips and tricks, and Android Tips and Trick that you should check out as well.

Is this rooted alrready?
I mean when i done this i will have root with it?
Is this rooted alrready?
I mean when i done this i will have root with it?
Is this rooted?
I mean when i done this i will have root with it?