Windows is the most popular operating system that people use in their computers. If you are using Windows for intense gaming, game development, or if you are running a high graphics program, then there is a chance you have faced Blue Screen of Death in Windows. The Kernel Mode Heap Corruption BSOD error occurs due to corruption or heaping of kernel-mode in Windows 10. The graphics might be too much for your system hardware to run or the outdated graphics drivers, corrupt system files, conflicts with unstable software, and hardware issues causes the BSOD to appear. Many users have reported the issue for Corrupted BSOD in windows 10 with low-end hardware.
Kernel Mode Heap Corruption BSOD is the most common error users face that are often using computers for high CPU and GPU intense activity purposes. Activities like app development, game development, gaming, 3D modeling, VFXetc, which uses the GPU and CPU to its limit, often causes the error due to the heaping or corruption of data in the kernel mode. Thus shows the BSOD error. However, it can only be fixed by trying out all the possible solutions that can be responsible for the error.
Also Read

Page Contents
What is Kernel Mode Heap Corruption, and why its causing BSOD in Windows 10?
When you face the BSOD error Kernel Mode Heap Corruption, it also shows the possible reason for the cause of the error. The code helps to identify the cause that is triggering the issue. More likely, it is often due to outdated graphic drivers or due to hardware malfunction. However, sometimes the cause is irrelevant to any real issues, sometimes it shows up while Windows startup or just by launching a simple video game.
Due to corrupted, damaged, and outdated drivers, the GPU malfunctions, which lead to the BSOD error. Outdated drivers cause the GPU and CPU to overload, hence heaping corruption of Kernel mode. If your drivers are not up to date, then BSOD is the regular screen that you will see.
Fix Kernel Mode Heap Corruption BSOD in Windows 10
There is no definite way to fix the issue, but there are few solutions like checking event viewer, backing up data, updating graphics driver, running driver verifier manager, checking RAM and incompatible software, etc. You can try these few solutions to fix the BSOD issue.
Solution 1: Updating and Rolling back Graphic drivers
If the BSOD error is showed up recently after you have updated your driver or if you haven’t updated your driver and the error showed up, then try to do the following steps and see if this resolves your issue.
Step 1) Go to your windows search bar and type Device Manager, click on the Device Manager application to open up the system device manager.
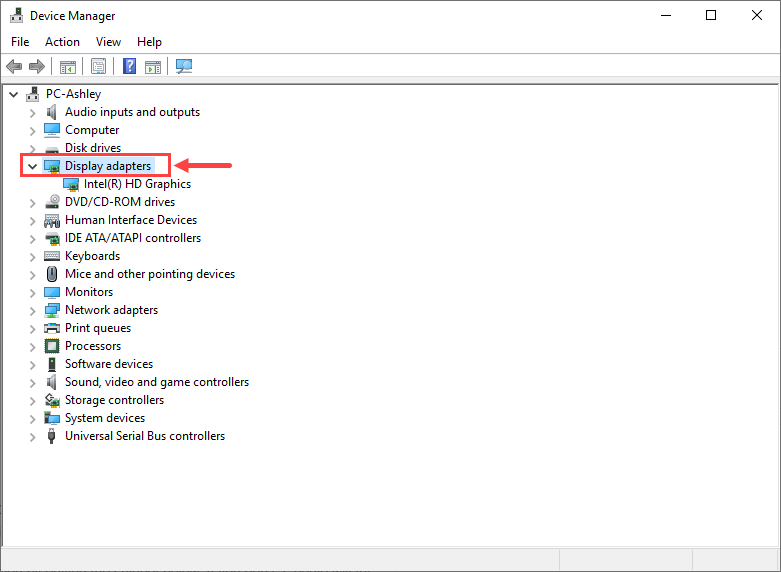
Step 2) On the system device manager, click on the left arrow beside the Display Driver option.
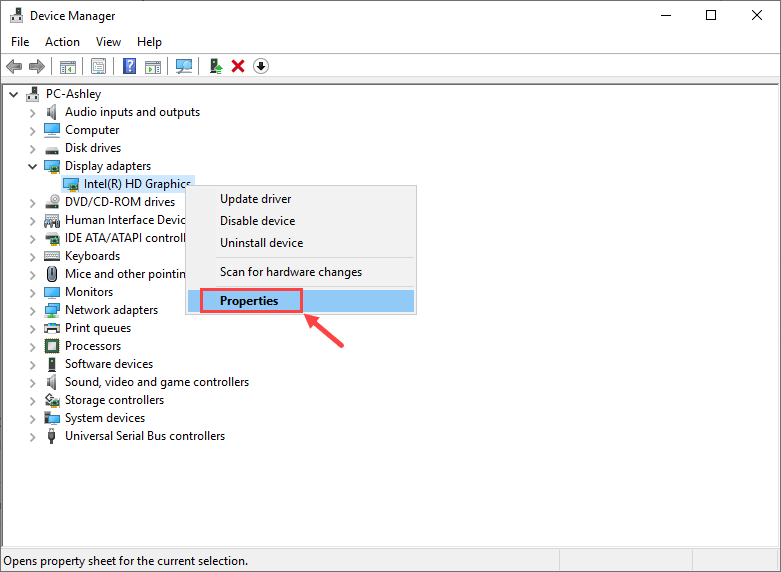
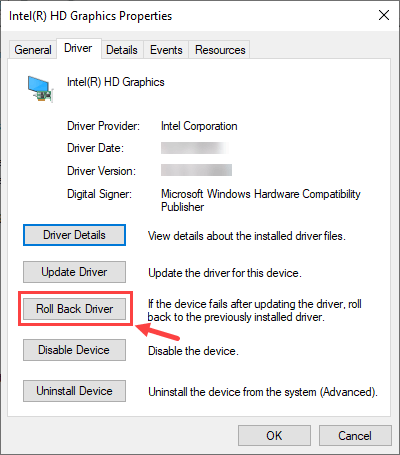
Step 3) After the drop-down menu expands, you will see your graphics driver name, right-click on it, and select the properties option. Go to the Driver tab on the properties window and click on the Update driver option if you want to update your driver and see if the problem is resolved. Otherwise, click on the Roll-back Driver option to install the previous driver.
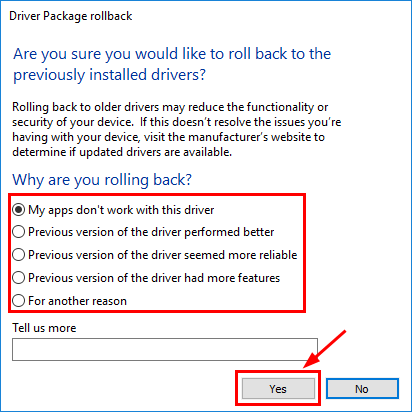
If you are rolling back driers, then another window might show up asking you the reason for installing the previous drivers, Select your appropriate option and click the yes button.
Solution 2: Running SFC and DISM scan
Running system file checker and Deployment Image Servicing and Management scans on your device can help to repair the damaged and corrupted files on your system hence resolving the issue.
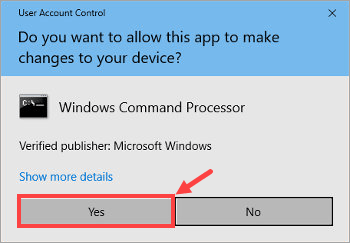
Step 1) Type cmd on your Windows search bar and on up the command prompt by right-clicking and selecting to run cms as an administrator. If a prompt appears, click on the Yes button.
Step 2) Type the command sfc / scannow in command prompt and press Enter to run the System File Checker scan.
sfc /scannow
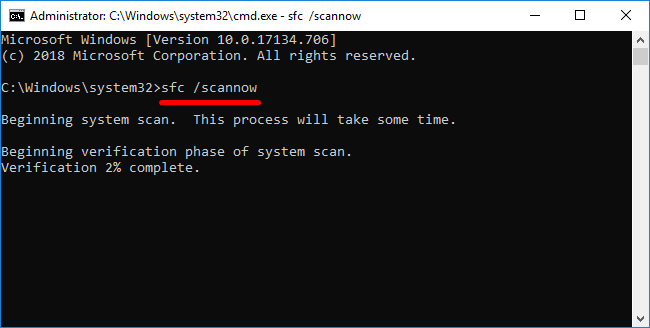
Wait until the scan is complete, then restart your computer and open up the cmd again.
Step 3) Type dism.exe / online / cleanup-image / restorehealth command in the command prompt and hit Enter to run the Deployment Image Servicing and Management scan on your computer.
dism.exe /online /cleanup-image /restorehealth
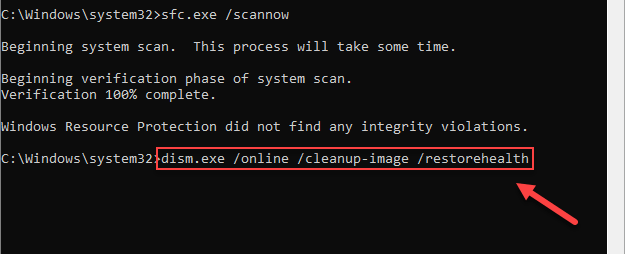
Wait until the process is complete and restart your computer.
Solution 3: Resolving conflicting Softwares
Applications that are consuming too much memory CPU and GPU can be the cause of BSOD error. Disabling applications, setting up priorities, and other tweaks can resolve the issue.
Step 1) Firstly, open up the task manager by typing Task Manager in the windows search bar and clicking on the task manager option.
Step 2) Now, go to the Details tab and look for the application that you often use, right-click on the application, hover on the Set Priority option, and select Low from the menu. This will set the priority of application low. Hence it will consume less CPU, memory, and GPU.
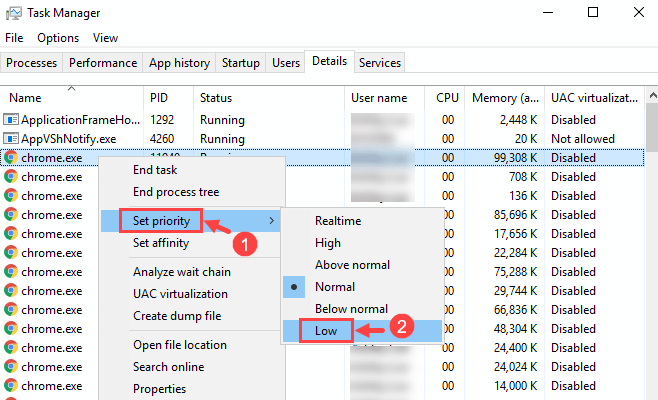
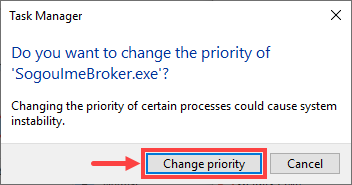
A prompt may appear for confirmation, click on the Change Priority option.
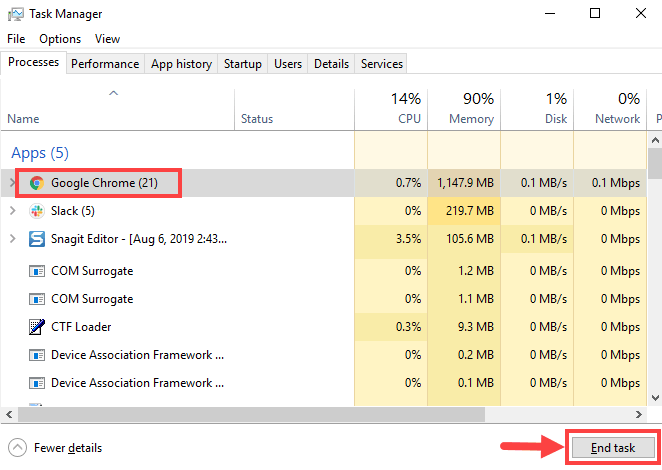
Step 3) Now, move to the Processes tab and look for the application that is consuming most of your memory and CPU, click it to select the application and click on the End Task bottom at the bottom of the window to disable the application from running.
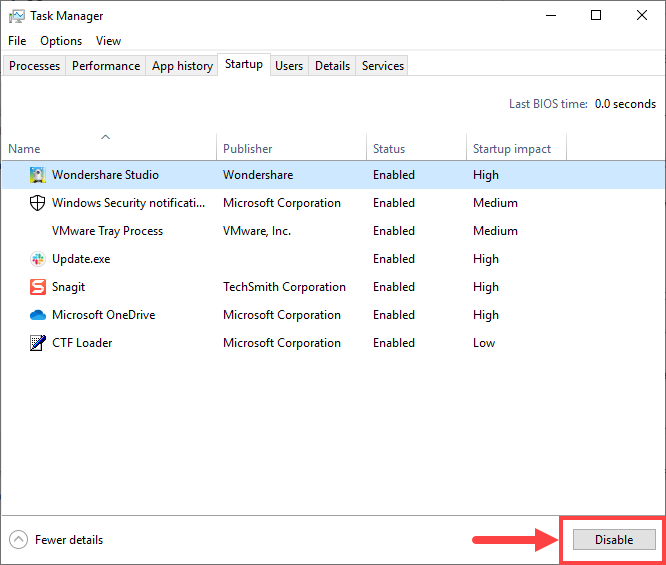
Step 4) You can also disable the startup apps to further prevent software conflicting. Go to the Startup tab, select the application, and click on the Disable button at the bottom o the window.
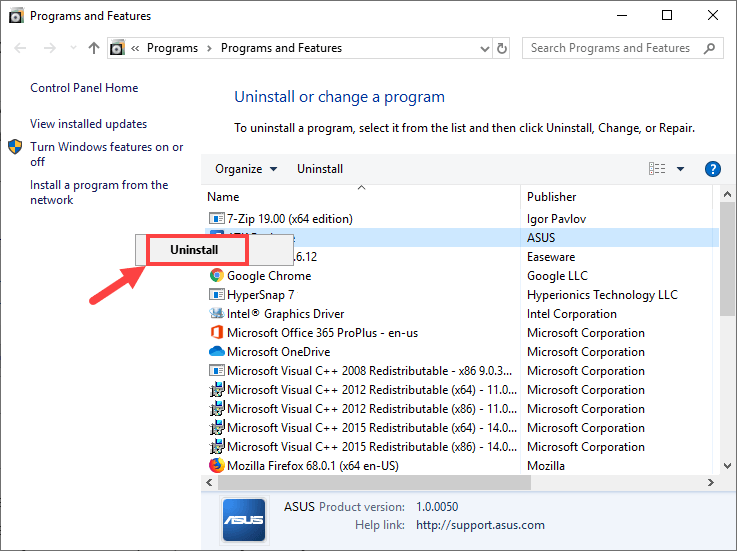
Step 5) If the above steps don’t help you, then you can also uninstall applications to avoid software conflicting. Open up the Windows settings, Goto Apps, click on the Programs and Features option. Now select the application that you want to uninstall, right-click, and select the uninstall option.
Solution 4: Running the Windows Memory Diagnostic Tool
Running the windows memory diagnostic tool will help you to see if your RAM is fine, if there is an error, then you must change your RAM.
Step 1) Type Windows Memory Diagnostic Tool in your Windows search bar and click on the application to open up the diagnostic tool.
Step 2) A prompt will appear, click on the Restart now and check for problems option.
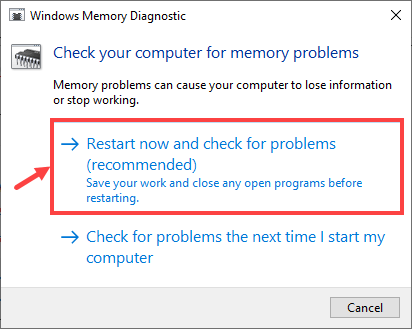
Step 3) Your windows will reboot into the Windows Memory Diagnostic Tool, and it will start scanning your device, it will show you the overall process.
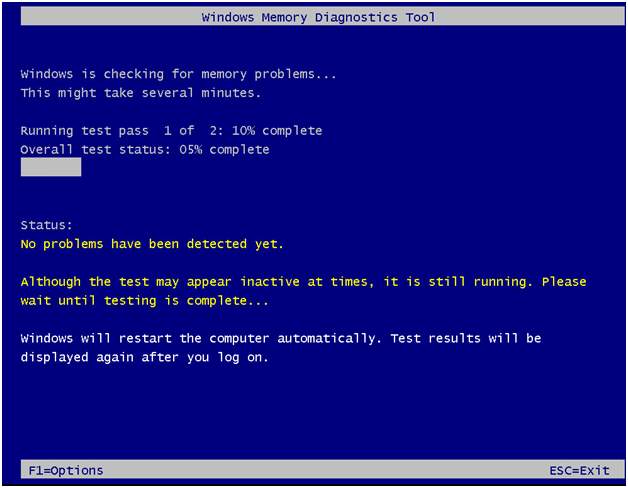
If you see any error, then you should change the RAM or restore/reinstall your Windows 10.
Conclusion
There are so many ways to fix the Kernel Mode Heap Corruption BSOD error. But these are some of the most effective ways to troubleshoot the issue. However, if the above steps don’t help you fix the problem, you can enter into the safe mode to troubleshoot. But the most common reason for kernel-mode heap corruption BSOD error is extensive use of CPU, RAM, and GPU. Therefore you must first ensure if any application is causing the error.
