Motorola Moto G42 launched in India as their latest budget segment that features a 6.4-inch full-HD+ AMOLED display with a 60Hz refresh rate. The device runs on Android 12 out of the box and is powered by Qualcomm Snapdragon 680 SoC. The device sports a triple rear camera setup headlined by a 50 MP primary sensor, an 8 MP ultra-wide and depth shooter, and a 2 MP macro shooter.
On this page, we have shared the download link and guide to installing the Motorola XT2233-2 (Moto G42) firmware flash file using the fastboot method. Here you will find all stock firmware zip files for all the supported regions with Motorola Moto G42 XT2233-2.
Also Read
If you are someone who wants to restore the device to factory firmware, then this guide is for you. By using this guide, you can fix certain software-related issues such as hard brick, soft brick, WiFi, or Bluetooth issue, fix lag or stutter, or even you can downgrade the device anytime.

Motorola Moto G42 Device Overview:
The Motorola Moto G42 features a 6.4 inches AMOLED panel with a 60 Hz refresh rate. It is an FHD+ panel with a resolution of 1080 x 2400 pixels and an aspect ratio of 20:9. Under the hood, we get the Qualcomm Snapdragon 680 4G processor built on a 6nm manufacturing process. It is an octa-core processor withfour Kryo 265 Gold cores clocked at 2.4 GHz and four Kryo 265 Silver cores clocked at 1.9 GHz. For handling the graphics-intensive tasks, we have the Adreno 610. The smartphone comes with Android 12 out of the box with Motorola’s stockUI skin running on top.
In optics, we get a triple camera setup at the rear and a single selfie camera at the front. The triple rear camera setup consists of a 50 MP primary sensor paired with an f/1.8 lens, an 8 MP ultrawide sensor paired with an f/2.2 lens, and a 2 MP macro sensor paired with an f/2.4 lens. The selfie camera at the front is a 16MP primary sensor paired with an f/2.2 lens. The front and rear camera systems are limited to 1080p video recording.
The smartphone comes in two storage options: 64GB internal storage + 4GB RAM and 128GB internal storage + 4GB RAM. We also get a dedicated MicroSD slot for storage expansion. In terms of communications, we get Wi-Fi 802.11 a/b/g/n/ac, Bluetooth 5.0, GPS, NFC, FM radio, and USB Type-C 2.0. And for sensors, we get a side-mounted fingerprint sensor, accelerometer, gyro, proximity, and compass. Powering it all is a 5,000 mAh battery that can be topped up quickly using an 18W power adapter. The smartphone has two color options: Atlantic Green and Metallic Rose.
Steps to Install Moto G42 Stock Firmware (Flash File)
Now, if you’re ready to manually flash the stock firmware on your Motorola Moto G42 XT2233-2 device, you need to download the flash tool, firmware file, and necessary drivers. So, without wasting any more time, let’s get into it.
Pre-Requirements:
- This ROM is supported for the Motorola Moto G42 XT2233-2 (hawao) variant only.
- Ensure your device is charged at least 50% or higher.
- You will require a PC or Laptop with a USB Data Cable.
- We always recommend that our readers take a full data backup of the device for safety.
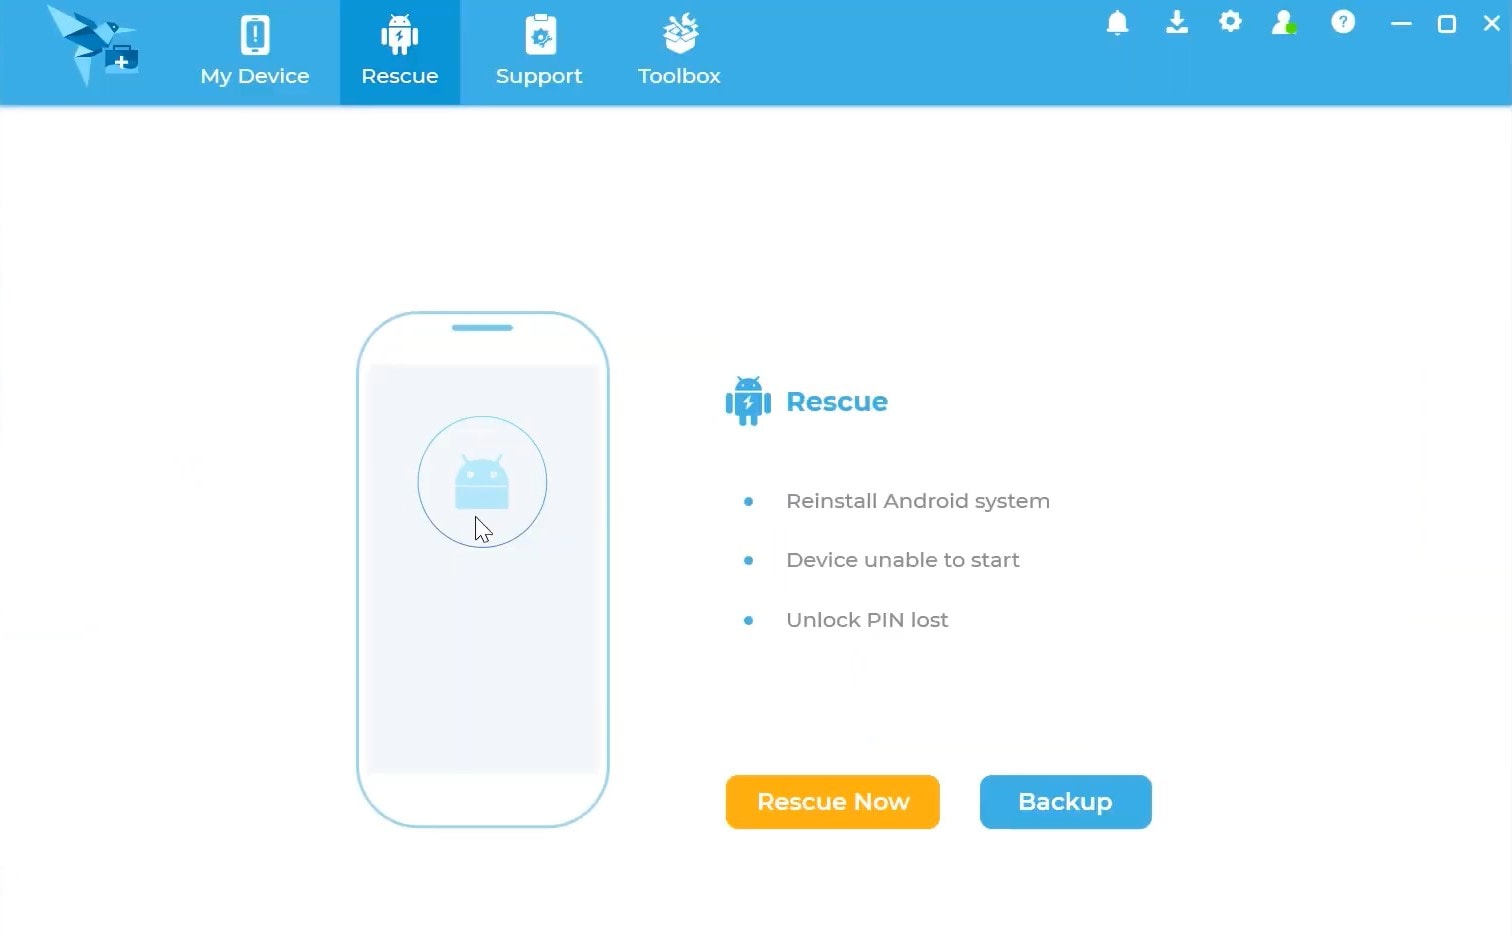
- Install Motorola USB Drivers and Rescue and Smart Assistant Tool on your PC
- To flash, you must download the ADB and Fastboot tool
Disclaimer:
Motorola Moto G42 XT2233-2 Firmware Flash Files:
| Flash File Name: S2SE32.28-41-1 Model: XT2233-2 Android Version: 12.0 |
Download |
Firmware Installation Guide:
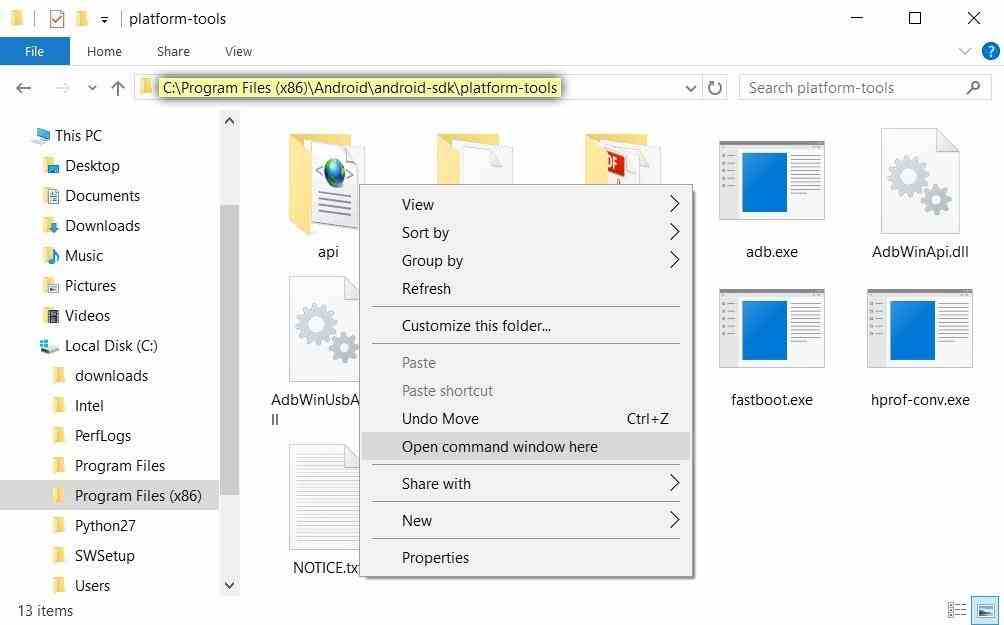
Check out the firmware flashing guide below for the Motorola Moto G42 XT2233-2. First, install or extract the adb and fastboot tool on your PC. Now enter the bootloader on your device.
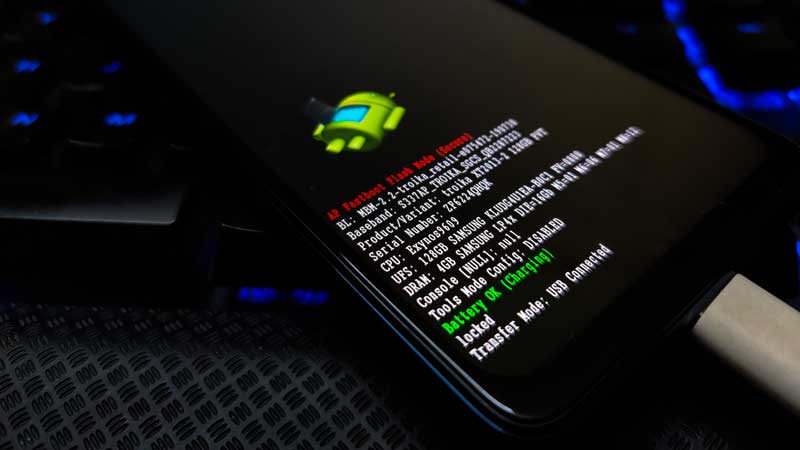
Step 1. Bootloader Mode
Enter bootloader mode on your phone. To boot, first, turn your phone off. Once your device is turned off completely, press and hold the volume down and turn it on. You should see the bootloader screen.
Step 2. Connect Your Device to PC:
After booting your Motorola Moto G42 into bootloader mode, connect it to the PC using the USB Cable.
Step 3. Download Stock ROM/Firmware:
To get the full ROM, you can use the LMSA or Rescue and Smart Assistant Tool. Download the zip file and copy it to somewhere on your PC. LMSA tool will unzip the file and will remove the zip file you downloaded.
You can also download the full stock ROM from this guide’s above download flash file section.
Step 4. Flashing Guide:
-
- The next step is to open the command window and go to the adb folder
- Enter the following command to flash the firmware
fastboot oem fb_mode_set
fastboot flash partition gpt.bin
fastboot flash bootloader bootloader.img
fastboot flash vbmeta vbmeta.img
fastboot flash vbmeta_system vbmeta_system.img
fastboot flash vendor_boot vendor_boot.img
fastboot flash bluetooth BTFM.bin
fastboot flash radio radio.img
fastboot flash dsp dspso.bin
fastboot flash dtbo dtbo.img
fastboot flash logo logo.bin
fastboot flash boot boot.img
fastboot flash super super.img_sparsechunk.0
fastboot flash super super.img_sparsechunk.1
fastboot flash super super.img_sparsechunk.2
fastboot flash super super.img_sparsechunk.3
fastboot flash super super.img_sparsechunk.4
fastboot flash super super.img_sparsechunk.5
fastboot flash super super.img_sparsechunk.6
fastboot flash super super.img_sparsechunk.7
fastboot flash super super.img_sparsechunk.8
fastboot flash super super.img_sparsechunk.9
fastboot flash super super.img_sparsechunk.10
fastboot flash super super.img_sparsechunk.11
- Toggle back to bootloader. Do the following:
fastboot flash erase userdata
fastboot flash erase carrier
fastboot flash erase apdp
fastboot flash erase ddr
fastboot flash erase metadata
fastboot oem fb_mode_clear
fastboot reboot
- Now your device will reboot into the bootloader with the firmware you installed.
- The next step is to open the command window and go to the adb folder
That’s it, guys. We hope this guide was helpful to you. Feel free to ask in the comment below for additional queries.