In this tutorial, we will show you the steps to remove password protection from your Windows 10 PC. Passwords have now become an integral part of our everyday online life. No matter which account you use, you might have already secured it with a password or PIN. And if you are using a public account, then the passwords become all the more important. However, there might be some instances where you would like to break these shackles.
Also Read
How to Fix White Screen of Death in Windows 11/10
Forgotten the Windows 10 password? Easy Way to Reset it
Download Dolby Audio Driver for Windows 11/10/8.1
Fix: Micro SD Not Showing Up on Windows 10/11
How To Fix External Hard Drive I/O Device Error in Windows 11/10
Fix: Win+Shift+S Not Working on Windows 11/10
Fix: Apple Magic Keyboard Not Showing Up in Windows 10 / 11
Download Windows 7 ISO File Legally (All Editions)
For example, you could consider removing the password on your home PC to which only you have access. Furthermore, since you might be accessing your setup many times in a single day, you might really feel irritated in entering these passwords every single time. So if you echo these thoughts and wish to remove the passwords, similar to other users across the Microsoft Forums, then this guide will help you out. Follow along for the steps to remove password protection from your Windows 10 PC.
Page Contents
How To Remove Password Protection In Windows 10
There could be three screens where you might be greeted with the password: when you boot up or restart your PC, when you cancel the screensaver, and while changing users. Out of these three, you could easily remove the password from the first two screens. Along the same lines, you could also create a local account that will help you out in the aforementioned task. In this guide, we will be discussing that as well. So without further ado, let’s begin.
Remove Password Protection from Login Screen
After executing the below steps, you would directly be taken to your desktop once your PC boots up. The password dialog box will no longer appear. Follow the below steps to do so:
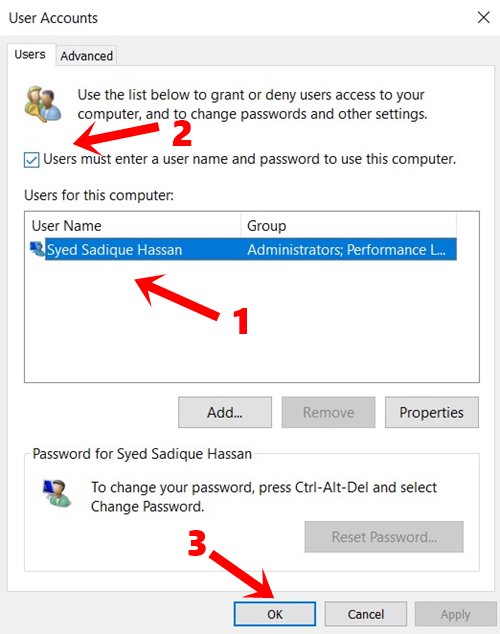
- Use the Windows+R shortcut keys to launch the Run dialog box.
- Then type in ‘netplwiz’ and hit Enter. This will take you to the User Account section.
- Now select your username from the list and untick the ” Users must enter a username and password to use this computer” option.
- It will now ask for the password, type in and click on Apply > OK.
That’s it. You have now successfully removed the password protection from the login screen in Windows 10.
Remove Passwords from Screensaver
If you leave your PC idle for quite some time, then the screensaver might come into play. While you could easily cancel with a simple mouse movement, but it will then ask you to enter your password. Although this extra layer of protection might be useful in a public environment but may prove to be somewhat unnecessary if it’s your own PC. With that said, you could easily remove this additional password using the below-given instructions:
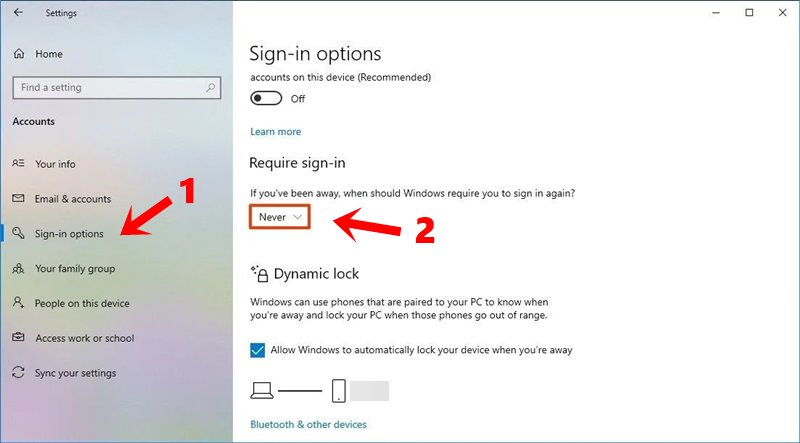
- Use the Windows+I shortcut to bring in the Settings menu.
- Then go to the Accounts section and click on Sign-in options from the left menu bar.
- Under the Require sign-in option select Never from the drop-down
- Now scroll to the bottom of the page and click on the Lock screen text link.
- Uncheck the ‘On resume, display log-on screen’ option and that’s it.
You have removed the password protection from the screensaver as well on your Windows 10 PC. From now on, you won’t get the password dialog box upon canceling the screen saver.
Using the Local Accounts
Apart from your primary Microsoft account, there is also a local account that you could use on your Windows PC. Talking about rights and privileges, it has the same as your primary account. But since your local account isn’t linked with your Microsoft account, you might not be able to access products such as OneDrive, Office 365, among others. On the flip side, if you on a local account and then launch the Windows Store, then your account will be converted to the Microsoft account. So keep all these points in mind before proceeding ahead:
- Search for Settings from the Start menu.
- Within that, go to the ‘Your Info’ section from the left menu bar.
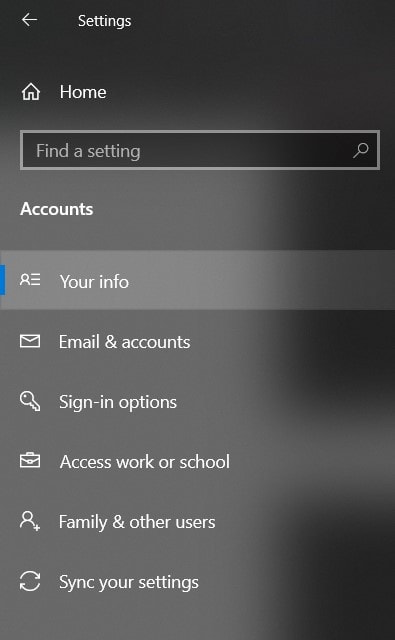
- Then click on the ‘Sign in with a local account instead’ option.
- Now type in your account credentials and click OK. You will now be taken to the ‘Enter your local account info’ page.
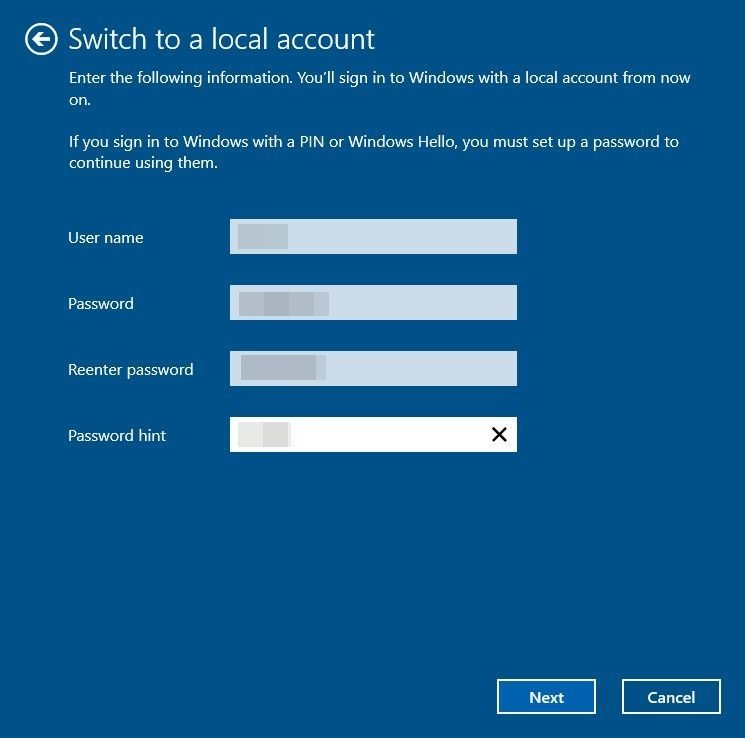
- Type in the desired username and password if you are creating it for the first time. On the other hand, if you already have a local account, enter its credentials here.
- Once done, you may now sign in to your local account using the above credentials.
With this, we conclude the guide on how to remove password protection from your Windows 10 PC. We have shared three different scenarios: on the login screen, on the screensaver, or via a local account. If you have any doubts regarding the aforementioned steps, do let us know in the comments section. Rounding off, here are some iPhone Tips and Tricks, PC tips and tricks, and Android Tips and Trick that you should check out as well.
