The Samsung unveiled finally the most breathtaking smartphone with their Next Note Series Generation, Galaxy Note 8. This next generation Note features a larger screen with 6.3-inch Quad HD – Super AMOLED ( Infinity display), which fits comfortably in one hand. If you looking to Root Samsung Galaxy Note 8 running Android Nougat, then you are at the right place. Samsung launched Samsung Galaxy Note 8 this year with Android 7.1.1 Nougat firmware out of the box. Most pro users of Samsung Galaxy Note 8 always want to gain root access on their device. In this guide, we will explain the easiest way introduced by Chainfire, a well-known root developer to root your Samsung Galaxy Note 8.
Talking about Specification, Galaxy Note 8 comes with a 1.6GHz octa-core Qualcomm Snapdragon 835 processor clubbed with 6GB RAM and 64 GB On-board storage. It can be expanded via microSD card for extra storage with up to 256GB. The handset runs on Android 7.1.1 Nougat. The camera on the Galaxy Note 8 sports a Dual 12 MP Camera at the rear and 8 MP front camera for selfies.
Now you can easily root your phone with our simple method. In this method to root Samsung Galaxy Note 8, we used CF-Auto-Root where CF Stands for ChainFire. Chainfire’s Auto-root package was released on Galaxy Note 8. So if your phone is running Android 7.1.1 Nougat or below version, then you can use this complete tutorial to root Samsung Galaxy Note 8.
Page Contents
How to Root Samsung Galaxy Note 8 with CF Auto Root (Nougat)
Samsung Galaxy Note 8 can be easily rooted using CF Auto Root aka Chainfire’s Auto root package. To root Samsung Galaxy Note 8 running Android Nougat, you need to download ODIN Software which is required to flash any Samsung device. So here is the full guide to installing ODIN software on your PC/Laptop.
What is Rooting and How does it help Galaxy Note 8?
If you root Galaxy Note 8, you can unlock many features which can’t be done by non-rooted Android devices. Rooting Samsung Galaxy Note 8 gives the power to modify the software code on the device or install other software that the manufacturer wouldn’t normally allow you to.
Here are the some of the features you can do after enabling root access :
- Unlock Hidden Features and Install “Incompatible” Apps
- You can use apps like Tasker which Automates Everything
- Increases battery life and performance of Samsung Galaxy Note 8.
- Block Ads using any app on Samsung Galaxy Note 8
- Backup your apps and data.
- Remove Bloatware apps on Samsung Galaxy Note 8.
- Flash Custom Kernel and ROM on Samsung Galaxy Note 8 .’
- Customize your Android phone to your taste and need.
Note: To flash the CF Auto Root on Samsung Galaxy Note 8, we used ODIN to flash the CF Auto Root.
Pre-Requisite :
- You need either PC or Laptop.
- Charge your phone to least 50%.
- Download CF Auto Root file on your computer
- Download and install ODIN software tool on your PC/Laptop
- Backup your phone before your modify your system.
Required Files and Downloads
- Download and Install the Samsung Kies Software: CLICK HERE
- Download and Install the Samsung USB Drivers: CLICK HERE
- Click to download and Extract the ODIN ZIP file on Desktop: CLICK HERE
- Download CF Auto Root: Coming Soon
Steps to Flash Chainfire’s Auto Root Package on Samsung Galaxy Note 8
- If you have downloaded and installed the file from above then you are good to Go – Read from Step 2
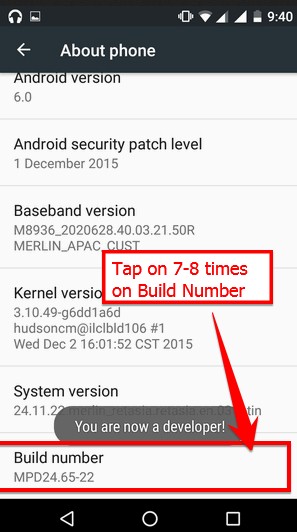
- First of all, enable the USB Debugging
- To Enable the USB Debugging you need also active the developer option, Now Go to your Settings -> About Phone -> Now Tap on the Build Number 7-8 Times until you see a toast message “Developer option enabled“
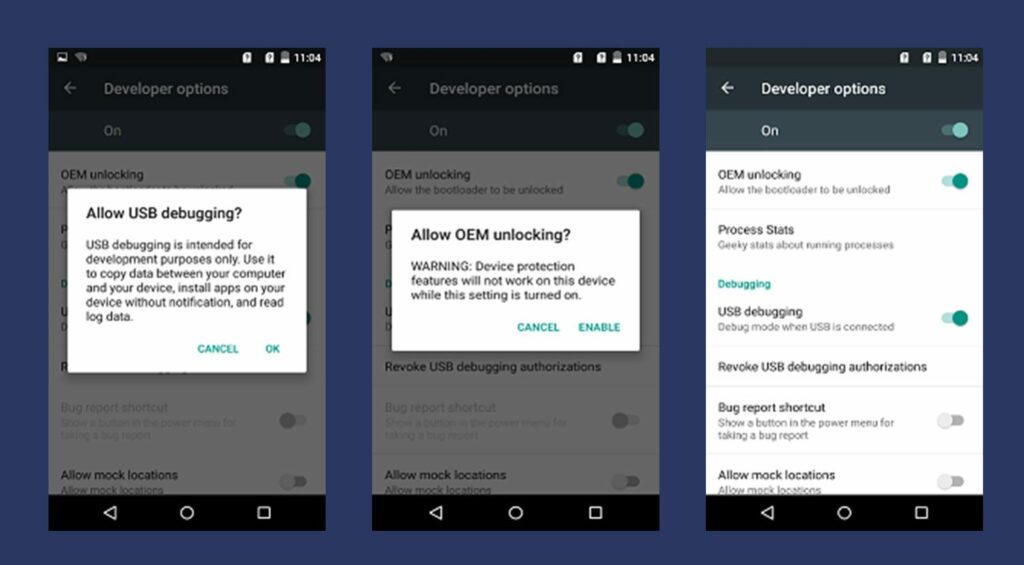
- Once your developer option is active, Go back to your settings -> Open developer option -> Enable USB Debugging
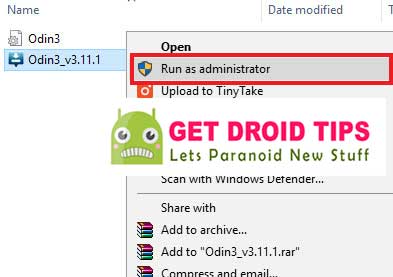
- Open the Extracted ODIN File called ODIN v3.11.1 exe file using the Administrator – Right Click your mouse and Open using Administrator
- Now Reboot your Phone into Download Mode
- Now Connect your Phone to PC using the USB Cables
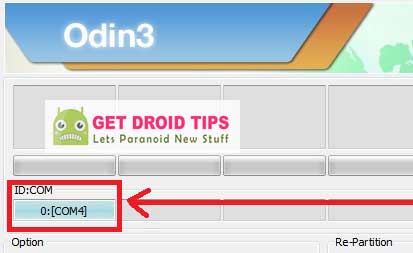
- When you connect the USB cable you will see a blue sign in Odin with ID:COM which means your device is connected by Odin. (as shown below)
- Now Go back again Odin and Add the CF-Auto-Root.tar file which you downloaded from Above by Clicking AP/PDA Button

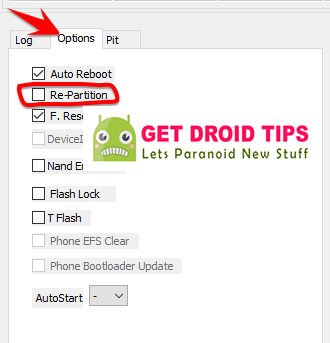
- Now Make sure re-partition is NOT ticked – Go to Option and see (Let the Auto Reboot and F-Reset Time be ticked)
- Click the start button, sit back and wait few minutes until you see a message pass. Once you see PASS then you can remove your Phone from the part. Don’t Panic if you see your Phone restarts while updating.
Note: You should not remove or operate on your device until the flashing process is shown to be completed.
Once the flashing process is completed and if everything has gone as planned, you should be able to see a big green box saying “RESET” or “PASSED.” This will depend on the version of Odin downloader you have downloaded. By now, the device has finished rebooting and it is safe to remove/unplug the phone/device.
That’s ALL! When you restart your device, you will have root access on Samsung Galaxy Note 8.
if you use this can you ever install verizon or samsung operating system updates