There are many VPN applications available on app stores, and likewise many Smart TVs from different manufacturers. However, when it comes to installing VPNs on a Smart TV, there are common grounds, and in this article, you’ll find everything you need to know in order to set up a VPN on your Smart TV.
You might be wondering why your Smart TV needs a VPN. Well, it’s pretty simple. Your Smart TV definitely has an internet connectivity feature, probably some microphone and camera accessibility features as well. All of these and more make your TV a Smart TV leaving the probability of malicious persons spying on you or invading your privacy, particularly as Smart TVs will usually be mounted in private areas of your home like your living room or your bedroom.
Also Read
How to Clear Netflix Cache on Samsung, LG, Sony, or any Smart TV?
Fix: macOS Ventura VPN Not Working issues
Netflix Not Working with ExpressVPN and SurfShark, How to Fix?
All TV Content Ratings and Their Meaning: TV MA, TV-Y, TV-Y7 FV, TV-G, TV PG and TV-14
Fix: Certificate Validation Failure on VPNs
Where are the Cameras and Microphones of Smart TVs hidden?
How to Fix IPTV Not Working with a VPN
Fix: NordVPN Not Connecting on iPhone, iPad or Mac

Installing a VPN on your Smart TV will reduce the risks of exploitation but much more than just protecting your privacy, also help you bypass censorship and access geo-blocked content.
So, let’s take a look at what you need as well as the methods available to set up a VPN on your Smart TV.
Page Contents
Essentials required to set up a VPN on Smart TV
Basically, to install a VPN on Smart TV, you’ll need a:
- Smart TV. Obviously, this tops the list. You might find it easier to install a VPN on an Android TV if you have one but definitely, most Smart TVs are covered.
- Stable Internet Connection. Whether it’s a Wifi or Ethernet connection, you need to have a stable internet connection.
- Trusted VPN Subscription. There are a lot of VPN providers on the internet, be sure to subscribe to a trusted one. You might also need to check for router compatibility depending on which method you’ll be using.
Before you start, however, it is imperative that you verify your Smart TV’s connectivity options as well as those of the other devices you’ll be using. In some cases, your Smart TV might be configured to work with an ethernet connection only, a Wifi- connection only or in other cases, both.
So, let’s cut to the chase and check out the different methods available for you to set up a VPN on your Smart TV.
Install a VPN App from Google Play Store on your Android TV
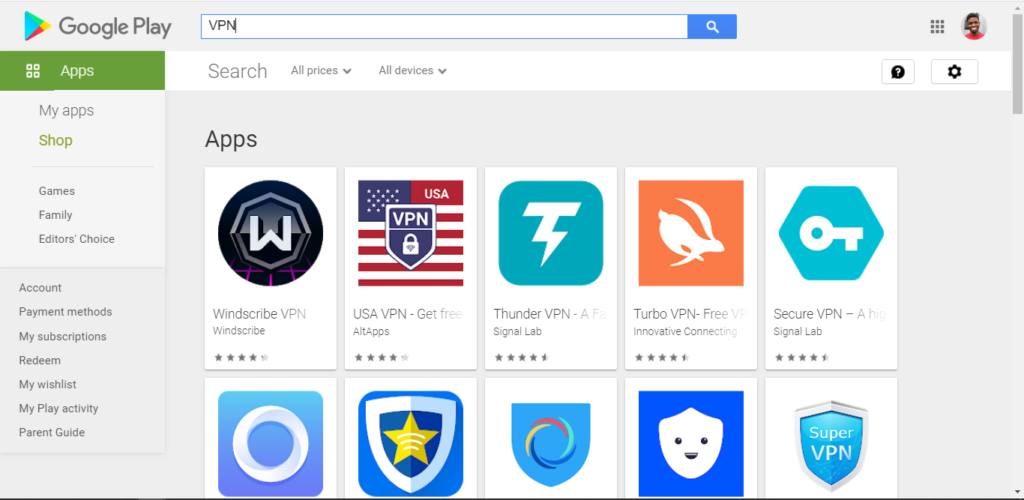
This is probably the easiest it can get. With an Android TV that can access the Google Play Store, visit the store on your TV and search for a verified VPN application.
Once you’re satisfied that the VPN application is credible, install it on your TV and connect to it by signing in. That’s it, you’re all set up.
Sideload a VPN App with an APK file
If you have a Smart TV that’s configured as an Android but cannot access the full features of the Google Play Store App, this method is for you. If your Smart TV is not running on Android and you try this method, there are only two possible outcomes.
Best case scenario, the APK file will only be taking up space, the VPN application will not run. On the flip side, the worst that could happen is that you’ll end up bricking your TV.
So, assuming that you have a Smart TV running on Android, you can download the APK file for your trusted VPN on to your TV since you cannot install the application directly from the Play Store.
Let’s break this down into steps to make it easier;
- On your Smart TV’s App Store, search for the “FX File Explorer” application and install it.
- Navigate to Settings > Security and restrictions > Unknown Sources. Depending on your device type, the navigation path may vary though only slightly. You’ll either have to toggle “Unknown Sources” on or toggle specific apps on. If the latter is the case, toggle “FX File Explorer” on.
- On your Windows or Mac PC, download the APK file for your trusted VPN.
- Copy the APK file to a virus-free USB drive.
- Plug the USB drive into your Smart TV.
- In the FX file explorer that you have installed on your Smart TV, locate the USB drive which will usually be labelled as “Media Card” and open it.
- Select and install the APK.
When you have successfully installed the APK file for the VPN, you’ll now be able to open the VPN as an application on your Smart TV, sign in and you’re good to go.
To be able to do this, you have to set up your PC as a mobile hotspot or virtual router and then connect your Smart TV to it like a regular Wifi connection.
You’ll need to make sure first of all that your PC can run as a virtual router. Here’s how to:
- Press the Windows key and type cmd in the search bar.
- Right-click on Command Prompt and Run as Administrator.
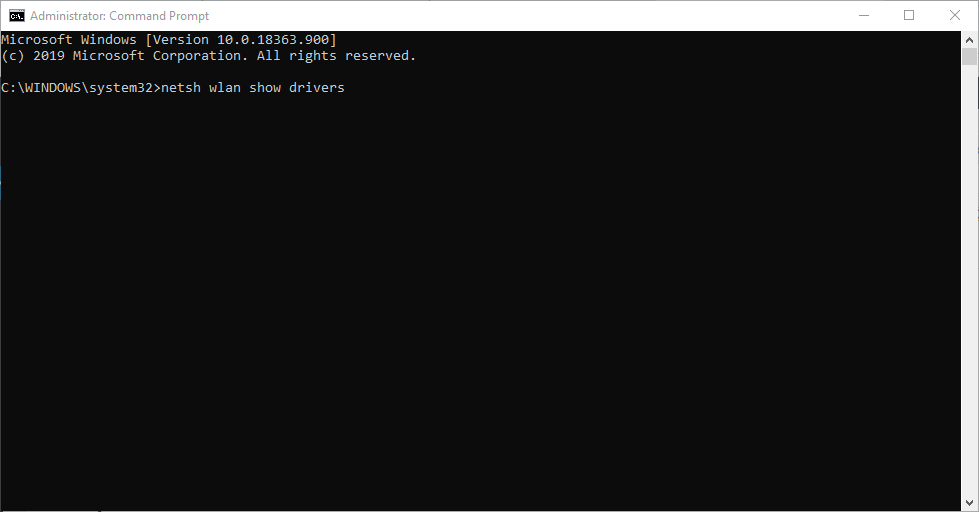
- In the Command prompt window, type in the following command:
netsh wlan show drivers
and press Enter.
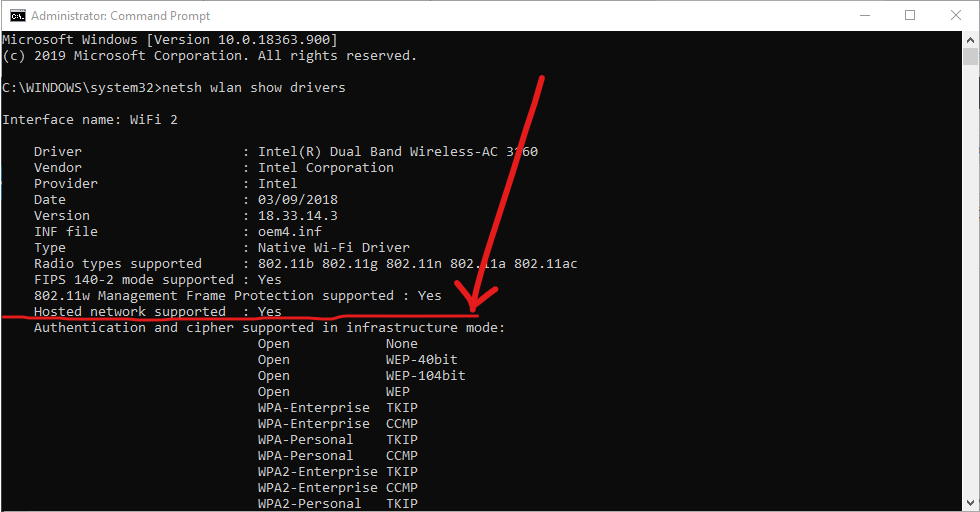
- If you get the feedback “Hosted network supported: Yes”, your PC supports the hosting of a virtual router. Otherwise, you’ll have to try another method.
Setting up a Windows Virtual Router
Follow these steps to set up your PC as a virtual router:
- Connect your PC to the internet.
- Download and install a trusted VPN application.
- Open Command prompt again as described above.
- Type in the command:
netsh wlan set hostednetwork mode=allow ssid=NETWORKNAME key=PASSWORD
and replace NETWORKNAME and PASSWORD with the user name and password of the new network you want to create.
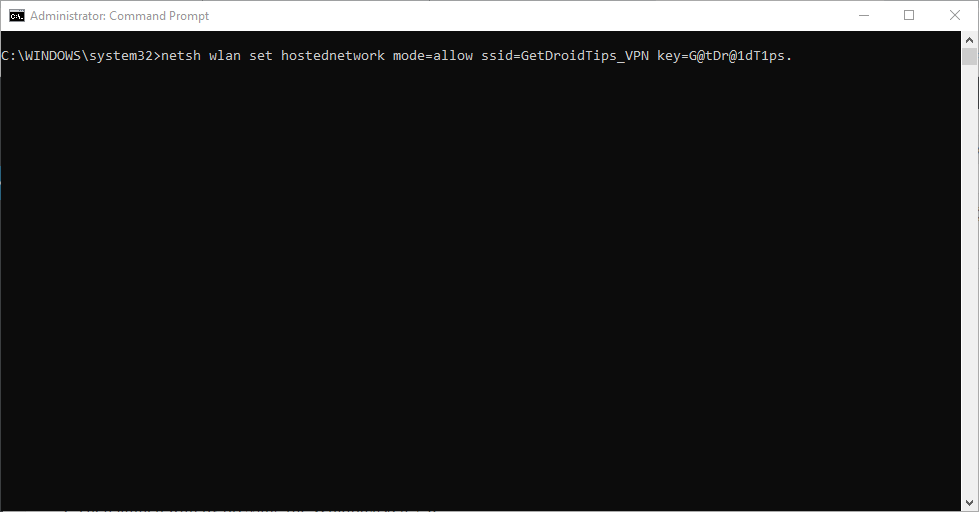
- Press Enter. You should get a confirmation of the hosted network successfully created.
- Then launch Run by pressing the Windows key + R.
- In the open dialogue box, type in “ncpa.cpl” and click on OK.

- Right-click on the connection labelled as [VPN service provider name] in the Network connections menu and from the options, click on Adapter and select properties.
- In the Sharing tab, check the “Allow other network users to connect through this computer’s internet connection” option.
- From the drop-down menu, select the new virtual router network you have created and press OK.
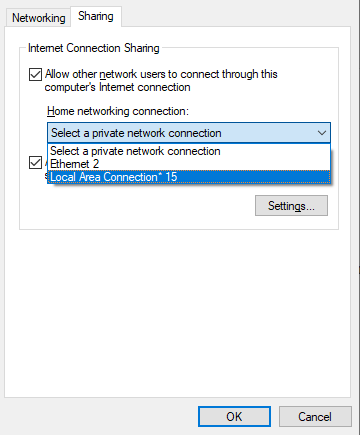
- Set your VPN to use the OpenVPN Protocol and connect to it on your PC
- From your Smart TV, connect to your PC’s Virtual Router.
It is expected that this method will work for any Mac user who is running the latest version of the macOS. You’re also expected to use a VPN provider that supports an L2TP/IPSec connection on Macs.
Bear in mind that depending on the model of your Mac, you might also need to use an adaptor to directly connect an ethernet cable to your Mac.
Follow these simple steps to share a VPN connection from your Mac:
- Download a trusted VPN and install it on your Mac using an L2TP/IPSec manual config.
- Connect to the VPN and then navigate to System Preferences and select Sharing.
- To the left, click on Internet Sharing.
- To the right, check the Wifi box and select Wifi options.
- For “Security” mode, select WPA2 Personal. You want to ensure that your connection is secured.
- Fill in a Network name and Password of your choice and set up the Network.
- Check the Internet Sharing checkbox in the Sharing tab.
- Tap Start.
With that, you can connect your Smart TV to your Mac just like a regular Wifi connection. Since your VPN is already on, you can be sure of your security and privacy.
Undoubtedly, one of the methods discussed above will help you set up a VPN on your Smart TV.
