Here in this article, we will share all the Nokia 1 Plus (TA-1130) firmware flash files along with the installation guide. If you are here, then you probably want to flash the latest flash files on your device. If yes, then this guide is for you. You can flash the official stock firmware file on your Nokia 1 Plus by following this guide.
As we all know, rooting an Android smartphone and installing a Custom ROM is very easy or trendy as well. But there are some issues with the third-party custom firmware or mod files. Now, if your device is bootloader unlocked or rooted and running on any Custom ROM, then flashing back to stock ROM is now made easy.
![How to Install Stock ROM on Nokia 1 Plus [Firmware Flash File]](https://www.getdroidtips.com/wp-content/uploads/2019/06/Nokia-1-Plus.jpg)
Page Contents
Why Stock ROM
The Stock ROM comes pre-installed on the phone or tablet. It offers a stable and updated version of Android and Security Patch as well. Whereas third-party ROMs are quite unstable and buggy. Sometimes, there won’t be any security patches to the ROM. Some custom ROM can’t really use it as your daily driver on your primary device. Meanwhile, Stock ROM doesn’t come with too many customization options, but it provides official stable firmware.
- Flash Stock To Unbrick your Nokia 6
- Flash Stock ROM to Fix the Bootloop problem
- Upgrade and Downgrade Nokia 6
- Unroot or Fix Bugs on your phone
- To fix the lag or stutter on Nokia 6
- By flashing Stock ROM, you can solve software problems.
- Revert back to stock to gain your warranty.
Firmware Details:
- Device Supported: Nokia 1 Plus
- Tool Supported: SP Flash tool
- Processor: MediaTek MT6739 SoC
- Android OS: 9.0 Pie
- File: Software Update File
- Gapps: Included
Steps to Install Stock ROM on Nokia 1 Plus
Before starting the installation process, we have listed some of the pre-requirements which you need to follow properly.
Pre-Requirements:
- The ROM file is only for the Nokia 1 Plus handset. Don’t use it on other device models.
- Your device battery should be charged up to 50% at least.
- You will require a Windows PC/Laptop and a USB cable to connect your device with the computer.
- Download and install Nokia USB Drivers on your PC.
- Download SP Flash Tool from the above link and install it on your PC.
- You will also require to download and install the VCOM Drivers from above.
Download Stock ROM File, Tools, and Drivers
- Download Flash Files:
- Flash Tool: Download SP Flash tool | Nokia OST Tool
- Required Drivers: Download VCOM Drivers | Nokia USB Drivers
Method 1: Instructions to Install via SP Flash Tool:
Now, follow the full guide mentioned below to install the stock ROM on your Nokia 1 Plus easily.
You can check out the video tutorial as well from below:
Video Tutorial to Flash Stock ROM using SP Flash ToolMethod 1: Flash Nokia 1 Plus Stock Firmware File via OST
Note: Please make a backup of all your data on your device before proceeding with the flashing the stock firmware.
Let us look at the step by step method on how to install the stock firmware using the Nokia OST (Online Service Tool)
- Open the folder where the Nokia Online Service tool is installed.
- Look for a file named ‘OnlineUpdateTool.exe’ and double click on the same to run it.
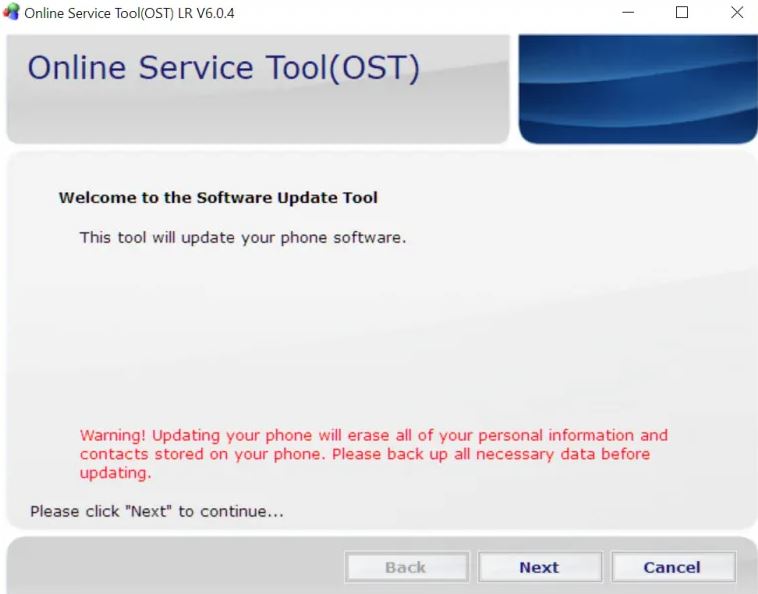
- Once you open the Nokia Online Service tool, you will see the below screen:

- Click the Next button.
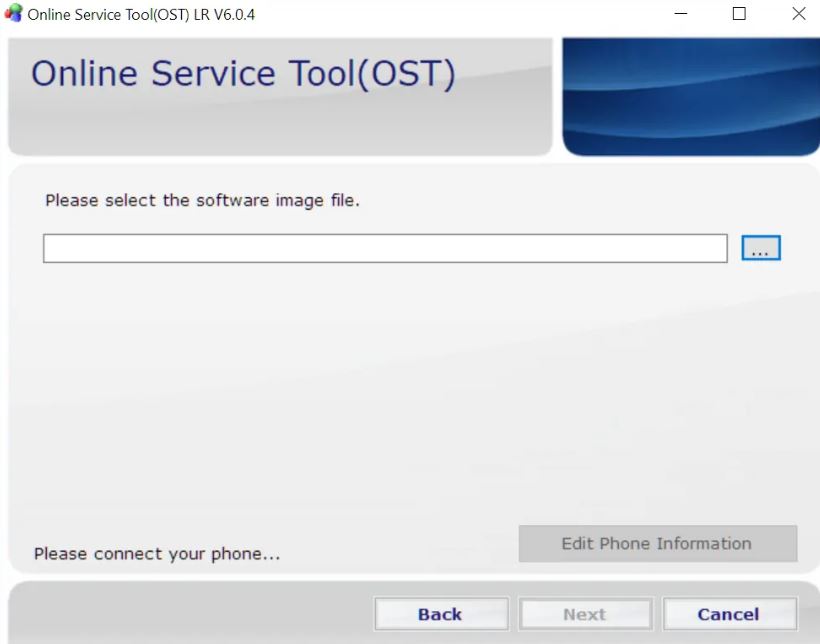
- Here you will need to choose the file location which you need to flash your Nokia device.

- Reboot the device into Download Mode by following the below steps;
1. Switch off your device.
2. Connect the USB cable to your phone (leave the other end open for now).
3. Press and hold Volume Down + Power buttons together.
4. Wait till your phone vibrates and you see a ‘POWERED BY Android’ in the screen along with ‘Download Mode’ at the top or bottom corner. - Select the firmware, and click the ‘Edit Phone Information’ button on the bottom right corner will become enabled.
- An error message will show up. Simply click OK.
- The firmware flashing process would have begun by now. Besides, it might take a few minutes to finish. Moreover, this is standard behavior and nothing to worry about.
We hope that you’ve successfully installed the Stock ROM on your Nokia 1 Plus device quite nicely. if you’ve any queries or experiencing any issue, write down in the comments below.

Good