In this guide, we will show you the steps to switch from SuperSU to Magisk. When it comes to extracting maximum benefits of an open-source OS like Android, gaining administrative privileges stands right there at the top. Also known as rooting the device, it brings in a plethora of goodies with itself. Be it for flashing custom binaries or trying out mods, the possibilities stand endless. In this regard, SuperSU was the go-to choice when it came to rooting a smartphone.
However, it suffered from a major drawback- it made changes to the system partition. This would then trip the SafetyNet which straightaway resulted in the inability of various apps to function properly. All this then paved the way for Magisk. Allowing the users to root their devices, it also comes with an additional benefit- it carries out all its tasks ‘systemless. In other words, it made no changes to the system partition, and hence the SafetyNet remains preserved.
So even if your device is rooted, SafetyNet wouldn’t be able to identify the same since the system is intact. As a result, apps like Pokemon Go, Google Pay, and Netflix would function well and well. So with such a long list of benefits attached, no doubt many tech enthusiasts have their eyes set on Magisk. If you are also currently using SuperSU and wish to switch to Magisk, then this guide is all that you would need. Follow along for the detailed instructions.
Also Read
Page Contents
How to Switch from SuperSU to Magisk (Detailed Guide)
Before we list out the instruction, make sure to take a complete device backup. Once that is done, you may start off with the below steps.
STEP 1: Remove All Root Mods
First and foremost, you will have to uninstall all the mods that are installed on your device. These include the likes of Xposed Framework, Substratum, Magisk Modules, etc. Likewise, if you have made any changes to the system partition, revert it to its default settings. In other words, your device shouldn’t be having any custom binaries nor there should be any changes to the system partition.
STEP 2: Unroot Device via SuperSu
- Next up, you will have to unroot your device. Here’s how it could be done:
- Launch the SuperUser app and head over to its Settings menu.
- Within that, go to the Full unroot option and select it.
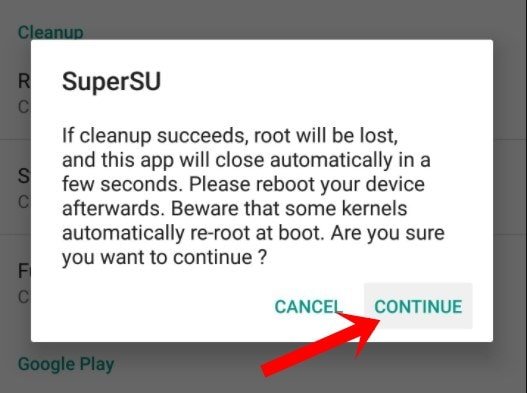
- You will now get a confirmation pop-up, tap Continue.
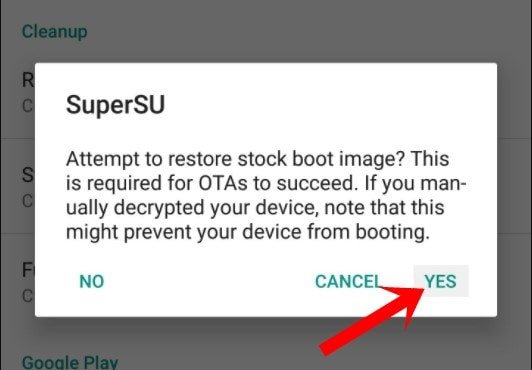
- It will now ask if you wish to revert to stock boot.img, reply YES.
- The next option will ask for the restoration of the stock recovery image.
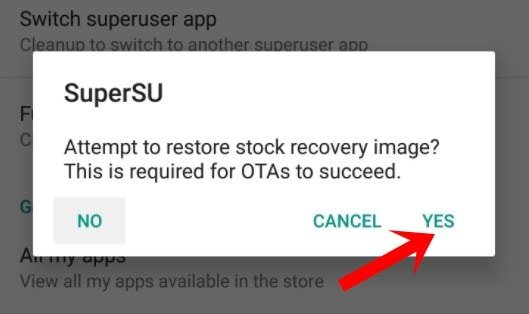
- If you currently have TWRP installed, then tap on No. However, if you don’t have TWRP, then reply YES and move over to the next step of this guide to switch from SuperSU to Magisk.
STEP 3: Install TWRP Recovery
You will now have to install the TWRP custom recovery. This is because we would be needing this recovery to flash Magisk and hence root your device. So please refer to our comprehensive guide on How to Flash TWRP Recovery on any Android Phone. Once done, move over to the next step to switch from SuperSU to Magisk.
STEP 4: Download Magisk
The next step requires you to get hold of the Magisk file, so download it from here: Latest Magisk zip v22.1 and Magisk Manager 8.0.7. Make sure to download both the ZIP and APK file. the magisk ZIP Installer will be flashed via TWRP whereas the APK will be installed to manage root.
STEP 5: Flash Magisk via TWRP
- To begin with, transfer the Magisk ZIP file to your device.
- Then boot your device to the TWRP Recovery.
- You may either use hardware key combinations or the adb reboot recovery command for the same.
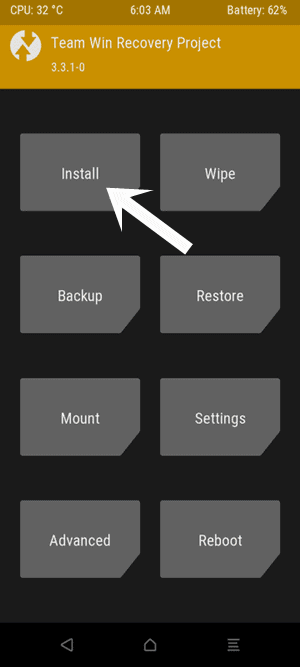
- Once booted to TWRP, go to Install, select the Magisk ZIP file and perform a right swipe to flash it.
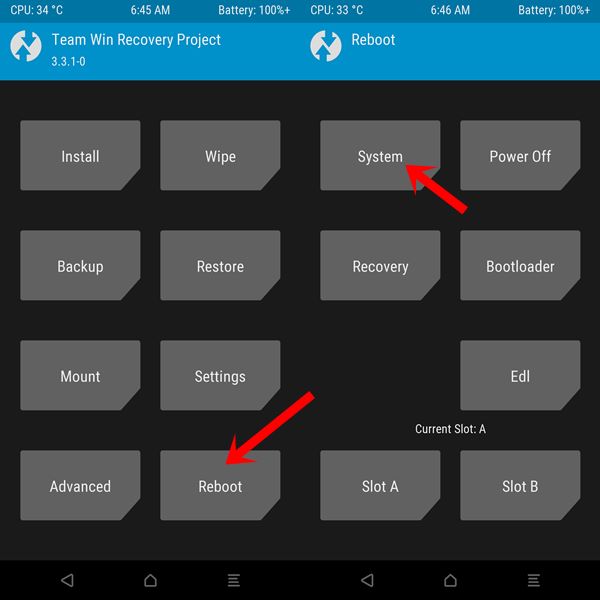
- After that, you may now reboot the device to OS. So go to Reboot and select System.
- Once the device boots up, download and install the Magisk Manager APK file.
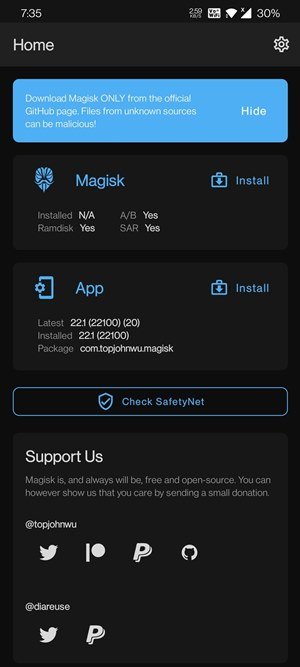
- Launch it and you may now handle all root-related tasks using it.
So this was all from this guide on how you could make a switch from SuperSU to Magisk. If you have any queries concerning the aforementioned steps, do let us know in the comments section. Rounding off, here are some iPhone Tips and Tricks, PC tips and tricks, and Android Tips and Tricks that you should check out as well.

How to re sign the (magisk) patched boot img after may 2017 security patch? I am elsewise unable to boot the img without a bootloop due to it being signed with avb 1.0 keys. I am at December 5th 2017 security patch.