Of course, file sharing is an essential feature in Windows. However, the updates that Windows brings in will most often result in some error that’ll affect some part of your system. As the update errors are increasing among the Windows 10 users, it is now known that sharing is also affected after a Windows 10 update.
Page Contents
After Update, Windows 10 Sharing Not Working: How to Fix?
This might not be an actual error or a bug. Instead, it most probably happens as an update is known to reset saved changes on a computer. So in this case, this should happen mostly because the file-sharing settings were reset after the update. In order to counter the problem, simply read on and take action with our guide on how to fix Windows 10 sharing not working after update.
1. Enabling and sharing files properly
- To start with, navigate to Start→Control Panel→Network and Sharing Center→Advanced sharing settings

- Then, check/select/mark the Turn on network discovery option under Private(current profile) and the Turn on file and printer sharing option under File and printer sharing section
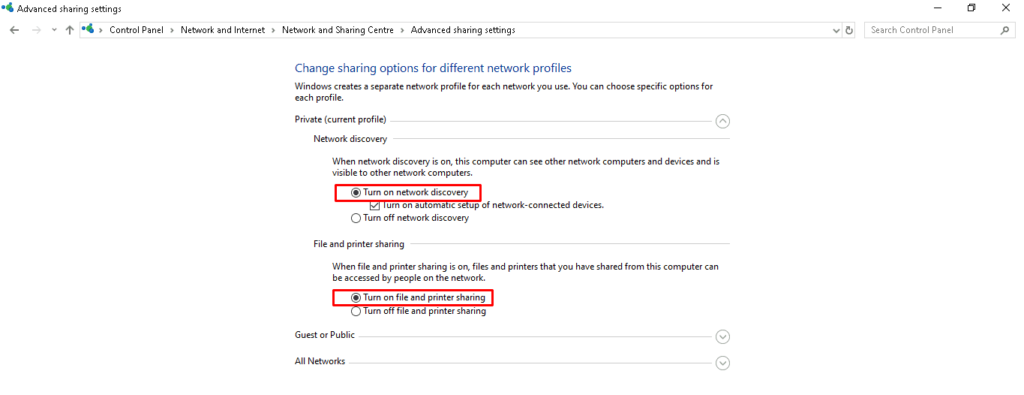
- When you’re done with those, make sure to click on the save changes button at the bottom
- Next, head over to Start→Control Panel→Windows Firewall→Allow an app or feature through Windows Defender Firewall
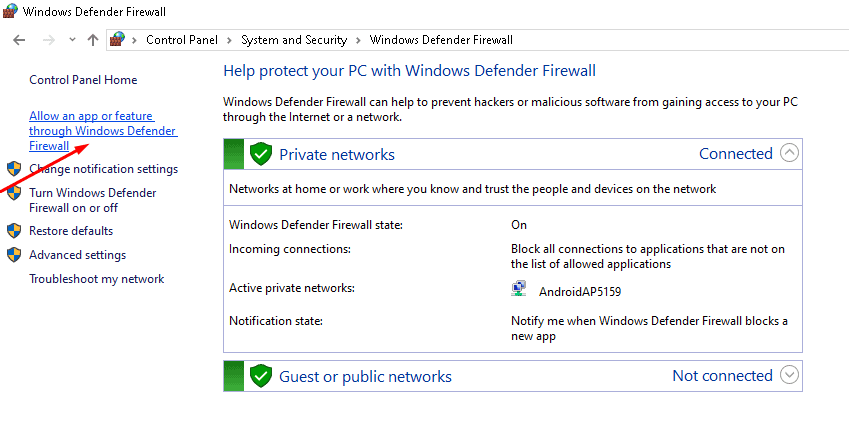
- Then, scroll down through the new window that appears and check the File and Printer Sharing option. Finally, click OK to save the changes
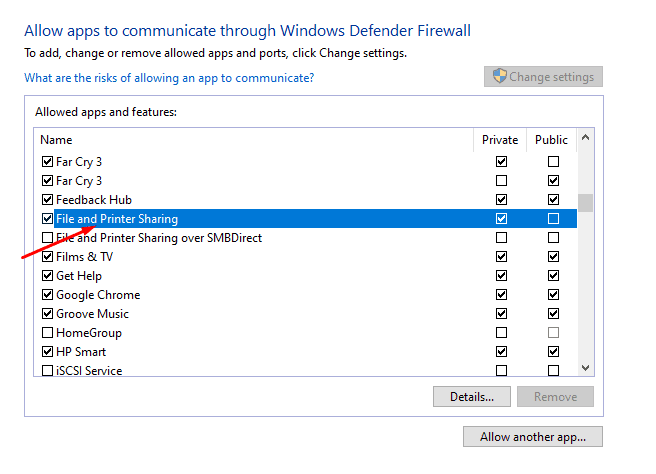
- If this doesn’t work, then an alternative is to disable Windows Firewall
- Moving on, we’ll now get into sharing the files the right way. For this, you first need to right-click on the file you wish to share
- From the options, head to Properties→Sharing→Advanced Sharing
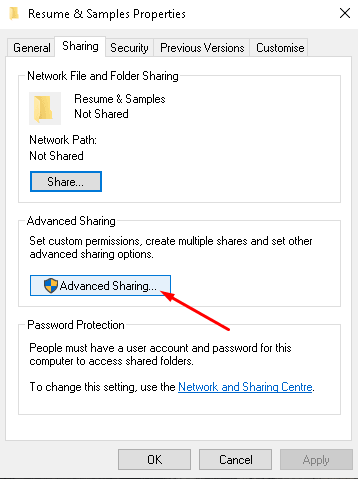
- Then, check/mark Share this folder, click Apply to save the changes, and then click OK and that’ll set you up.
2. Turn off Password Protection for sharing
- Head over to Control Panel→Network and Sharing Center→Change advanced sharing settings
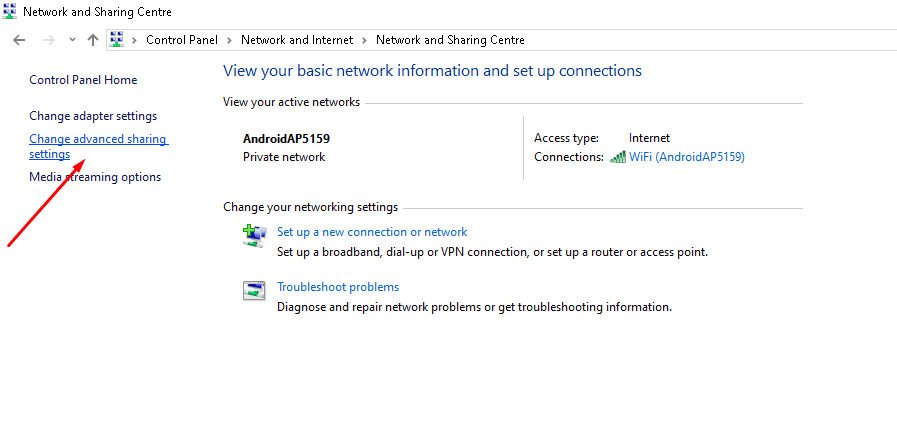
- From there, simply check/mark the Turn off password-protected sharing option under the All Networks section
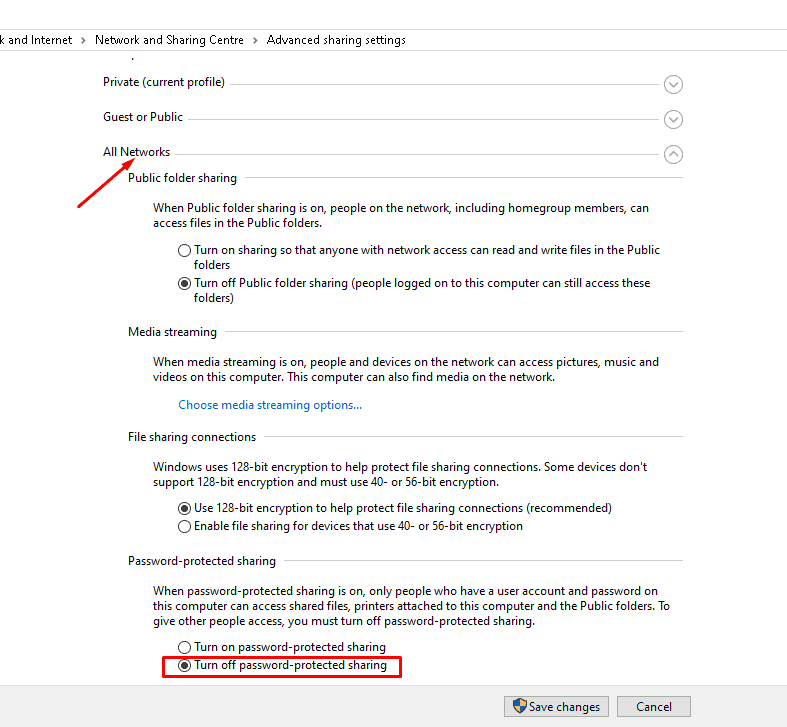
- Then, click on the Save Changes button at the bottom and that’ll probably fix the issue for you.
3. Add a Windows Credential
- To start with, open the Control Panel on your system and type in Credentials Manager in its search bar
- From the results, go into Credentials Manager

- When inside, click on Windows Credentials and then choose the Add a Windows Credential option
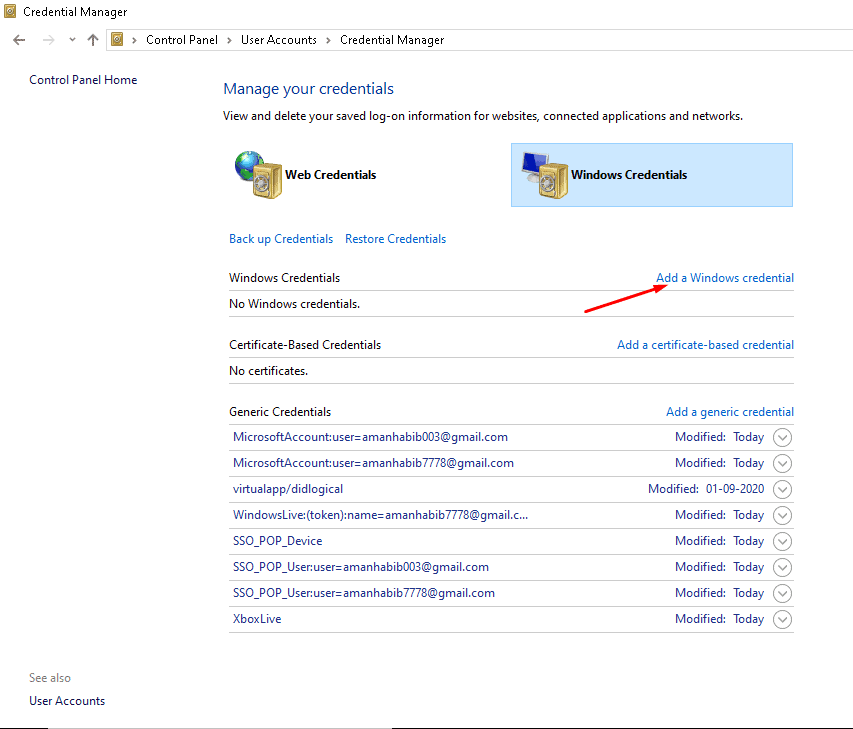
- Then, enter down the target computer’s IP address in the Internet or Network Address field, followed by the username and password respectively.
4. Disable IPv6
- Head over to Control Panel→Network and Sharing Center→Change Adapter Settings
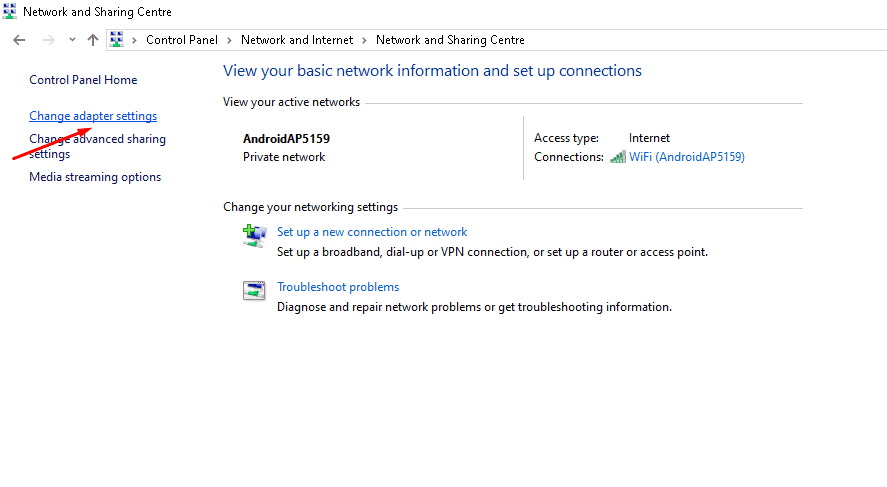
- This will open a new Network Connections window. In this window, double-click on your active Network Adapter
- Next, go into Properties and find Internet Protocol Version 6 from the list of items
- Uncheck it and click OK to save the changes
- Finally, restart your computer and see if the problem still persists. If it does, then move on to the other fixes
5. Enable SMB 1.0/CIFS File Sharing Support
- In order to Enable the SMB 1.0/CIFS File Sharing Support, go to the Control Panel→Programs and Features→Turn Windows features on or off
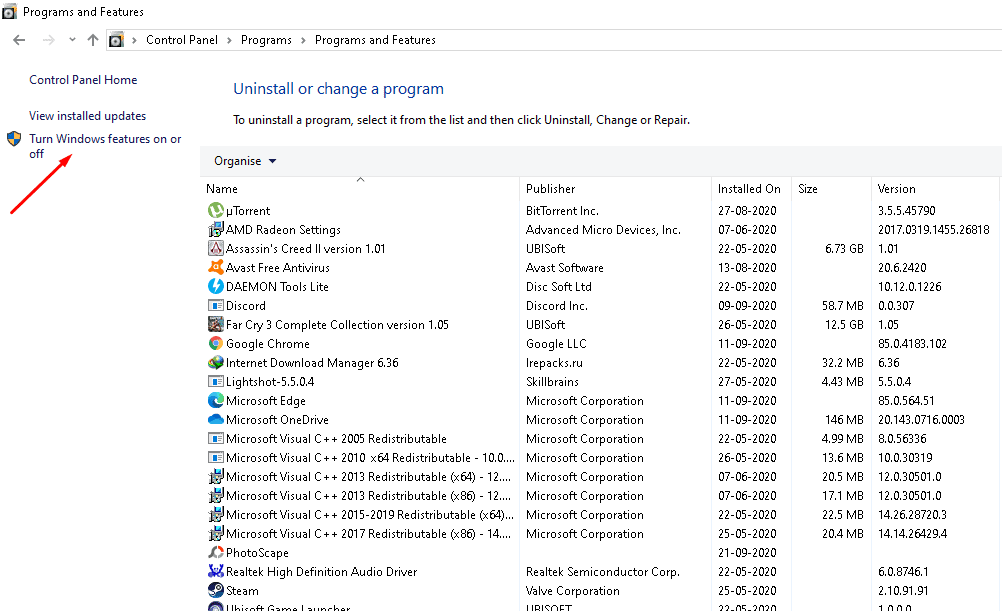
- Then, from the new popup window, scroll through and find SMB 1.0/CIFS File Sharing Support
- Finally, check/mark the option, click the OK button, and restart your computer.
6. Change the file sharing connections
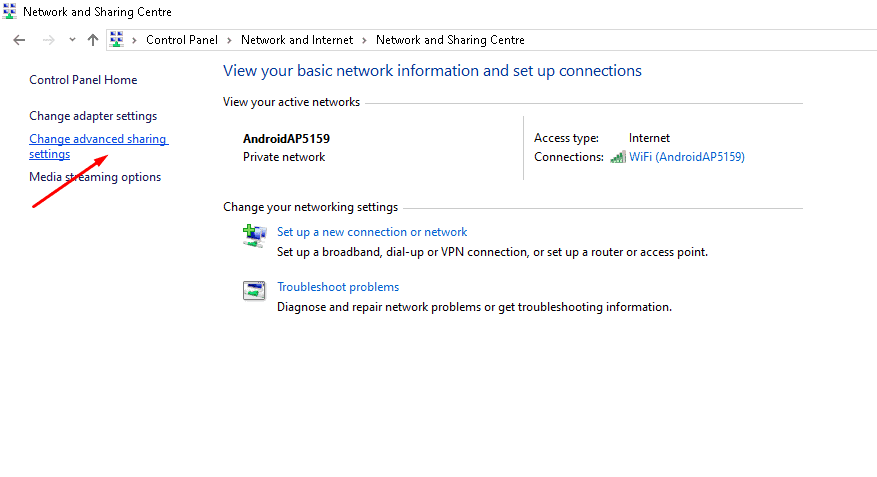
- Navigate to Control Panel→Network and Sharing Center→Change advanced sharing settings
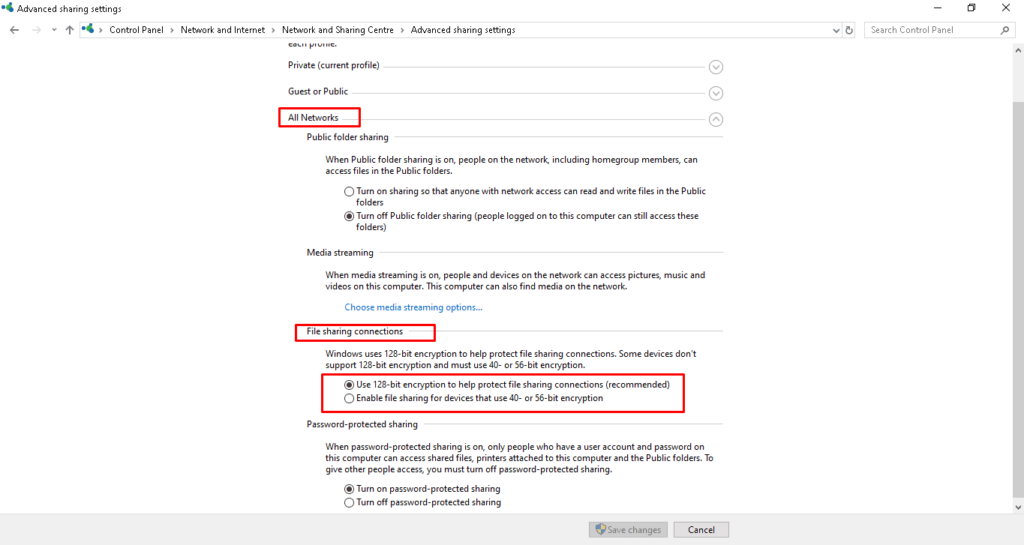
- There, you’ll find File Sharing Connections under the All Networks section. Simply try sharing files by switching between the two available connections. Make sure to click the Save Changes button after switching between the two connections.
- How to Fix When Red X Volume Icon Appear in Windows 10
- How to Fix If MKV file not playing on Windows 10
- Fix Slow Hard Drive on your Windows 10
- How to Set Up Multiple Monitors on Windows 10 With Different Resolution
- Fix Can’t Hear Cortana speak in Windows 10
- Bluetooth Speaker Not detected in Windows 10: How to Fix?
Coming to a conclusion, that’s everything you need to know about fixing the file sharing feature in Windows 10. Although the update did hit us with bugs, it is a good idea to apply each of these fixes and see which works out for you. That said, we hope reading the article above has equipped you with some bit of information. Please let us know by commenting down below if you have any further queries regarding the same.
Also, check out our iPhone Tips and Tricks, PC tips and tricks, and Android Tips and Tricks if you’ve got queries for it or want help. Thank you!
