This guide will have an in-depth look at the EDL Mode on Qualcomm devices and its associated importance. Android devices are always known to be at the pinnacle of customization. These include the ability to flash custom recoveries like TWRP, flash a custom ROM, or GSI images. Likewise, you could also gain administrative privileges in the form of the root. Some tech enthusiasts also tweak the boot and system partition and explore the device’s full potential. However, not everything’s as easy as it may sound. All these modifications bring in some associated risks as well.
More often than not, it results in your device getting into a boot looped or soft-bricked state. But even then, there’s still a handy way around. All you have to do is boot your device to fastboot mode and flash the stock firmware onto your device. But you would only be able to boot your device to fastboot in the first place if it has been soft-bricked. The moment it ends up in hard-bricked, your device won’t even boot to Bootloader or Fastboot mode. And in such a state, the best use of your device is a dead paperweight (that’s why the brick name)!
However, if your device has an underlying Qualcomm Snapdragon chipset, then there’s some good news in store. Every Qualcomm device comes with an EDL or Emergency Download Mode. Your device could then make use of EDL’s set of rules to flash the stock firmware files onto your device. With that said, here is every bit and piece of information regarding this EDL Mode and the need for such a mode on your Android device.
What is an EDL Mode?
EDL or Emergency Download Mode follows a specific set of rules known as the Firehose or Sahara protocol to force-flash the firmware. The thing with this mode is that it is independent of Bootloader or Fastboot mode. Even if your device cannot access these modes, which most hard-bricked devices cannot, it is not an issue. The EDL Mode is independent of both these modes as it resides in the Primary Bootloader interface.
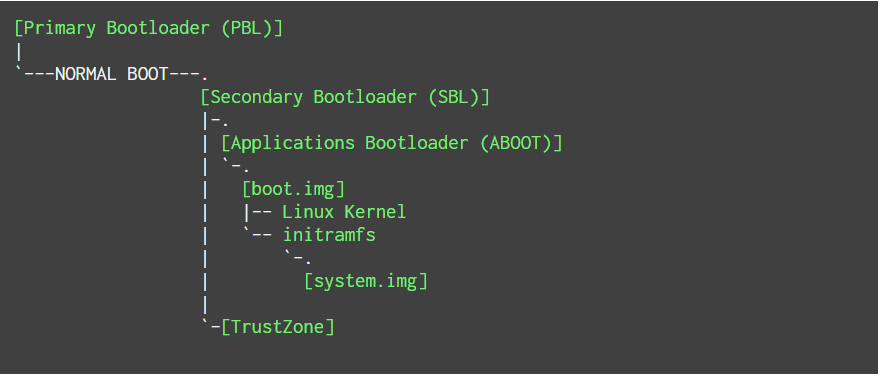
So all the Qualcomm devices that have the Primary Bootloader trigger a secondary bootloader. The latter holds important file configurations and partitions, including ABOOT, Linux Kernel, and system.img. The TrustZone, responsible for checking the ABOOT or Android Bootloader’s authenticity, is also present there. When we unlock the bootloader on our Android device, we disable this authenticity check.
Furthermore, everything after the Primary Bootloader (ABOOT, kernel, trust Zone) resides in the Secondary Bootloader and is the one to be affected by the incorrect software modifications. In other words, if you end up flashing an incorrect build of a custom ROM onto your Android device, then only the secondary bootloader gets affected. Fortunately, the Primary Bootloader remains unaffected, and so does the EDL Mode, as it resides in the Primary Bootloader itself. Hence you could easily boot your Qualcomm device to this mode and force flash the device-specific firmware.
Booting up a Qualcomm Device to EDL Mode
Now there are two things to note here, the steps to boot your device to fastboot mode and then the flashing instructions. Regarding the former, you could make use of the ADB or Fastboot Commands. While that is the easiest route, it often does not fail to give the desired results. This is because executing ADB commands; you need to enable USB Debugging, which is just not possible in a bricked device. Similarly, you cannot boot your device to fastboot mode if your device has been hard-bricked.

The only other escape route involves the use of Test Point mode. Or some Xiaomi devices also use the Deep Flash Cable in this regard. Once your device is connected in an EDL mode to your PC, it will be recognized as Qualcomm HS-USB QDLoader 9008. Some smartphone manufacturers like OnePlus and Xiaomi have a specific set of tools just for this very purpose regarding the flashing part. These include the QPST, QFIL, MSMDownload, etc., which have been released by the OEM themselves or have been leaked. So, connect your device to EDL, launch the tool, and flash the associated firmware file.
The Need for the EDL Mode
When you flash incorrect software or make some system-level modifications in a manner that wasn’t intended, it affects the device’s normal functioning. In that case, your device ends up in a boot loop (or gets soft-bricked). The easiest escape route involves booting the device to Fastboot or Download Mode. You are not always in luck, and sometimes your device will refuse to boot to either of these two modes. Those devices are then said to be hard-bricked.
And in that case, you could only bring back your device to normal working condition by booting it to EDL mode. This would then pave the way for force flashing the firmware via the provided tool. So if at any point in time you mess up big time, boot your Qualcomm device to EDL mode using the above-mentioned tips. After this, you could make use of the provided steps to flash the stock firmware. Hopefully, everything will be right back on track, and you will be saved from a trip to the service center.
5 Methods To Boot EDL mode on any Qualcomm Device
We have shared 5 methods to enter into EDL Mode, using ADB Commands, using fastboot mode, using hardware buttons, using Deep Flash Cable, and PCB Test Points. But before going to the steps below, let’s take a look at the requirements as well.
Pre-Requirements:
- This guide will only work on any devices with Qualcomm SoC.
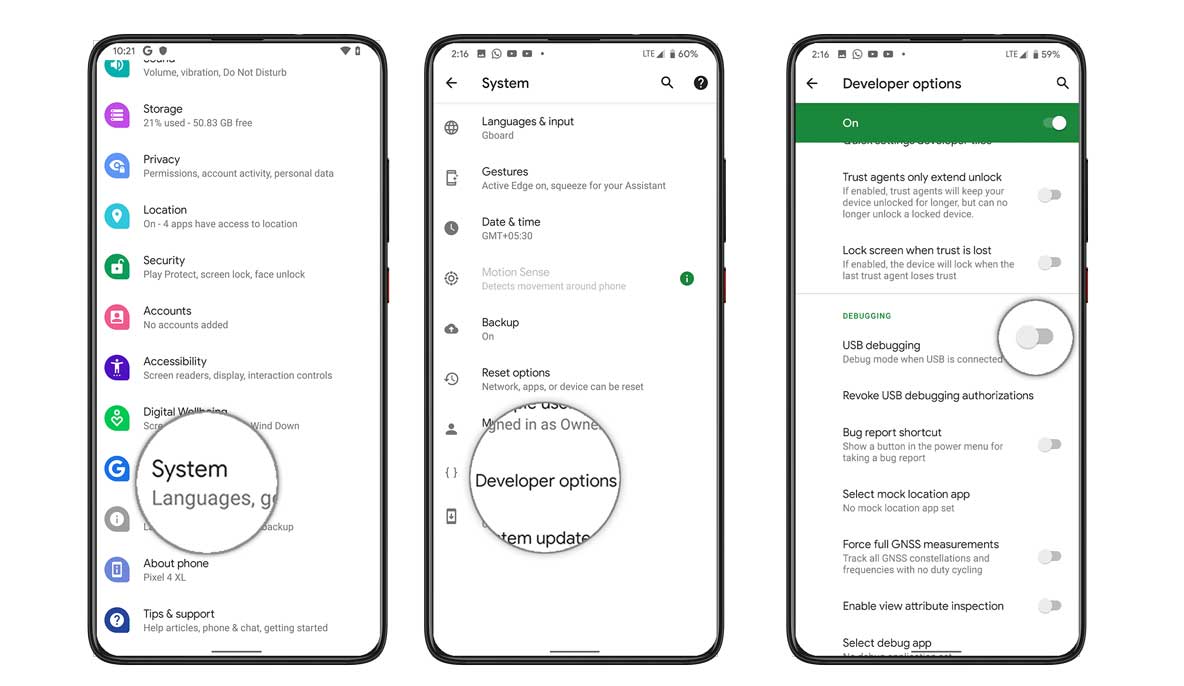
- Enable USB Debugging on the device.
- A PC/Laptop and a USB Cable.
- Install Android USB Drivers on the PC.
- Install ADB and Fastboot Tool on the PC.
1. Boot EDL Mode via ADB Commands
ADB stands for Android Debug Bridge which can be used to boot into EDL mode on your device. But the USB Debugging should be enabled on the device and connected to the computer.
- We hope you’ve already enabled USB Debugging.
- Connect the phone to the computer using a USB cable.
- Allow USB Debugging on the phone by tapping on the OK button.

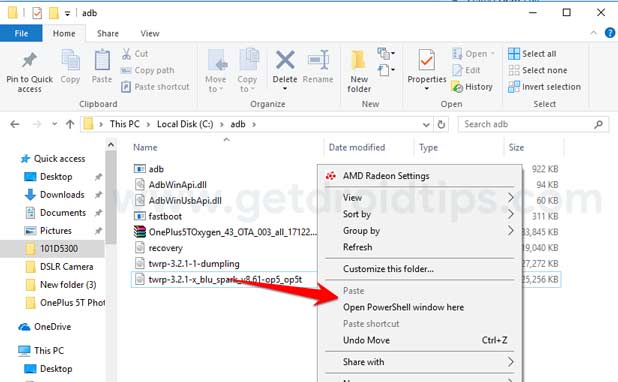
- Go to the installed ADB folder on your PC > press and hold the Shift button + right-click.
- Select the Open command window here option, type in the following command, then hit enter.
adb reboot edl
- Now, your device should go to EDL mode. (The phone screen will dim)
- Head over to the Device Manager option on the PC.
- Click on Ports. If the driver works properly, Qualcomm HS USB Qdloader 9008 will be detected.
- Finally, you can flash the firmware on your device via the Mi Flash Tool.
2. Use Fastboot to Boot EDL mode on any smartphones
- Switch off your device and go to Fastboot mode by press and hold the Power + Volume Down button together for a few seconds until the Mi logo or Rabbit logo appears.
- Now, connect the device to the PC.
- Use ADB & Fastboot tool to write commands as we’ve mentioned in the first step.
- Type the following command and hit enter to enter EDL mode. If one command doesn’t work, try another.
fastboot oem edl
OR
fastboot reboot-edl
OR
fastboot reboot edl
- That’s it.
3. Use Hardware Buttons
- Turn off your device.
- Press and hold the Power + Volume Down buttons together and immediately connect the device to the PC.
- It will automatically boot into EDL mode, and LED lights may blink.
4. Use Deep Flash Cable
You have to purchase this tool online, or you can manually build it as well. Even if your Qualcomm device bootloader is locked, this tool will force your device to use Qualcomm 9008 mode.
5. Use PCB Test Points
A test point is a location on electronic circuits used to monitor the condition of the circuit test signals. Test points are primarily used during manufacturing to verify that the newly assembled device is working properly or not. Even the used aftermarket devices can be checked before repair.
The location of test points on each phone variant will vary depending on the PCB type. While Qualcomm devices usually provide test points to force the device into EDL mode (9008).
That’s it, guys. We hope you’ve found this guide helpful for your Qualcomm processor-powered devices.
Discussion
3 CommentsI own redmi 4. On flashing a custom rom it got hard bricked. I am trying to flash firmware through EDL methode.But unfortunately flashing through MI flash tool show some error like” cannot receive hello packet ” and ” reached end of the file” ect. please help me.
Same. Readed many tips from forums but all doesn’t work (another errors). Now I think about locked bootloader: for example, I flashed Xiaomi Redmi S2 with locked BL and got same errors.. With unlocked S2 flashed was completed…
Bien sûr elle est utile je voudrais connaître les point de test huawei G8