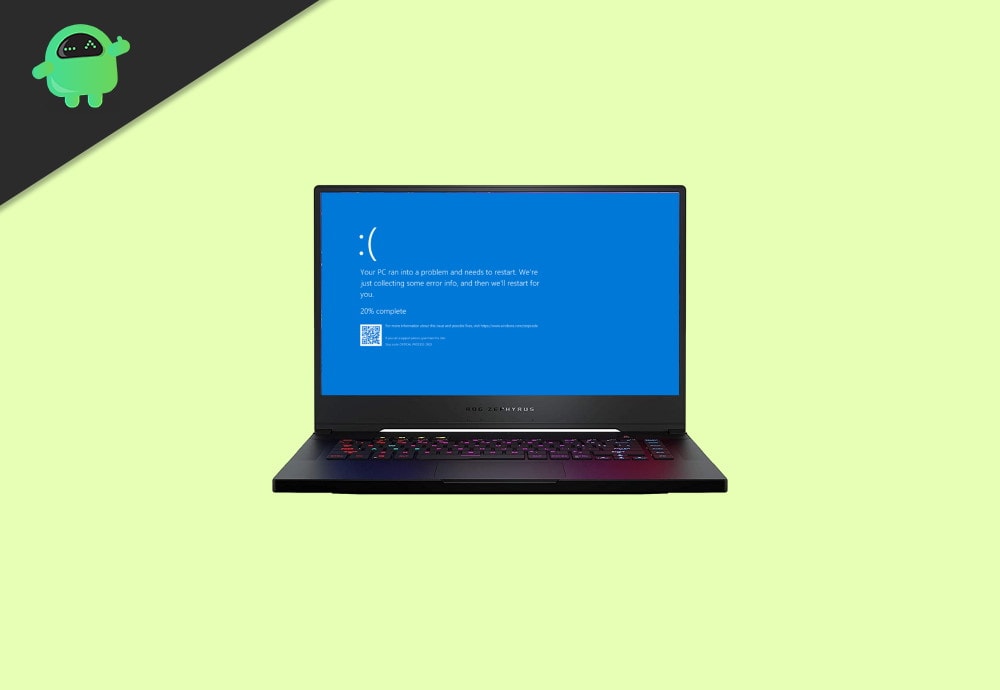
ASUS Zephyrus users are reporting unfortunate Blue Screen of Death Error on multiple occasions. People are saying that the BSOD error is constant, sometimes they can access their Windows, and sometimes they can’t. Even more, users have also said that the BSOD is in a continuous loop, and they can’t access their Windows.
Well, we know that BSOD shows up when there are device incompatibility issues and Driver issues mostly, But it is also possible that the error is due to the old BIOS version or because of your messed up system settings. So today, we will help you fix your Zephyrus BSOD error with these PC troubleshooting tips.
Page Contents
Fix Asus Zephyrus Laptop Blue Screen of Death (Windows 10)
If you are suffering from a constant BSOD error on your ASUS laptop, then this article is for you. We will discuss the possible reasonable causes of the Zephyrus BSOD error, and also we will discuss a few solutions.
Also Read
Method 1: Uninstalling Recent Windows Update
As mentioned earlier, it is possible that the latest Windows update was not compatible; thus, the BSOD error shows up. Therefore, the best course of action to fix such error will be to remove the recent Windows update.
If you are facing the BSOD error just after some time, you have updated your Windows 10, then be sure that the issue is because of the Windows update.
Step 1) Firstly, open up the Windows Update Settings, therefore go to the Windows Search bar, and type Windows Update Settings, click-open the Windows update settings from the result.
However, you can also press the Windows key + I on your keyboard to open up Windows settings>Update & Security.
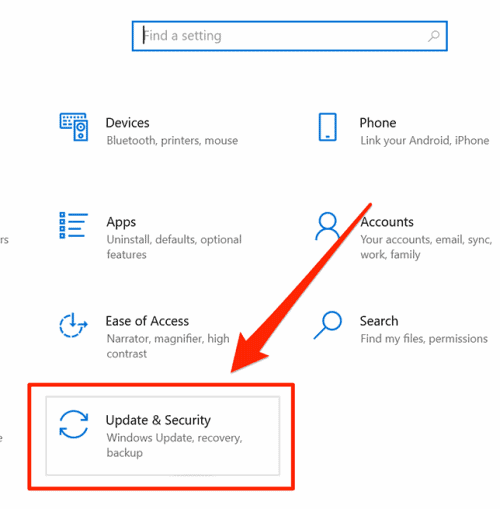
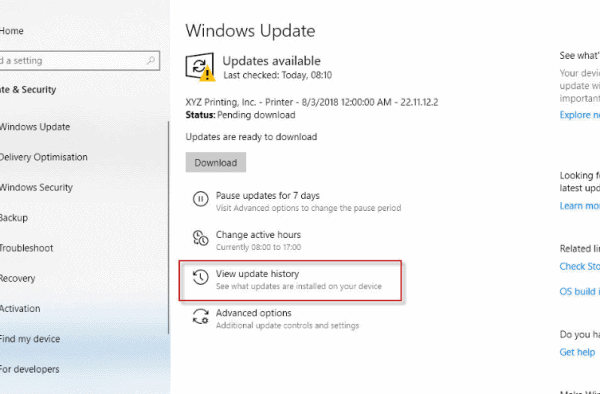
Step 2) On the Update & Security Settings Page, click on the Windows Update tab on the left pane, and on the right pane, click on the View Update History option.
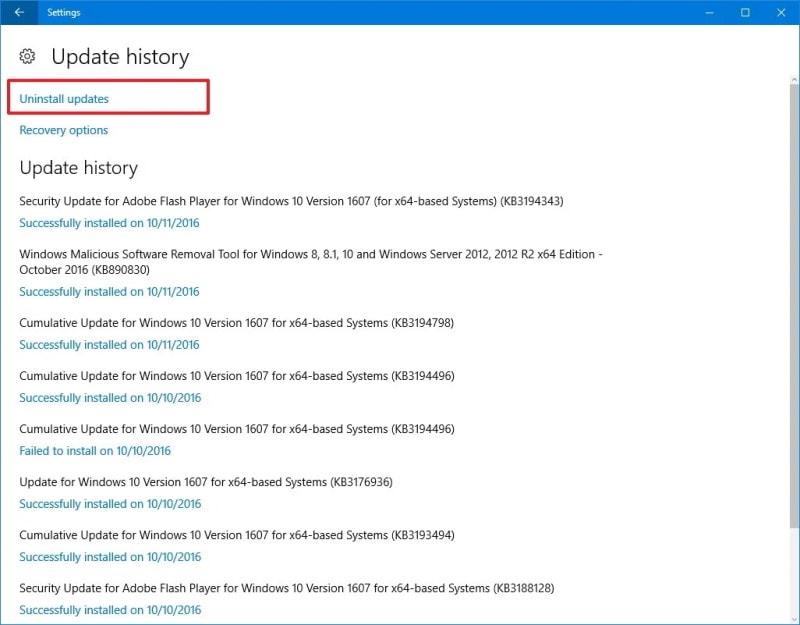
Step 3) Now, on the View Update History Page, click on the first option there, Uninstall Updates to uninstall the recent Windows Update.
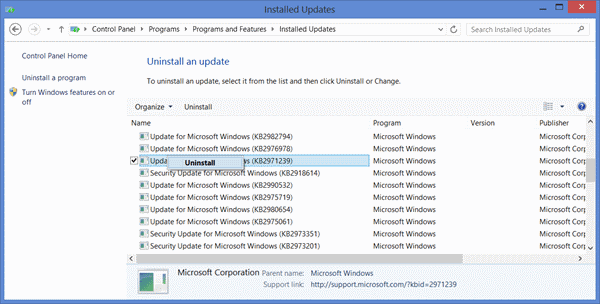
Step 4)On the Installed Updates window, select the last update according to the date. Right-click on it and select Uninstall, confirm it, and you are done fixing the BSOD error.
It is possible that you are stuck in the BSOD and can’t access your Windows. However, you can still uninstall Windows update from there and fix the issue.
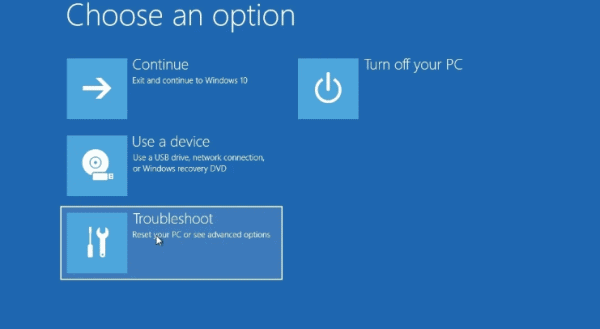
You will have to boot Windows until you access the Advanced Startup Window, there select the Troubleshoot option.
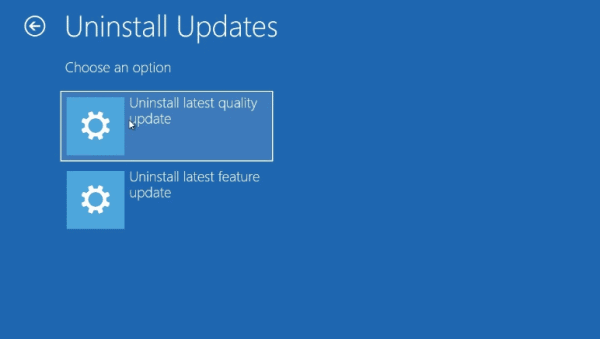
After that, go to Advanced Options. On the next page, select Uninstall Updates, and lastly, select the Uninstall Latest Quality Update option, type your Admin password, confirm it and uninstall updates. This should fix the BSOD error.
Method 2: Roll-Back Graphic Driver Update
It is possible that you have recently updated your Graphic driver, but it is not compatible with your device. Therefore, you would like to roll-back to the previous driver because the un compatible driver can cause a constant and sudden BSOD error.
To roll-back, your Graphic driver, firstly, opens up the Device Manager by typing Device Manager in the Windows Search Bar.
Then click-open the Device Manager from the search result. In the Device Manager, click the Downward arrow beside Display Adapters. This will expand the Graphics Drivers on your Device, select the Graphics Driver, right-click on it and select Properties.
Now in the Properties Window, click on the Roll-Back Driver button. Then select the appropriate reason why are you rolling back, click on the Yes button.
Method 3: Using MyASUS to Run a system Diagnostic
You can inspect anything on your ASUS Zephyrus laptop using the MyASUS app, even fix the BSOD error. The app comes installed by default on your ASUS laptop. To open it, just search MyASUS in the Windows Search Bar.
Then click-open the MyASUS app from the search result. Then in the MyASUS app, click on the Diagnostic System icon. If the icon doesn’t show up, it means your PC doesn’t support it.
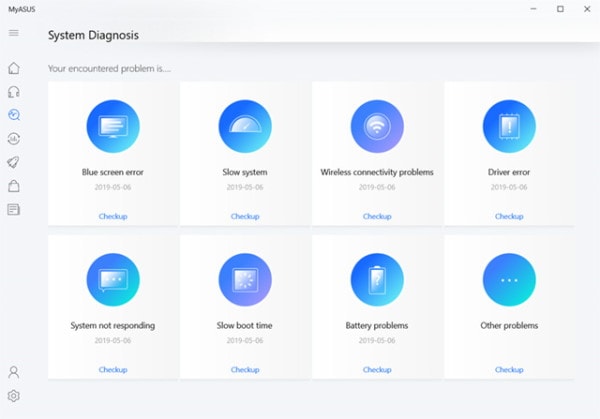
Now, in the System Diagnostic page, select the Hardware Diagnostic option, select all options there, and do a checkup.
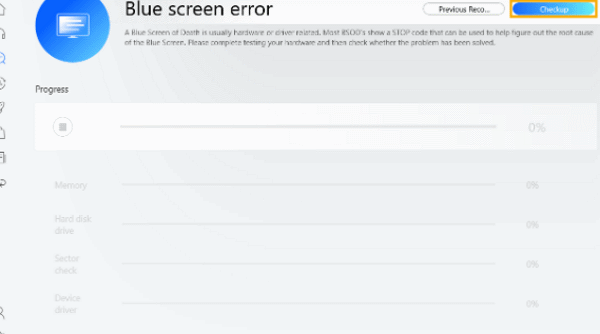
Once done, go to System, Diagnostic page again, click on the Blue Screen Error option. Click on the check-up button.
If the app detects an issue, it will automatically fix it. You can also see the progress below.
