The Emulator Bluestacks is a popular software for Windows PCs that lets users run any Android application directly on a Windows PC. It does not support all the applications on the Google Play Store, but it does support most of them. With updates rolling out now and then, we see support for more and more applications.
Every Android interface has an IMEI, GUID, and SIM ID. And there is a feature in Bluestacks that does allow you to change them on your device. Now, how exactly do you do that? That is what we will find out in this article.
Also Read

How to Change GUID, IMEI or SIM Serial Number in BlueStacks 4?
Digital security is a grave concern now for many users, especially in a world where it is almost close to impossible to live without the internet. So you must do everything on your hands to try and ensure that your digital security is intact. In that case, changing the IMEI, GUID, and SIM ID might be something to consider. Then you will be able to open up any websites or go to any links without worrying about leaving a real digital footprint of yourself.
Also Read
Now to change these unique numbers in Bluestacks 4, you will need the Bluestacks program along with the BSTweaker program. You can download the Bluestacks application from here, and then you can get the BSTweaker program from here.
- First, open up Bluestacks and then make sure that it is functioning correctly.
- Now open the BSTweaker program.
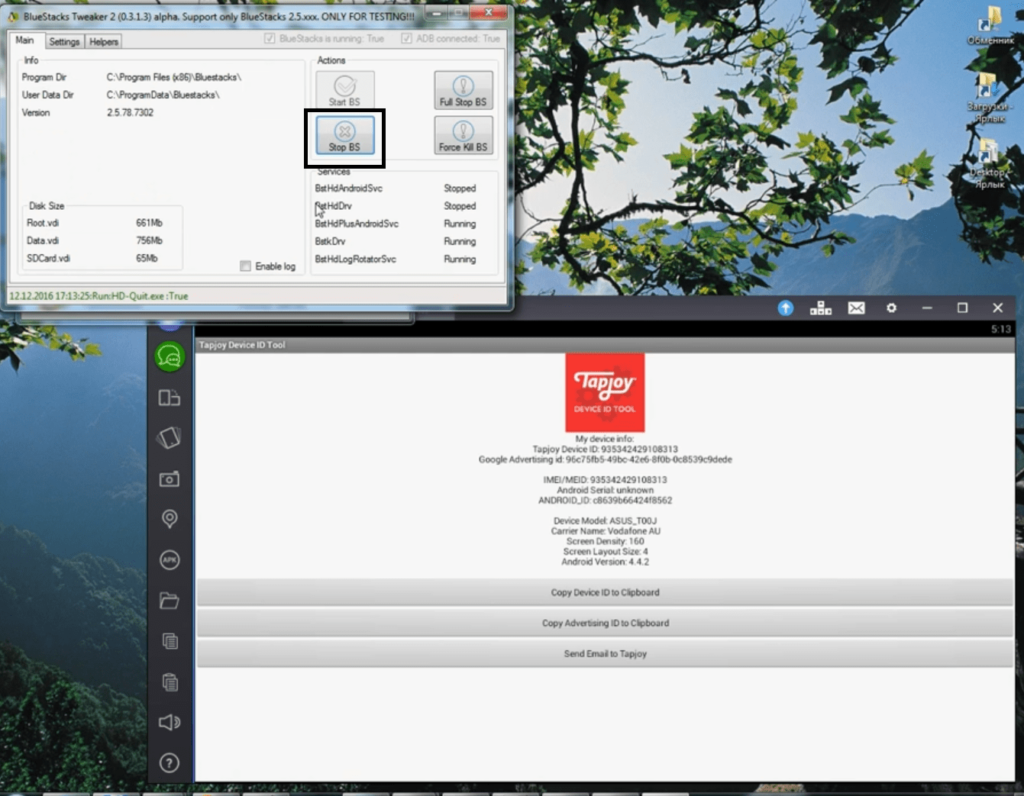
- Under the main tab, click on the Stop BS button and terminate the Bluestacks program running in the background. You will see all the running services stopping right there in the program window.

- Once all the services have stopped, then click on the Settings tab.
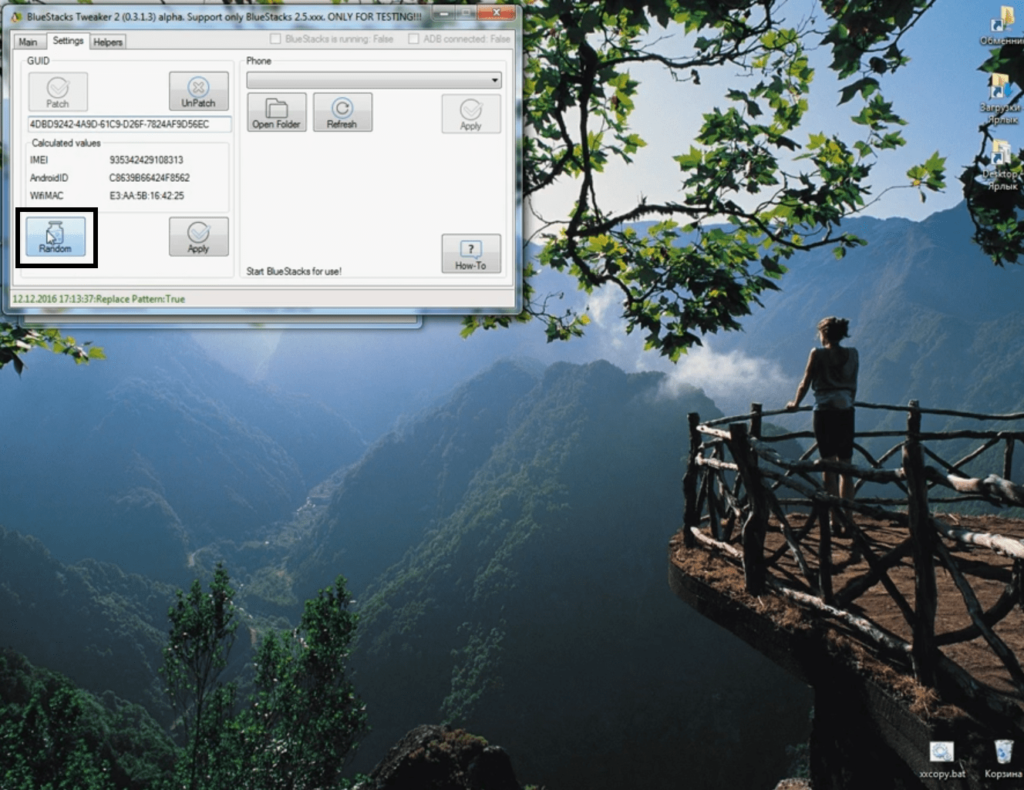
- Here you will find a Patch button. Click on it.

- Then click on Random, and you will see a random IMEI, Android ID, and GUID being generated.

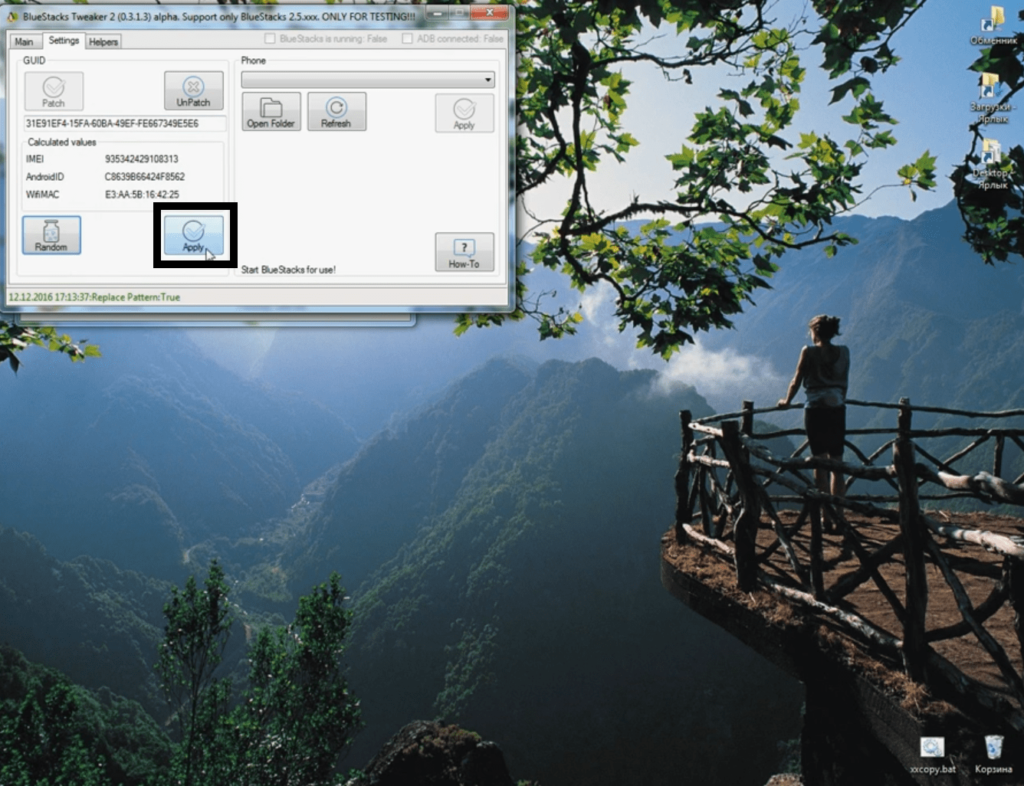
- Then click on the Apply button. Finally, in the main tab, click on Start BS, and you are done.

Now open the Bluestacks application and using any application that gives you device details, check if the changes are now saved. You will see a new GUID, Android ID, and an IMEI assigned to this Bluestacks application.
If you have any questions or queries about this guide, then comment below, and we will get back to you. Also, check out our other articles on iPhone tips and tricks, Android tips and tricks, PC tips and tricks, and much more for more useful information.
Also Read
