Many of you in excitation upgraded your iPad OS to the iPadOS 14 Beta Version. Now, as we all know that upgrading our system to Beta version sometimes can create many performance-related problems. It can cause many issues like crashing of apps, lags, or slow performance. Some people might face issues related to working on certain apps. In that scenario, you will think to downgrade your system.
Now, downgrading to iPadOS 13 is possible, and it’s not rocket science. In this article, we are going to do that with an easy process. Here we will be talking about a simple method to downgrade your iPadOS 14 Beta to iPadOS 13 version. Before heading towards this method, we would advise you to securely back up all your important files and data to either Finder, iTunes, or iCloud. So, let’s get started with this method.
Page Contents
How to Downgrade iPadOS 14 Beta to iPadOS 13
The method of downgrading iPadOS 14 Beta to iPadOS 13 version is quite simple just make sure to follow all the steps which we mention carefully. Since you can only downgrade to iOS 13.5.1 version, and due to this, you can not downgrade your device’s version any lower than this version.
However, this process is safe, but we do suggest you backup your device just in case if any problem arises you can safely restore from there. Just follow all the steps in this method correctly.
Steps to downgrade iPad OS 14 Beta to iPad OS 13 without losing any data
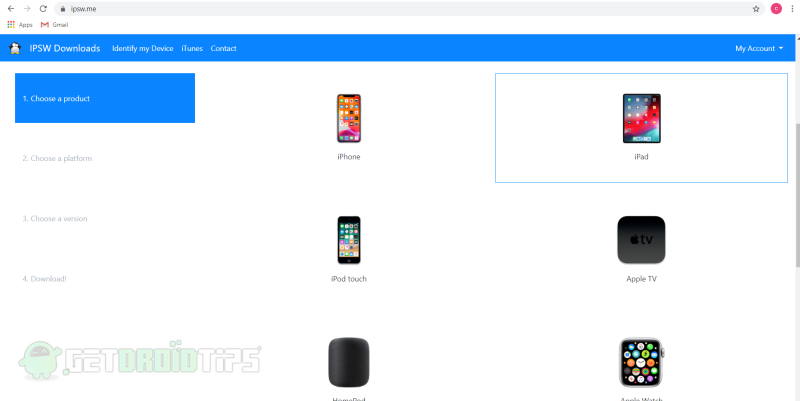
Step 1: Now, the first thing you should do is, of course, download the iPad OS 13 firmware file (the IPSW file) and save that file on your desktop. To do just go on this link and choose your device model: IPSW File
Step 2: Now connect your iPad or iPhone to your PC or Mac using a cable. Make sure that they are connected properly.
Step 3: Ensure that Find My Device feature is disabled on your iPad/iPhone. You can find that feature in your device’s settings. Put your device in DFU ( Device Firmware Update) mode so that iTunes or Finder can recognize the device is in recovery mode.
Step 4: Once you have done with all the setup and IPSW files, just go ahead. The next step is to open Finder or iTunes on your PC or laptop ( depends on whether you have macOS or Windows ). You will see your device name on the left-hand side. Check the below image for reference.
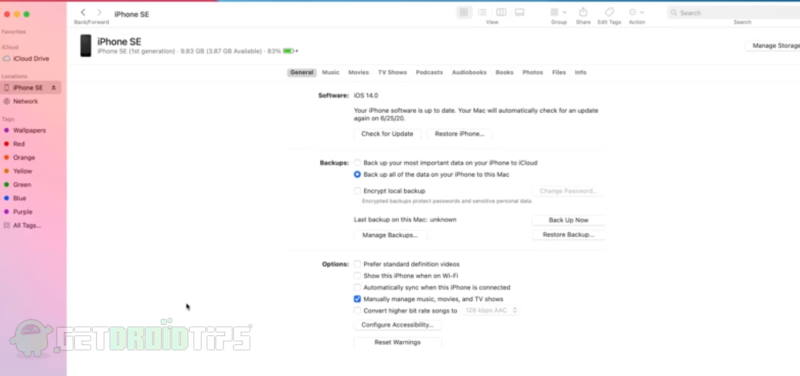
Step 5: Select your device from there. Now press and hold the left option key (on mac) and shift key (on windows), while holding the option key or shift key just click on check for updates or restore option.
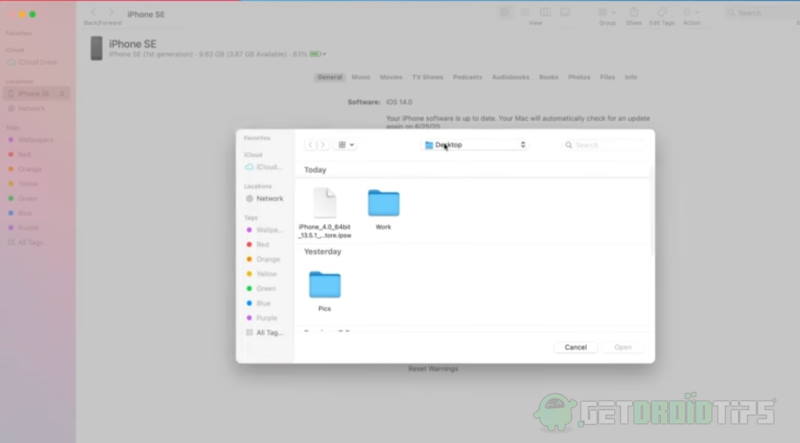
A new screen will pop-up, and you will get the option to choose the IPSW file that you downloaded earlier. Just open it. Now you’re good to go. See the below screenshot :
Step 6: Tap on update and wait for some minute for that process to finish. It’s not updating but basically downgrading your device from iOS 14 beta to ios 13. So just sit back and wait for this process to finish.
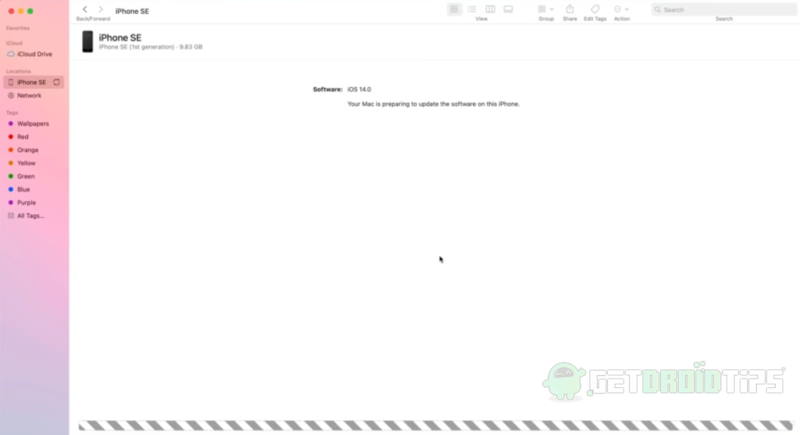
Step 7: Now, once everything is finished, just check your device, and you will see the iOS setup screen. Lastly, set your device up or restore the backup.
This process is quite similar to all the previous processes that we used to downgrade our iOS version. The only thing you need to do is go through all the steps clearly.
Conclusion
Thus, it was all about the method to downgrade your iPadOS 14 Beta version to iPad OS 13. All you need to do is just follow all the steps, and you will not face any kind of issue. Ideally, you should not upgrade your device to the Beta version just after it releases.
You should wait for some days until all the bugs and issues are sorted out and resolved. But if you upgrade, you can always follow the above-mentioned steps. Most importantly, we always recommend you to back up all your files and data and follow the process. This was all about it. Thank You!
