Most games and people who use Graphic intensive application tends to install a dedicated GPU or invest in good Integrated graphics. However, if you already have a great GPU installed, then how do you use it. By default, Windows has settings that allow you to set up any integrated graphics. But in some cases, it is crucial to force an app or game to use Nvidia GPU or integrated Graphics GPU to check or troubleshoot performance. In such cases, this guide will be helpful to you.
If you are expecting an application to run on your Windows to its high performance, then you will have to run your app through your dedicated GPU. Even if you are using a low-end PC, you have secondary intel GPU. Windows allows you to use that to get the best performance from the application and games. However, we are discussing here how to run apps and games using Nvidia GPU or an integrated GPU on your device.
Also Read

Page Contents
How to Force App or Game to Use Integrated Graphics
Every PC has an integrated GPU installed. By default, your apps won’t run on the integrated GPU to achieve High Performance. But you can tweak some windows settings to run your apps through an integrated GPU. Follow the steps to do so.
Step 1) Firstly, type Display Settings in the Windows Search box. Click on the first option that appears. It will open up the Display Settings of your Windows.
Step 2) Scroll down and click on the Graphics Settings option.
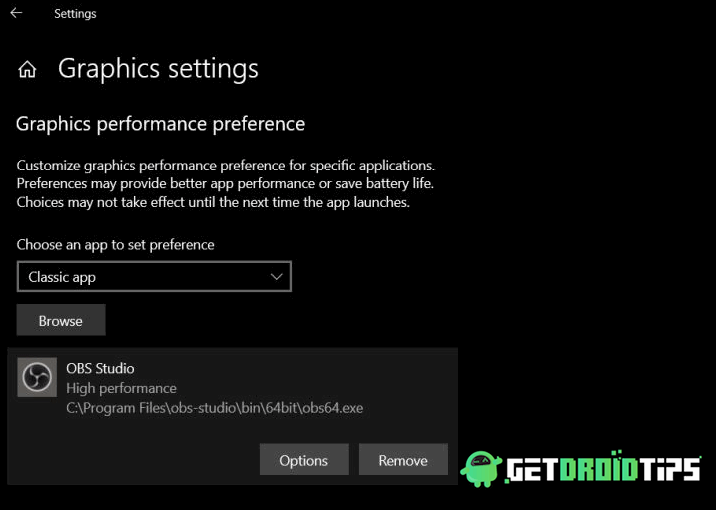
Step 3) Click on the drop-down menu if the Classic app is not selected; otherwise, click on the Browse button. Navigate to the directory where your games and apps are installed. Select the application and click on the Open button.

Step 4) After selecting the application, be back on the Graphic Setting Window. You will see the app you have selected earlier, now click on the Options button.

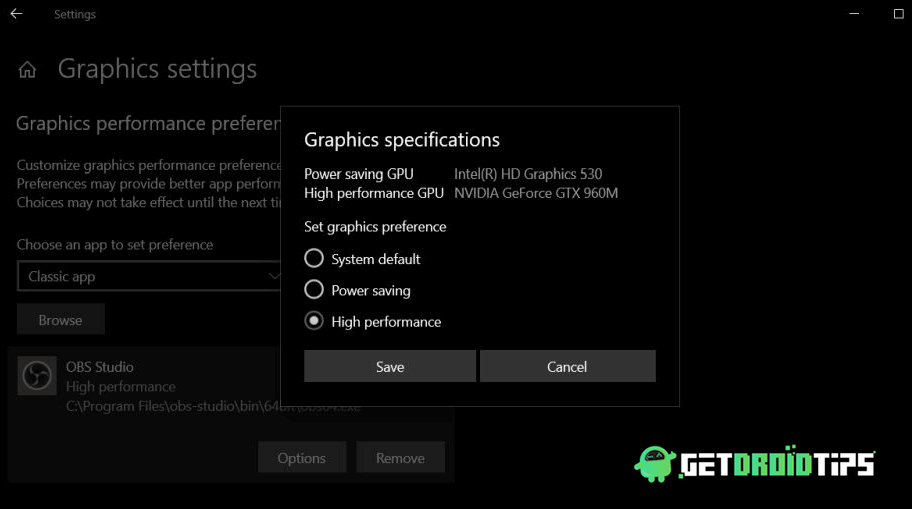
Step 5) A menu will appear, select the High-Performance option, and save it.
Now when you run your apps, it will use the integrated GPU and will give you the best performance.
Also Read
How to Force App or Game to Use Nvidia GPU
If you have Nvidia GPU installed on your device, then definitely, you have installed all the necessary Nvidia-related applications and Drivers on your Windows. You can use the Nvidia Control Panel application to have access to force run an application or game using Nvidia GPU. Follow the steps mentioned to do so.
Step 1) On your Desktop, right-click on an empty area and select the NVIDIA Control Panel option.
Step 2) Now go to the Desktop menu and select the Add”Run with graphics processor” to Context Menu option.

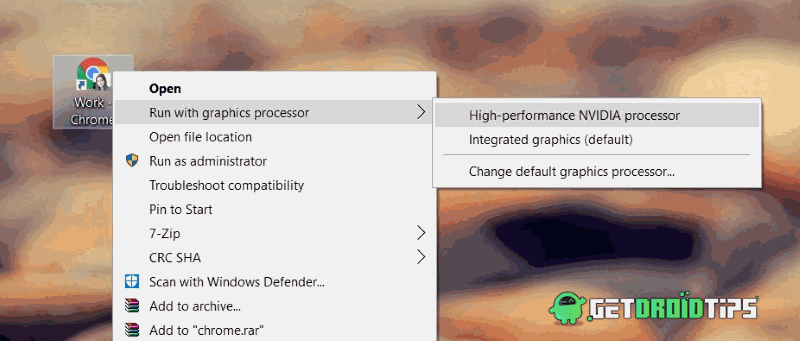
Step 3) To force run the app or game with your Nvidia GPU, you just have to locate the application and right-click on it.

Step 4) Now hover your mouse on the option Run with graphics processor. A sub-menu will appear, select the High-performance NVIDIA processor option. Your app will now run using the Nvidia GPU.
Conclusion
This is how you can easily Force App or Game to Use Nvidia GPU or Integrated Graphics. It becomes a handy tool when you need to witch GPUs for better performance. For more such interesting tutorials, follow our PC tips and tricks section to explore more.
- How to Fix NVIDIA Installer Failed Error
- Disable Nvidia GeForce Experience Overlay to Boost FPS on Graphics Games
- How to Rollback Nvidia Graphics driver to Previous Version in Windows 10
- How to Uninstall or Reinstall DirectX 12 in Windows 10
- Stop Microsoft Edge Automatically Opening on Windows and Mac
